
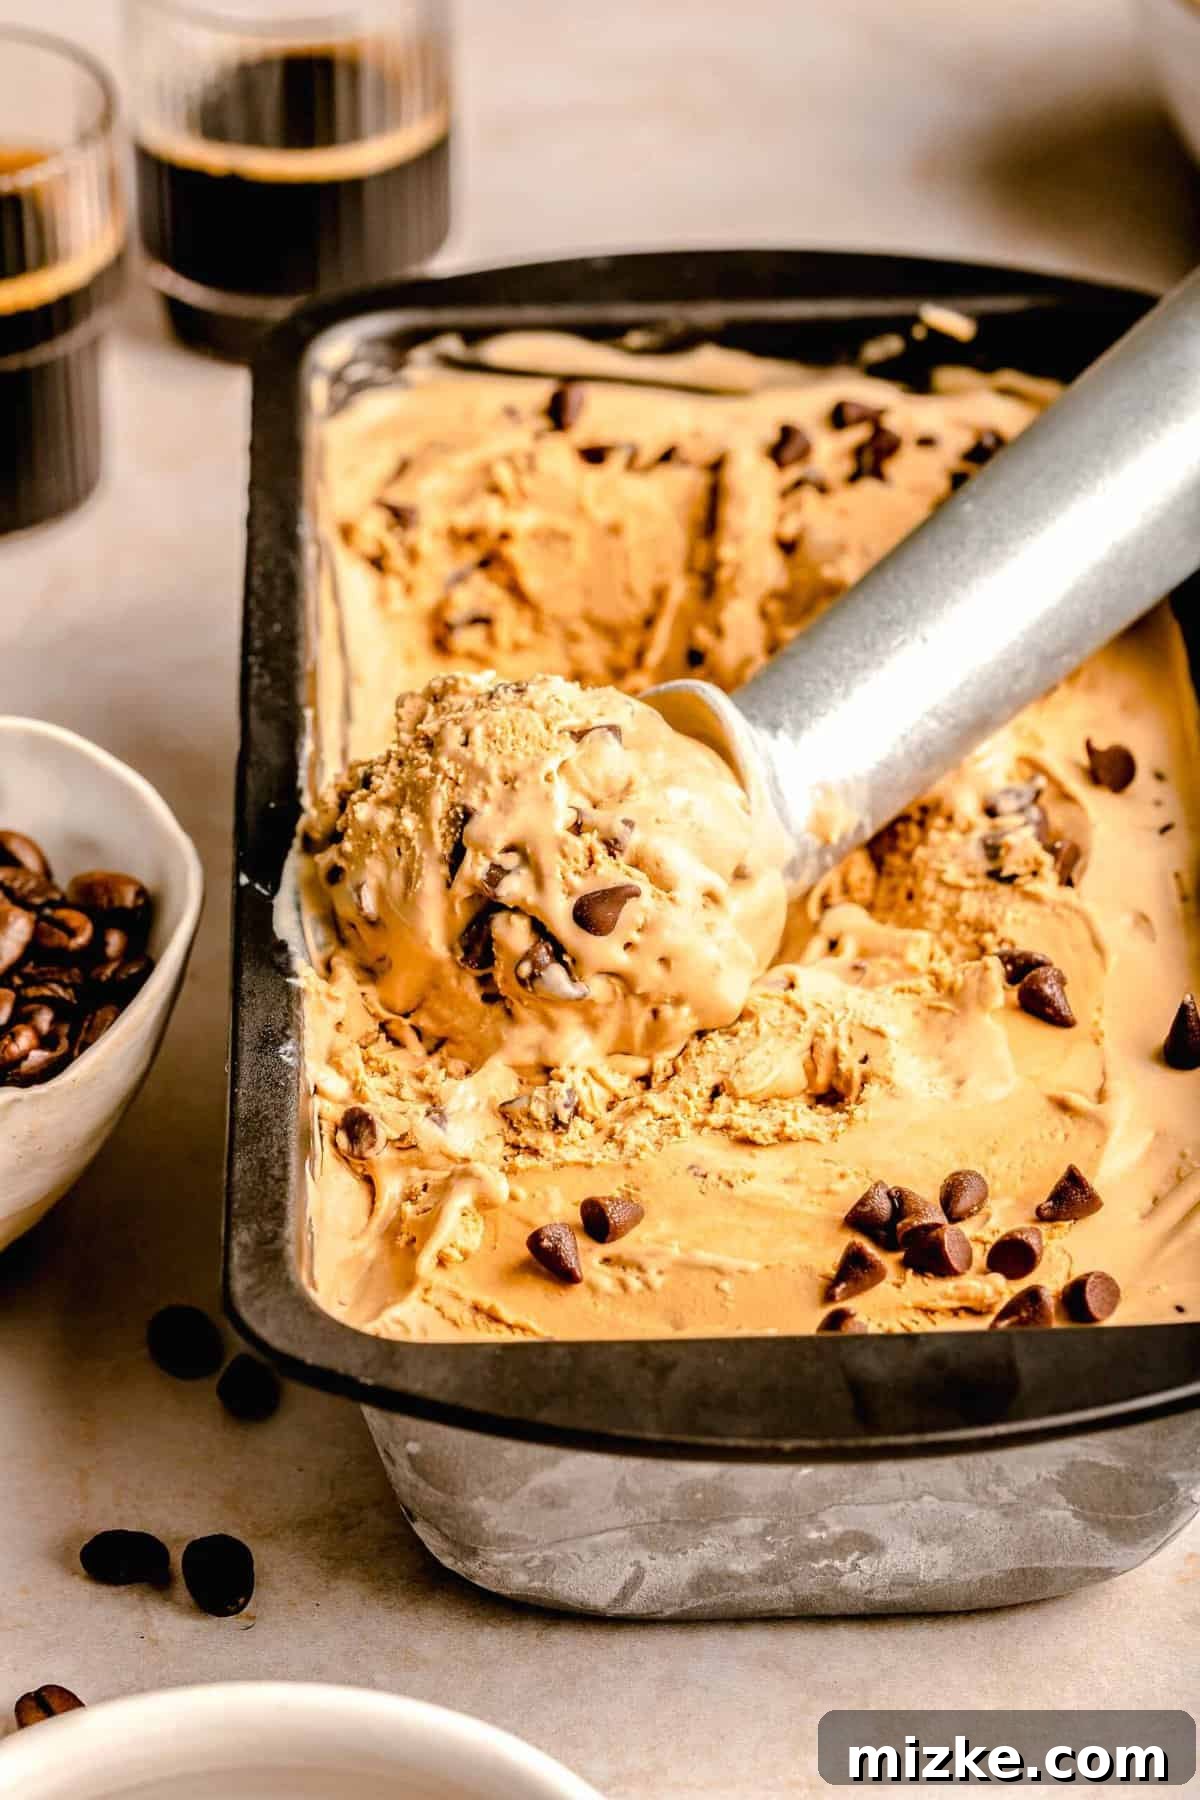
Attention, coffee aficionados and dessert lovers! Prepare to embark on a delightful culinary journey with this incredibly simple yet profoundly delicious espresso chocolate chip ice cream recipe. Requiring just 5 minutes of active prep time, a handful of essential ingredients like robust espresso powder, rich heavy cream, and luscious sweetened condensed milk transform into a truly extraordinary frozen treat. The mere thought of crafting your own ice cream might seem daunting, but this recipe effortlessly demystifies the process, making it as easy as, well, eating a scoop of ice cream! Why wait any longer to elevate your dessert game?
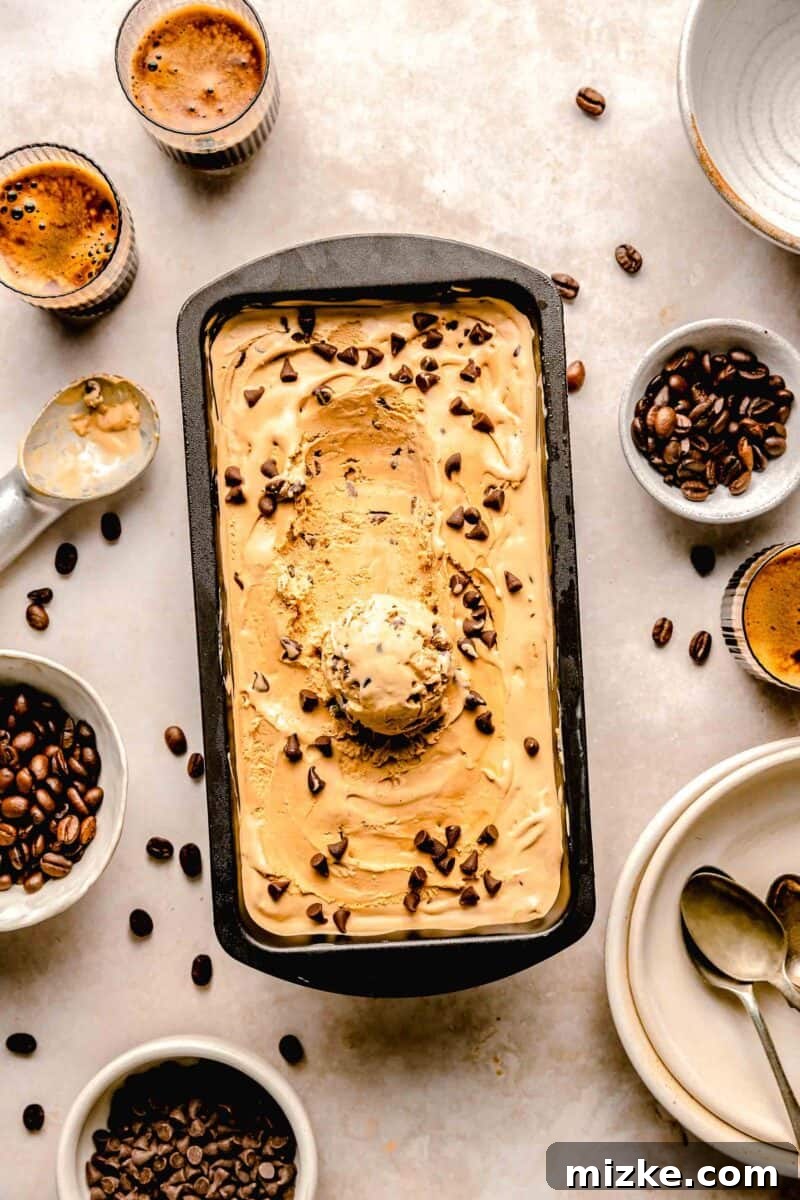
There are few pairings in life as harmonious and universally cherished as ice cream and coffee. For many, these aren’t just food items; they’re daily rituals, comforting indulgences, and sources of pure joy. I confess, my obsession runs deep: I maintain a Pinterest board entirely devoted to ice cream recipes, a testament to my profound love for frozen delights. And coffee? Let’s just say my day often begins in my dreams, anticipating that first aromatic sip of a morning cup. Whether it’s dawn, midday, or dusk, the captivating aroma and complex flavor profile of coffee hold an irresistible charm that keeps me coming back for more.
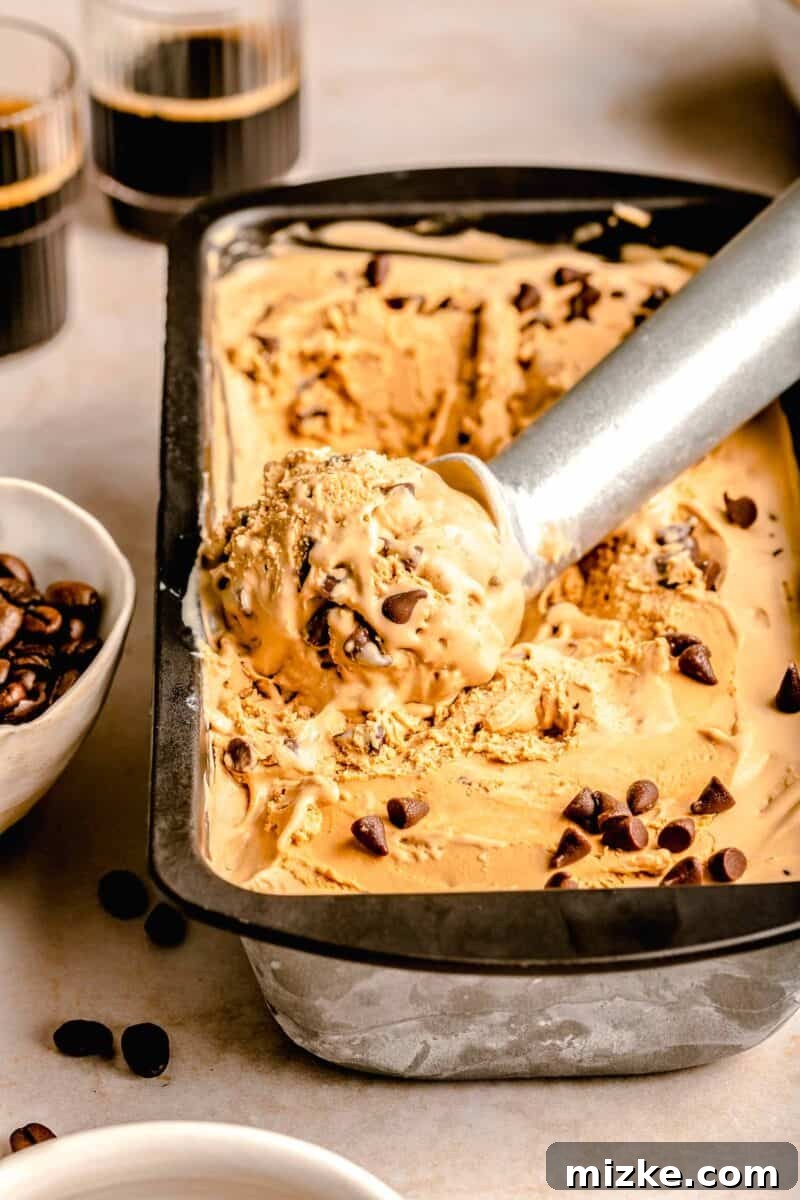
This particular ice cream recipe beautifully encapsulates the very best of both these beloved worlds. It delivers the opulent, velvety texture that every true ice cream connoisseur craves, seamlessly blended with the warm, earthy, and invigorating essence that coffee enthusiasts adore. The result is a dessert experience that is nothing short of perfect. And for an extra layer of delight? We stir in mini chocolate chips, adding a delightful crunch and a complementary burst of sweetness. With this recipe in hand, your quest for the ultimate homemade ice cream might just reach its blissful conclusion.
Why You’ll Fall in Love with This Homemade Coffee Ice Cream
It’s genuinely challenging to find a reason *not* to adore this exquisite dessert. But to truly convey its magic, let me walk you through some of the standout qualities that make it an absolute must-try for any sweet-toothed coffee lover:
- Minimal Active Preparation Time: One of the greatest virtues of this recipe is its incredible efficiency. As long as you remember the crucial step of freezing your ice cream maker bowl at least 24 hours in advance, your active involvement is astonishingly brief—we’re talking under 5 minutes. Simply combine a few key ingredients, and then let your ice cream maker take over, transforming the liquid base into a creamy dream. This makes it a perfect dessert for busy individuals or anyone who prefers to spend less time cooking and more time enjoying.
- Unparalleled Creaminess: There’s nothing quite as disappointing as biting into an icy or watery homemade ice cream. This recipe guarantees a luxurious, smooth, and utterly creamy texture every single time. The secret lies in the harmonious blend of high-fat heavy cream and rich, thick sweetened condensed milk. This dynamic duo works together to inhibit the formation of large ice crystals, resulting in an incredibly luscious mouthfeel that rivals premium artisanal ice creams. You can trust that this recipe will deliver on its promise of supreme creaminess.
- Effortless No-Cook Method: Many traditional ice cream recipes often intimidate home cooks with their requirements for making a custard base, involving careful tempering of eggs over a stovetop. This recipe sidesteps all that fuss and complexity. There’s absolutely no cooking involved. You simply whisk the ingredients together, and you’re ready to churn. This straightforward approach not only saves time but also makes homemade ice cream accessible to beginner cooks and seasoned chefs alike, without compromising on flavor or quality. The taste is just as wonderful, if not more so, than those more complicated versions.
- Bold & Authentic Coffee Flavor: For coffee devotees, the quality of the coffee flavor is paramount. This recipe utilizes espresso powder, which delivers an intense, concentrated coffee essence without adding excess liquid. You can adjust the amount to suit your preference, from a subtle coffee whisper to a robust, invigorating espresso kick. The flavor is deep, authentic, and perfectly balanced by the sweetness of the condensed milk.
- Perfectly Balanced Sweetness and Crunch: The sweetened condensed milk provides the ideal level of sweetness, complementing the espresso without overpowering it. The addition of mini chocolate chips introduces a delightful textural contrast and a classic flavor pairing that elevates the entire experience. Every spoonful offers a symphony of creamy, sweet, and slightly bitter notes with a satisfying crunch.
Essential Tools & Ingredients for Your Homemade Ice Cream
Crafting this exquisite espresso chocolate chip ice cream is remarkably straightforward, requiring just a few key tools and a handful of quality ingredients. The beauty of this recipe lies in its simplicity, proving that you don’t need an elaborate setup to create something truly spectacular. Here’s a detailed breakdown of what you’ll need to get started:
Tools:
- Ice Cream Maker: This is your primary piece of equipment, and it does most of the heavy lifting. I personally highly recommend the KitchenAid Ice Cream Attachment if you already own a KitchenAid stand mixer, as it’s efficient and integrates seamlessly. However, any good standalone ice cream maker, such as this popular model, will perform beautifully. Ensure your chosen maker has a freezer bowl that can be adequately pre-chilled.
- Large Mixing Bowl: Essential for combining your base ingredients before churning. Choose one that’s big enough to comfortably whisk everything together without spills.
- Whisk: A good sturdy whisk will ensure your ingredients are thoroughly combined and homogenous, preventing any lumps of espresso powder.
- Freezer-Safe Container: You’ll need this to store your freshly churned ice cream as it finishes hardening in the freezer. An airtight container or a loaf pan works perfectly.
Ingredients:
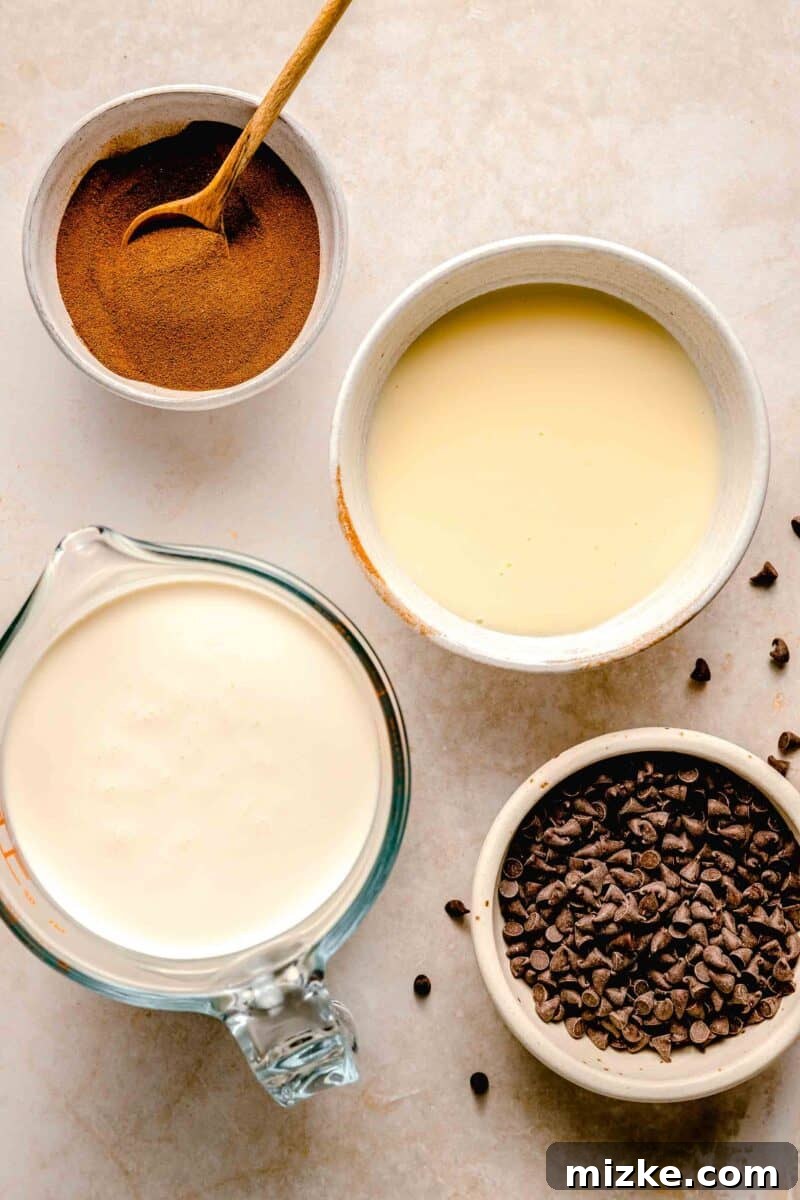
- Heavy Cream: The foundation of our creamy texture. Opt for full-fat heavy cream (also known as heavy whipping cream) for the best results. The high fat content is crucial for preventing ice crystal formation and achieving that luxurious, smooth consistency. If you’re looking for a dairy-free alternative, full-fat canned coconut milk can be a suitable substitute for both the heavy cream and sweetened condensed milk, yielding a slightly different but still delicious result.
- Sweetened Condensed Milk: This magical ingredient serves a dual purpose: it provides the perfect amount of sweetness and significantly contributes to the rich, dense texture of the ice cream. It also acts as a natural stabilizer, further enhancing the creaminess without the need for cooking.
- Espresso Powder: The heart of our coffee flavor. Not to be confused with instant coffee (though a strong instant coffee can work in a pinch), espresso powder is finely ground and intensely flavored, designed to dissolve quickly and impart a deep coffee essence. Adjust the quantity to achieve your desired level of coffee intensity – 2 tablespoons for a subtle hint, 3 for a bolder kick.
- Mini Chocolate Chips: These delightful morsels add a wonderful crunch and a sweet counterpoint to the coffee flavor. Mini chips are preferred as they distribute more evenly throughout the ice cream and remain softer when frozen compared to larger chips, ensuring a pleasant bite every time. Dark, milk, or semi-sweet chocolate chips all work wonderfully, so choose your favorite!
Crafting Your Espresso Chocolate Chip Ice Cream: A Step-by-Step Guide
The journey to homemade espresso chocolate chip ice cream is surprisingly simple, primarily involving a bit of measuring, a quick whisk, and the patient hum of your ice cream maker. The real “work” is done by the machine, leaving you to anticipate a delightful outcome. Here’s how to bring this creamy dream to life, step by easy step:
- Step 1: The Essential Freeze – Prepare Your Ice Cream Maker Bowl. This initial step is non-negotiable and absolutely critical for success. The bowl of your ice cream maker must be thoroughly chilled, so place it in your freezer for a minimum of 24 hours. A colder bowl translates to faster, more efficient churning and a perfectly creamy ice cream texture. Do not skip or rush this!
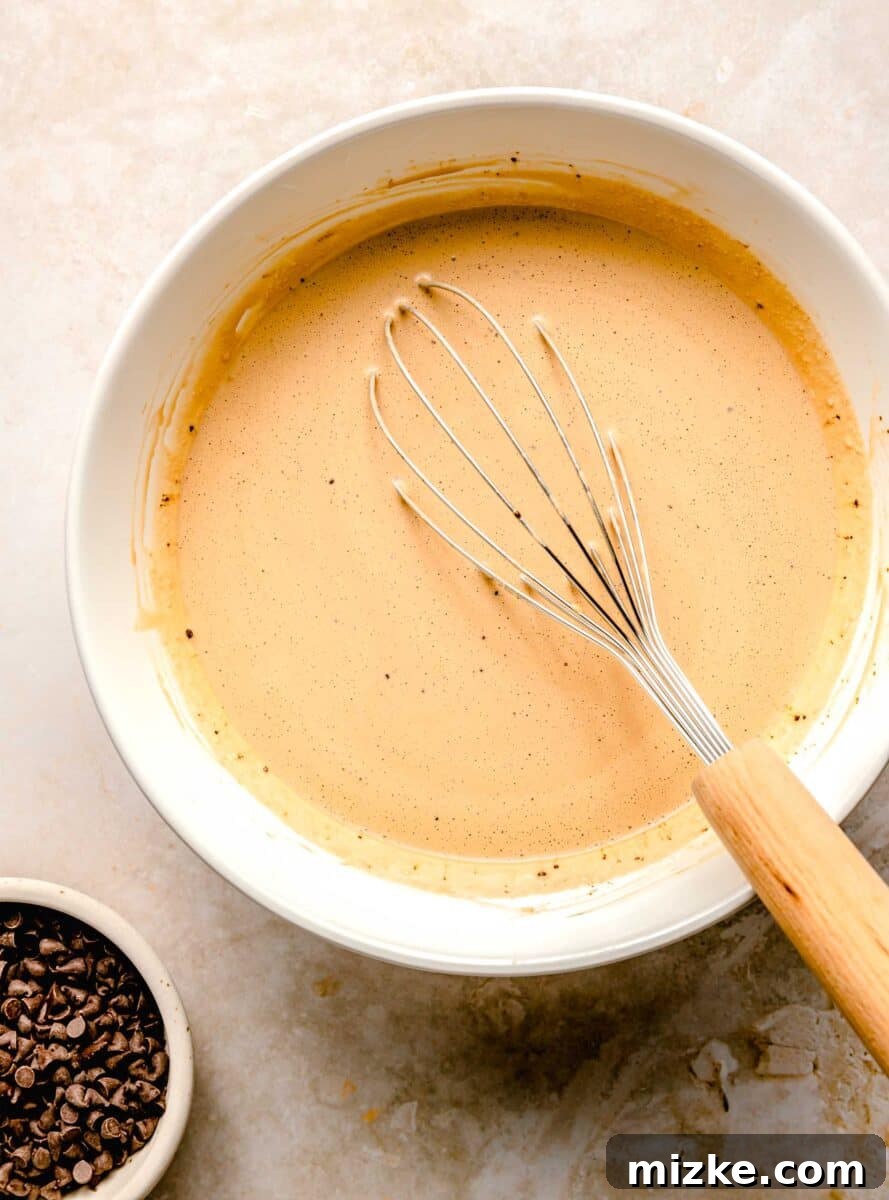
- Step 2: Combine Your Creamy Base. In a generously sized bowl, combine the heavy cream, sweetened condensed milk, and espresso powder. Whisk these ingredients vigorously until the mixture is completely homogenous. This means ensuring the espresso powder is fully dissolved and there are no streaks or lumps. The mixture should be smooth and consistent in color and texture. For best results, ensure all liquid ingredients are well-chilled before mixing.
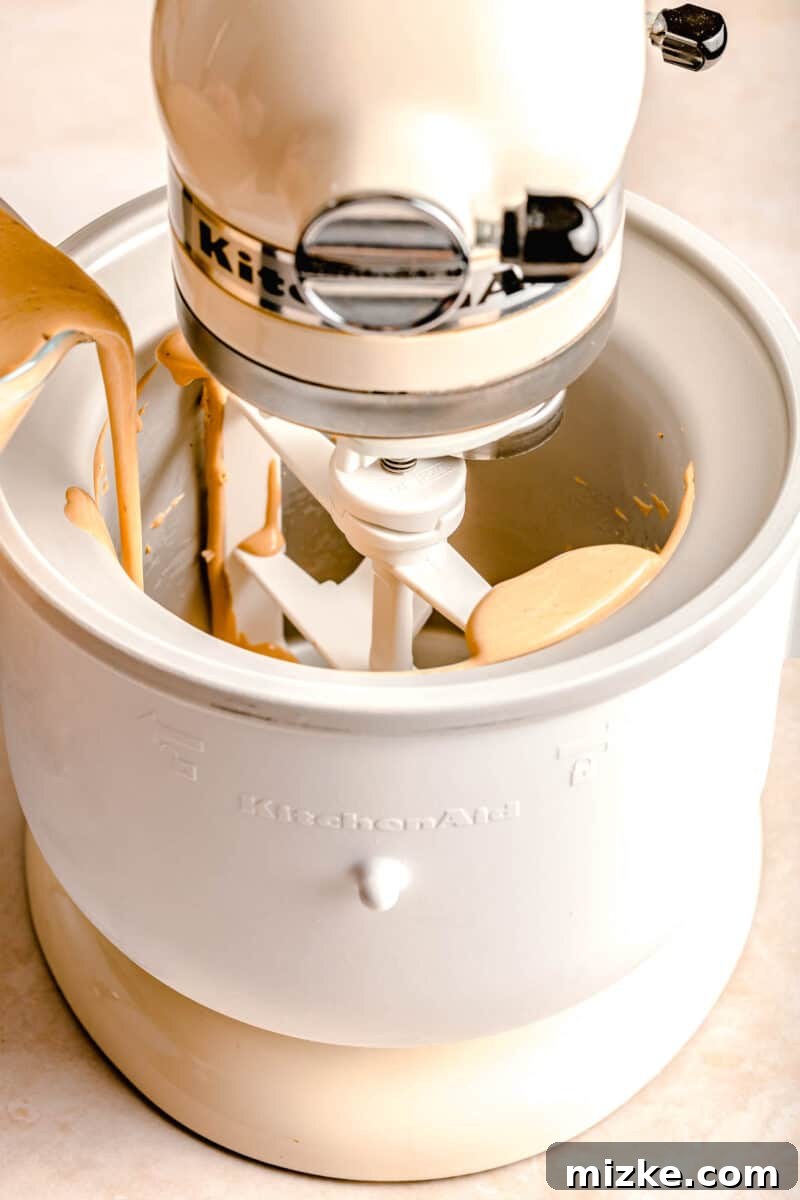
- Step 3: Churn to Perfection. Carefully pour the prepared mixture into the pre-frozen bowl of your ice cream maker. Activate the machine and let it churn according to the manufacturer’s specific instructions. The churning process typically takes about 20-25 minutes, during which the mixture will gradually thicken and freeze into a soft-serve consistency.
- Step 4: The Chocolate Chip Swirl. Approximately halfway through the churning process (usually around the 10-15 minute mark), add the mini chocolate chips to the ice cream maker. This timing ensures they are evenly distributed throughout the mixture without sinking to the bottom or clumping together. Allow the machine to continue churning until the ice cream reaches your desired soft-serve consistency.
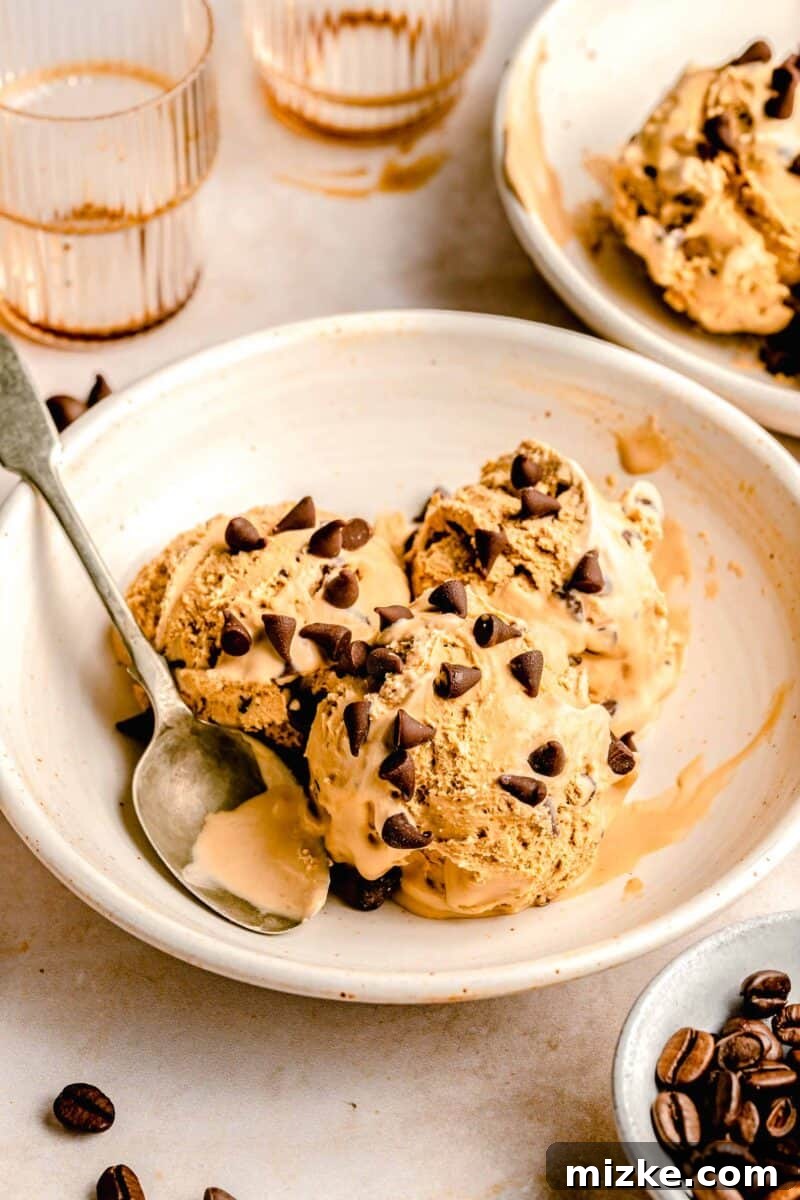
- Step 5: The Final Freeze for Firmness. Once the churning is complete, transfer the freshly churned ice cream—which will still be quite soft—into a freezer-safe container. Cover it tightly (a loaf pan covered with wax paper and then plastic wrap works wonderfully) and place it in the freezer. Allow it to firm up for at least 4 hours. This crucial step transforms the soft-serve into scoopable, firm ice cream, allowing the flavors to meld and the texture to fully develop.
Expert Tips for Crafting the Best Espresso Chocolate Chip Ice Cream
While this espresso chocolate chip ice cream recipe is refreshingly simple and largely hands-off, a few key practices can elevate your results from good to absolutely phenomenal. The ice cream maker truly does most of the hard work, but adhering to these crucial tips will ensure you achieve the creamiest, most delicious outcome possible. Let’s dive into these essential nuggets of wisdom:
- Pre-Freeze is Paramount: The 24-Hour Rule. This is the golden rule of homemade ice cream. You absolutely cannot skip or shortcut this step. The intense chill stored within the walls of your ice cream maker’s bowl is the sole force responsible for rapidly freezing your ingredients. This quick freezing is what prevents large, unappealing ice crystals from forming, which are the culprits behind an icy, rather than creamy, texture. If the bowl isn’t adequately frozen (for at least a full 24 hours, or even longer if your freezer isn’t super cold), you’ll end up with a disappointingly runny or slushy final product. Plan ahead!
- Embrace Full Fat for Supreme Creaminess. Now is not the time for dietary compromises. The fat content in heavy cream is fundamentally what gives ice cream its luxurious, velvety texture and helps it remain smooth rather than becoming icy. Do not be tempted to substitute heavy cream with lighter alternatives like half-and-half, milk, or even light cream. These lower-fat options will significantly compromise the texture, leading to an undesirably icy consistency. Go full fat; your taste buds will thank you.
- Don’t Overload the Churning Bowl. Each ice cream maker bowl has a finite amount of cold energy it can impart. Overfilling the bowl with too much liquid mixture will cause it to lose its crucial chill much faster. When this happens, the ice cream won’t freeze sufficiently during the churning process, resulting in a soft, often soup-like consistency that struggles to harden later. Always adhere to your ice cream maker’s maximum capacity guidelines.
- Patience for Perfection: Don’t Skip the Post-Churn Freeze. It’s incredibly tempting to dive spoon-first into the ice cream immediately after it finishes churning, as it has a delightful soft-serve consistency. However, resisting this urge is vital. The additional 4 hours (or more) in the freezer allows the ice cream to firm up properly, develop its full texture, and allows the flavors to deepen and meld. This secondary freezing period is what transforms it from soft-serve into the firm, scoopable, classic ice cream you crave.
- Quality Ingredients Matter. The fewer the ingredients, the more each one shines. Use high-quality heavy cream and a good brand of sweetened condensed milk. For the espresso, invest in a reputable espresso powder. Its rich, concentrated flavor will make a noticeable difference compared to regular instant coffee (though instant coffee can be a decent substitute in a pinch). Better ingredients equal better flavor.
- Ensure Your Mixture is Chilled. Before churning, make sure your whisked ice cream base is as cold as possible. Even if your liquids were cold to start, the act of whisking can slightly warm them. Pop the bowl of mixed ingredients into the refrigerator for at least 30 minutes (or even an hour) before pouring it into the ice cream maker. A colder base will start the freezing process more efficiently in the chilled bowl.
Delightful Pairings: What to Serve with Espresso Chocolate Chip Ice Cream
While our espresso chocolate chip ice cream is undeniably divine on its own, it also serves as an exceptional base or accompaniment to a myriad of other treats. Don’t feel constrained to enjoy it plain; unleash your creativity and turn it into an even more memorable dessert experience. Here are some fantastic ideas to elevate your serving:
- Classic Whipped Cream: A dollop of light, airy whipped cream is a timeless topping. I’m a firm believer in the superior taste and texture of homemade whipped cream, but if time is short, a good quality store-bought version will absolutely do the trick.
- Decadent Sauces: Drizzle your scoops with a luscious sauce for an extra layer of indulgence. Try whipping up your own rich homemade chocolate sauce or a buttery, sweet, and salty salted caramel sauce. The combination of cold ice cream and warm sauce is simply irresistible.
- As an Exquisite Topping: This espresso ice cream is robust enough to stand proudly atop your favorite baked goods, adding a creamy, coffee-infused dimension. It pairs exceptionally well with my Fudgy Dirty Chai Dark Chocolate Brownies, providing a cool contrast to the warm spice. It’s also heavenly with an Espresso Chocolate Mug Cake for an extra coffee kick, or even balanced beautifully with the rich sweetness of Salted Caramel Molten Lava Cakes for Two.
- Creative Floats & Affogatos: Reimagine the classic root beer float! Replace the root beer with a rich, hot chocolate or a frothy mocha, then gently plop a generous scoop of espresso ice cream on top. The melting ice cream will create a delightful, creamy foam. For an easy affogato, pour a fresh shot of hot espresso directly over a scoop of the ice cream – a simple, elegant dessert that’s pure coffee bliss.
- With Cookies or Waffles: Create an ultimate ice cream sandwich with your favorite cookies, or serve a scoop alongside warm, freshly made waffles for a delightful breakfast-for-dessert experience.
- Sprinkled with Nuts or Shaved Chocolate: For added texture and flavor, sprinkle with toasted chopped nuts (like almonds or pecans) or delicate shavings of dark chocolate.
Optimal Storage Techniques for Your Homemade Ice Cream
Once your exquisite espresso chocolate chip ice cream has completed its churning cycle and enjoyed its crucial 4-hour (or longer) firming freeze, you can savor it immediately, or store it for future indulgence. Proper storage is key to maintaining its creamy texture and preventing dreaded freezer burn. Here’s how to ensure your homemade delight stays fresh and delicious:
For the best preservation, transfer the fully firmed ice cream to a high-quality, freezer-safe, airtight plastic container. This type of container minimizes exposure to air, which is the primary cause of ice crystals and freezer burn. Alternatively, you can press the ice cream firmly into a loaf pan, cover the surface directly with wax paper or parchment paper (pressing it down to eliminate any air pockets), and then tightly wrap the entire pan in several layers of plastic wrap or aluminum foil. The goal is to create an impenetrable barrier against air and moisture. Stored correctly in a consistently cold freezer, your homemade espresso chocolate chip ice cream can be enjoyed for up to 2 weeks, though its peak freshness and texture will be best within the first week.
Explore More Easy & Delicious Ice Cream Recipes
Perhaps espresso isn’t your primary craving today, or maybe you’re simply eager to expand your homemade ice cream repertoire! No problem at all! The world of ice cream is vast and wonderfully varied, offering countless delightful flavors and simple recipes to explore. If you enjoyed the ease and deliciousness of this recipe, you’ll surely love these other fantastic ice cream creations. Here are some of my personal favorites, perfect for satisfying any sweet tooth:
- No-Churn Oreo Fudge Ice Cream: A delightful treat that combines the classic crunch of Oreo cookies with rich fudge swirls, all without needing an ice cream maker. Pure bliss for cookie lovers!
- Black Sesame Ice Cream (No-Churn): For those seeking a unique and sophisticated flavor, this no-churn black sesame ice cream offers a wonderfully nutty, earthy, and subtly sweet experience.
- Fig and Honey Mascarpone Ice Cream: An elegant and luxurious ice cream, blending the creamy richness of mascarpone cheese with the natural sweetness of figs and golden honey.
- Pistachio Ice Cream: A vibrant and flavorful classic, this pistachio ice cream is packed with the distinctive nutty taste and beautiful green hue of real pistachios.
- Mocha Latte Ice Cream Sandwich Cookies: Combine two irresistible desserts into one! These homemade cookies feature a creamy mocha latte ice cream filling, creating the perfect handheld treat.
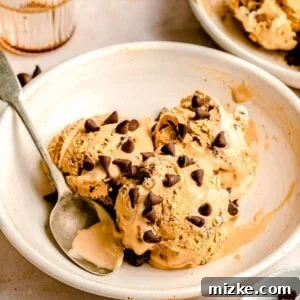
Espresso Chocolate Chip Ice Cream
By: Julie Chiou
Step right up coffee lovers: this Espresso Chocolate Chip Ice Cream is to die for!
Prep Time: 5 minutes
Cook Time: 20 minutes
Freeze Time: 4 hours
Total Time: 4 hours 25 minutes
Servings: 8 servings
Equipment
- Ice cream maker
- Large mixing bowl
- Whisk
- Freezer-safe container (e.g., loaf pan with lid or plastic container)
Ingredients
- 2 cups (473 ml) heavy cream (full-fat)
- 7 ounce (199 ml) sweetened condensed milk
- 2-3 tablespoon espresso powder, depending on desired coffee strength
- ½ cup (90 g) mini chocolate chips
Instructions
- Freeze the bowl of your ice cream maker for at least 24 hours. This step is crucial for achieving a creamy texture.
- In a large bowl, whisk together the heavy cream, sweetened condensed milk, and espresso powder until the mixture is homogenous and the espresso powder is fully dissolved. Ensure the mixture is well-chilled if it has warmed at all.
- Pour the combined mixture into the pre-frozen bowl of your ice cream maker. Churn the ice cream according to your manufacturer’s instructions. This typically takes about 20-25 minutes.
- About halfway through the churning process (around the 10-15 minute mark), add the mini chocolate chips to the ice cream maker. Continue churning until the ice cream reaches a soft-serve consistency.
- Once churning is complete, transfer the soft ice cream to a freezer-safe bowl or loaf pan. Cover the surface directly with wax paper or plastic wrap, then seal the container tightly. Freeze for at least 4 hours to allow the ice cream to firm up to a scoopable consistency.
Nutrition Information (Approximate)
Please note: This information is an approximation and can vary based on specific ingredients and brands used. For precise nutritional data, please use a nutrition calculator with your exact ingredients.
- Serving: 1 scoop
- Calories: 343 kcal
- Carbohydrates: 24g
- Protein: 4g
- Fat: 26g
- Saturated Fat: 17g
- Polyunsaturated Fat: 1g
- Monounsaturated Fat: 6g
- Trans Fat: 0.02g
- Cholesterol: 77mg
- Sodium: 56mg
- Potassium: 193mg
- Fiber: 0.3g
- Sugar: 22g
Photographs by Eat Love Eat