
Mastering Homemade Granola Bars: Your Go-To Guide for Healthy & Delicious Grab-and-Go Snacks
Transform your mornings and snack times with these incredible homemade granola bars – a truly versatile and wholesome option that’s quick, easy, and incredibly satisfying.
Conquering the Morning Rush: The Indispensable Role of Grab-and-Go Breakfasts
For many of us, the start of the work week signals a return to a fast-paced routine where every minute counts. The idea of preparing a elaborate breakfast at the crack of dawn, perhaps as early as 5:45 AM, often feels like a monumental task. At that hour, my primary thoughts revolve around the persistent alarm clock and, more importantly, securing my first cup of coffee. Eating anything substantial seems like an impossible feat when my brain hasn’t quite caught up to the basic functions of chewing and swallowing.
This daily reality has solidified my appreciation for convenient grab-and-go breakfast and snack options. Traditionally, this often meant reaching for a store-bought cereal bar, which I’d consume at the office alongside my essential morning coffee. This method offers a certain ease, allowing a crucial 30 minutes for the caffeine to kick in before diving into the day’s tasks. However, a growing awareness about nutrition has led me to question the true value of these quick fixes.
Beyond the Supermarket Aisle: Why Homemade Granola Bars Reign Supreme
It’s no secret that not all breakfast bars are created equal. While convenient, many popular brands often contain high levels of added sugars, unhealthy fats, and artificial ingredients that undermine their supposed “healthy” claims. Those familiar Quaker Chewy bars, for instance, might be tasty, but they aren’t always the most nutritious way to kickstart your day. This understanding sparked my interest in a more wholesome approach, and when I started seeing homemade granola bar recipes circulating among fellow food bloggers, I knew it was time to give them a try.
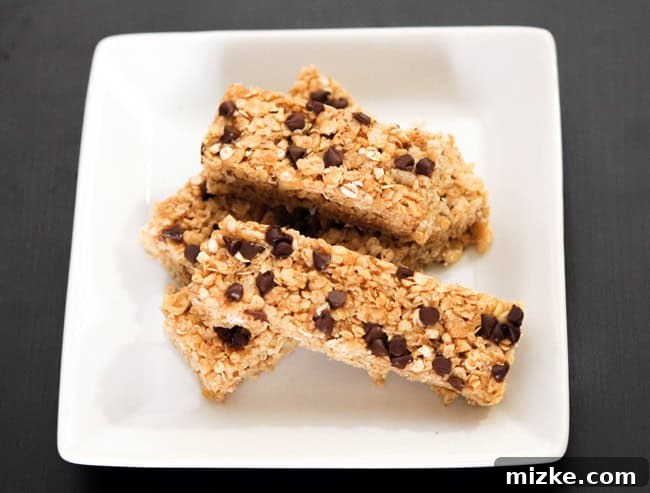
The results were astounding! These homemade granola bars are not just healthy; they are incredibly delicious and remarkably easy to prepare. I must confess, they’re so addicting that I could have easily devoured the entire pan without a hint of regret! The primary advantage of making your own lies in complete control over the ingredients. You dictate what goes in, allowing you to avoid unwanted additives, reduce sugar content, and customize them to fit specific dietary preferences or allergies. This level of personalization is simply not possible with store-bought options, making homemade a clear winner for health-conscious individuals.
Crafting Your Perfect Bar: Unleashing Creativity with Granola Bar Variations
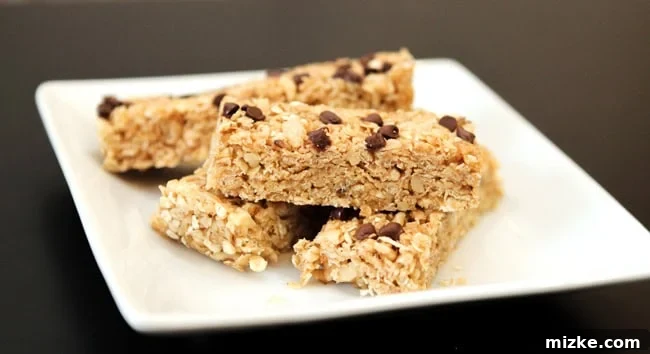
The versatility of homemade granola bars is truly one of their greatest assets. While this particular recipe shines with its classic combination of chocolate chips and walnuts, it serves as a fantastic foundation for countless creative variations. For instance, I happened to have some extra walnuts on hand from a previous baking project, and they added a delightful crunch and rich flavor. However, if you have nut allergies, or simply prefer other additions, feel free to adapt the recipe. The possibilities are virtually endless.
Popular Customization Ideas:
- Nuts & Seeds: Beyond walnuts, consider pecans, almonds, cashews, peanuts, sunflower seeds, pumpkin seeds, or chia seeds for added texture, healthy fats, and protein. Lightly toasting them beforehand can enhance their flavor.
- Dried Fruits: Introduce natural sweetness and chewiness with raisins, dried cranberries, chopped apricots, dates, cherries, or even small pieces of dried mango.
- Sweeteners & Spices: While honey and brown sugar provide the primary binding and sweetness, you can experiment with maple syrup for a different flavor profile. A pinch of cinnamon, nutmeg, or even a touch of ginger can add warmth and complexity.
- Chocolate & Other Chips: Mini chocolate chips are a fantastic choice, but don’t limit yourself! Try white chocolate chips, peanut butter chips, butterscotch chips, or even a drizzle of melted dark chocolate over the cooled bars for an extra touch of indulgence.
- Protein Boosters: For a more substantial snack, consider adding a scoop of your favorite protein powder (unflavored or vanilla works best) or a spoonful of nut butter (like peanut butter or almond butter) to the mixture. Adjust the liquid ingredients slightly if adding nut butter to maintain consistency.
This adaptability means you can manipulate the recipe to cater to your exact preferences, dietary needs, or whatever ingredients you have on hand. It truly is a versatile snack that can be as healthy or as indulgent as you choose. While packing them with too many sweet additions might push them further from a “healthy” label, a well-balanced homemade bar will almost always be superior in terms of nutritional value and ingredient quality compared to most store-bought alternatives.
Print Recipe
Rating: 5 out of 5 stars based on 1 vote
Homemade Granola Bars: Chocolate Chips & Walnuts
By: Julie Chiou
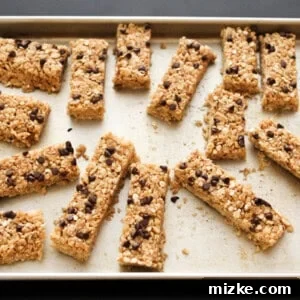
These homemade granola bars with chocolate chips and walnuts are a fantastic grab-and-go breakfast or snack! They’re easy to make, customizable, and a healthier alternative to store-bought options.
Cook Time:
5 minutes
Total Time:
5 minutes
Servings:
12 bars
Equipment
- Large rimmed baking sheet
Ingredients
- ¼ cup (57 g) butter
- ¼ cup (85 g) honey
- ⅓ cup (73 g) packed dark brown sugar
- 2 cups (160 g) quick cooking oats, not rolled oats
- 1 cup (19 g) crispy rice cereal
- ½ teaspoon vanilla extract
- 1 cup (117 g) walnuts, finely chopped
- 4 tablespoons mini chocolate chips
Instructions
- Lightly grease a large rimmed baking sheet (approximately 9×13 inches is ideal for thicker bars) and set it aside. This prepares your surface for easy removal of the finished bars.
- In a spacious mixing bowl, combine the 2 cups of quick cooking oats, 1 cup of crispy rice cereal, and 1 cup of finely chopped walnuts. Stir these dry ingredients together thoroughly to ensure they are evenly distributed, then set the bowl aside.
- In a medium-sized saucepot, combine the ¼ cup of butter, ¼ cup of honey, and ⅓ cup of packed dark brown sugar. Place the pot over medium heat and stir continuously until the butter is completely melted and the mixture comes to a gentle bubble. Once boiling, reduce the heat to low and continue to cook for an additional 2 minutes, stirring occasionally. This step is crucial for creating the sticky binding agent that holds the bars together.
- Remove the saucepot from the heat and carefully stir in the ½ teaspoon of vanilla extract.
- Pour the warm liquid mixture from the saucepot over the dry ingredients (oats, cereal, walnuts) in the large bowl. Mix gently but thoroughly using a sturdy spatula until all the dry components are just moistened and evenly coated by the sticky mixture. Be careful not to overmix, which can sometimes make the oats tough.
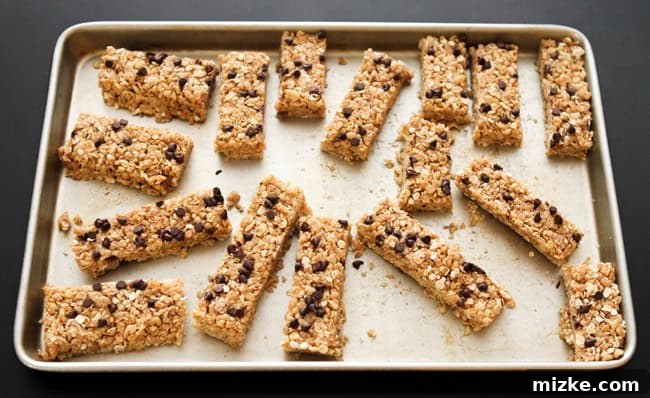
- Transfer the entire mixture onto the prepared baking sheet. Using the back of a spatula, a piece of parchment paper, or even lightly greased hands, firmly press the mixture down to an even thickness of approximately 3/4 inch. For thicker bars, you can press the entire mixture into one half of a larger baking sheet. Once pressed, sprinkle the 4 tablespoons of mini chocolate chips evenly over the surface and gently press them down into the granola mixture to ensure they adhere. Allow the bars to cool completely on the countertop until they reach room temperature and are firm, which typically takes about 2 hours. For quicker setting or a firmer texture, you can refrigerate them for about an hour. Once fully cooled and firm, use a sharp knife to cut them into 12 even bars.
Notes
Source: Lauren’s Latest
Nutrition Information (Approximate per bar)
- Serving Size: 1 bar
- Calories: 189 kcal
- Carbohydrates: 22 g
- Protein: 3 g
- Fat: 11 g
- Fiber: 2 g
- Sugar: 12 g
Disclaimer: This nutrition information is provided for convenience and as a courtesy only. Nutritional values can vary significantly based on specific ingredients, brands, and preparation methods. For the most precise nutritional data, we recommend using your preferred nutrition calculator based on the actual ingredients you use in the recipe.
Insider Tips for Achieving Granola Bar Perfection
While this recipe is incredibly straightforward, a few key tips can elevate your homemade granola bars from good to absolutely perfect every single time. The secret to bars that hold their shape and don’t crumble lies primarily in how you compact the mixture. Pressing the granola mixture firmly and evenly onto the baking sheet is crucial. Don’t be shy – use the back of a sturdy spatula or even your hands (lined with parchment paper or lightly oiled to prevent sticking) to apply significant pressure. This step is non-negotiable for bars that stay together beautifully.
Another important factor is the type of oats. This recipe specifically calls for quick-cooking oats, not traditional rolled oats. Quick oats are pre-steamed and cut into smaller pieces, allowing them to absorb the liquid binder more efficiently and contribute to a more cohesive bar. Rolled oats, while healthy, might result in a chewier texture and a less firm bar unless the liquid ratios are slightly adjusted. For an even firmer set, especially in warmer climates, consider chilling the prepared pan in the refrigerator for at least an hour before cutting. This helps the binding agents to firm up completely, making for cleaner cuts and less mess. Finally, ensure your butter, honey, and brown sugar mixture truly reaches a gentle boil and cooks for the full two minutes; this helps create a strong, sticky bond.
Optimizing Freshness: Storage and Serving Suggestions
Once your delectable homemade granola bars are perfectly set and sliced, proper storage is key to maintaining their freshness and satisfying texture. For optimal enjoyment, store them in an airtight container at room temperature for up to one week. If you prefer a firmer bar or wish to extend their shelf life, they can be kept in the refrigerator for up to two weeks. This is especially useful in warmer environments or if your bars contain ingredients that benefit from cooling.
For longer-term storage, homemade granola bars freeze exceptionally well. Individually wrap each bar in parchment paper or plastic wrap, then place them in a freezer-safe bag or container. They can be stored in the freezer for up to three months. When you’re ready to enjoy one, simply remove it from the freezer and allow it to thaw at room temperature for about 15-30 minutes for a convenient and wholesome snack on demand. These versatile bars are not just ideal for busy mornings; they also make excellent pre- or post-workout fuel, a healthy addition to a packed lunch, or a satisfying pick-me-up during an afternoon energy slump. Pair them with a piece of fresh fruit, a dollop of Greek yogurt, or your favorite hot beverage for a truly fulfilling experience.
Embrace the Homemade Revolution: Your Journey to Better Snacking Starts Here
Taking the time to craft your own grab-and-go snacks, like these incredible homemade granola bars, is a truly rewarding endeavor. It’s an empowering act of self-care that allows you to nourish your body with ingredients you trust and flavors you adore. Bid farewell to the guesswork, hidden sugars, and unpronounceable additives often found in store-bought alternatives. With this easy-to-follow, no-bake recipe, you can effortlessly whip up a batch of customizable, delectable granola bars that will keep you energized and satisfied throughout your busy week.
So, gather your ingredients, unleash your culinary creativity, and get ready to experience the unbeatable taste, superior nutrition, and sheer convenience of homemade. Your mornings just got a whole lot tastier and healthier!