
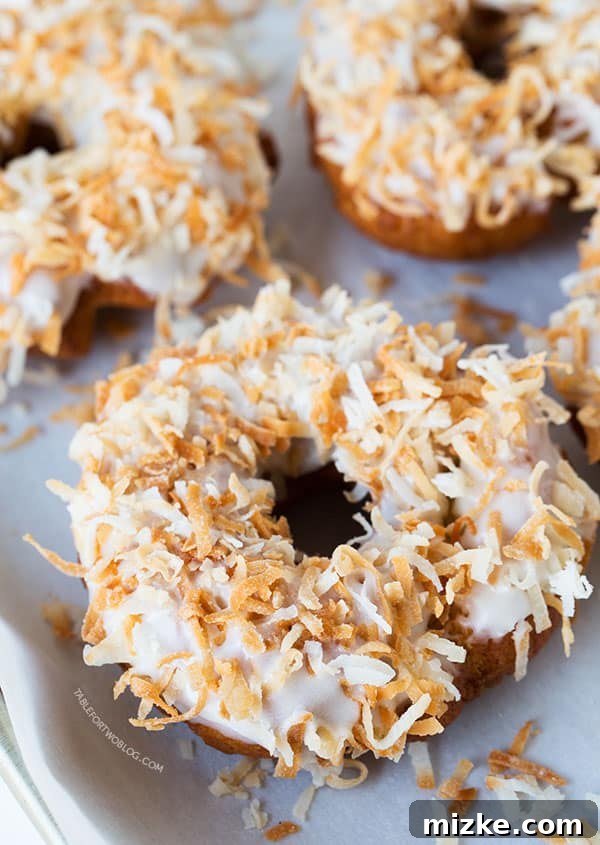
Triple Coconut Donuts: A Taste of Tropical Paradise
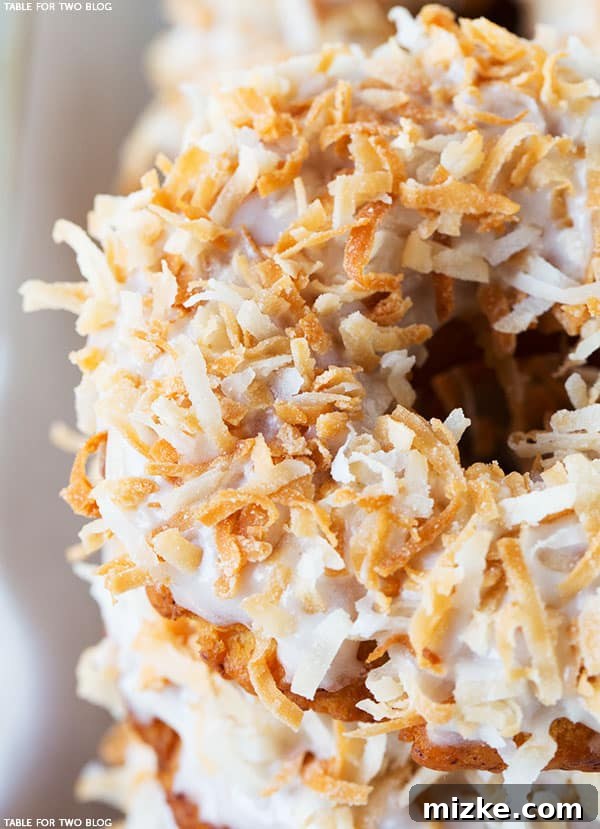
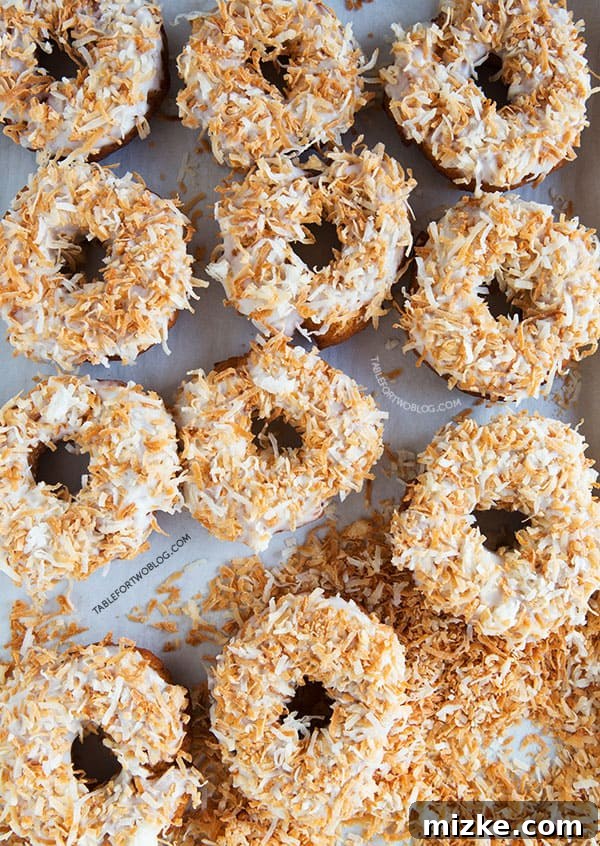
Get ready to transport your taste buds straight to an island getaway with these incredible Triple Coconut Donuts! Imagine a perfectly tender, cake-like donut base, enveloped in a luscious coconut glaze, and crowned with a generous sprinkle of crunchy, golden toasted shredded coconut. This isn’t just a donut; it’s an experience, a delightful escape that promises pure bliss in every bite. Whether you’re a long-time coconut enthusiast or simply looking for a unique and utterly delicious treat, these homemade donuts are guaranteed to kickstart your week (or any day!) with a burst of tropical flavor.
Embracing Indulgence: A Donut During Resolution Season?
I know, I know. We’re often in the thick of “diet” and “new year’s resolutions” season, a time when many of us are trying to rein in our eating habits. And perhaps a week dedicated to donuts seems like it’s completely at odds with all those healthy intentions. However, I am a firm believer in the power of moderation. Life is meant to be enjoyed, and sometimes, a truly exceptional treat is exactly what you need to keep spirits high and cravings satisfied without feeling deprived.
This isn’t an invitation to devour a whole dozen (though, once you taste them, I honestly wouldn’t blame you if you did!). It’s about savoring a moment of pure culinary delight. These triple coconut donuts are so incredibly good that one bite might just make you forget all about your diet for a glorious second. The rich, nuanced flavors of coconut layered throughout make these donuts a standout. In fact, my coworker, after trying one, enthusiastically suggested I should sell them at our local coffee shop. While my life is already brimming with commitments and I had to politely decline, that compliment truly warmed my heart and sparked a fleeting, delicious thought of a donut empire! It’s clear these aren’t just any donuts; they’re a special indulgence.
The Ultimate Coconut Lover’s Dream: Three Layers of Flavor
Seriously, if you consider yourself a coconut aficionado, prepare to be utterly captivated by this creation. The “triple” in Triple Coconut Donut isn’t just a catchy name; it signifies a deep, pervasive coconut flavor throughout every single component. You’ll find delicate coconut notes infused into the soft, tender donut dough itself, contributing to its unique aroma and subtle sweetness. This first layer provides a foundational tropical base, ensuring every part of the donut speaks of coconut.
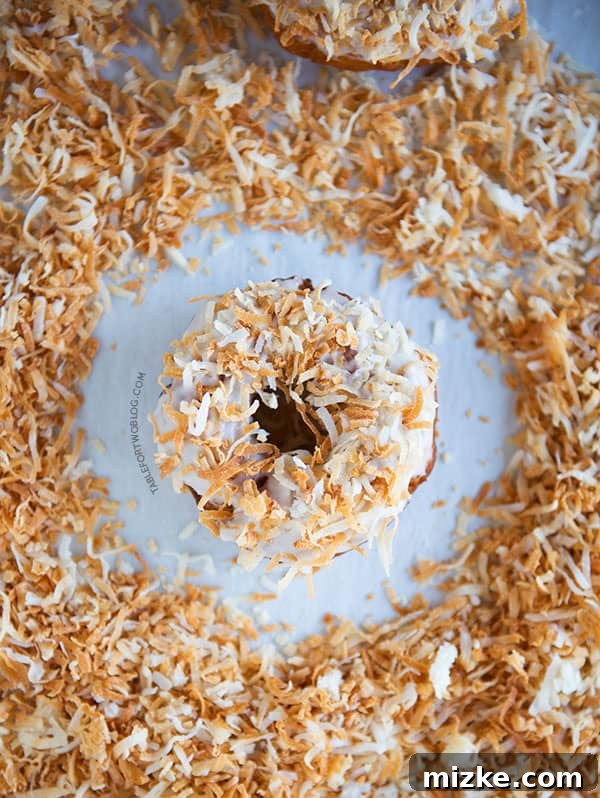
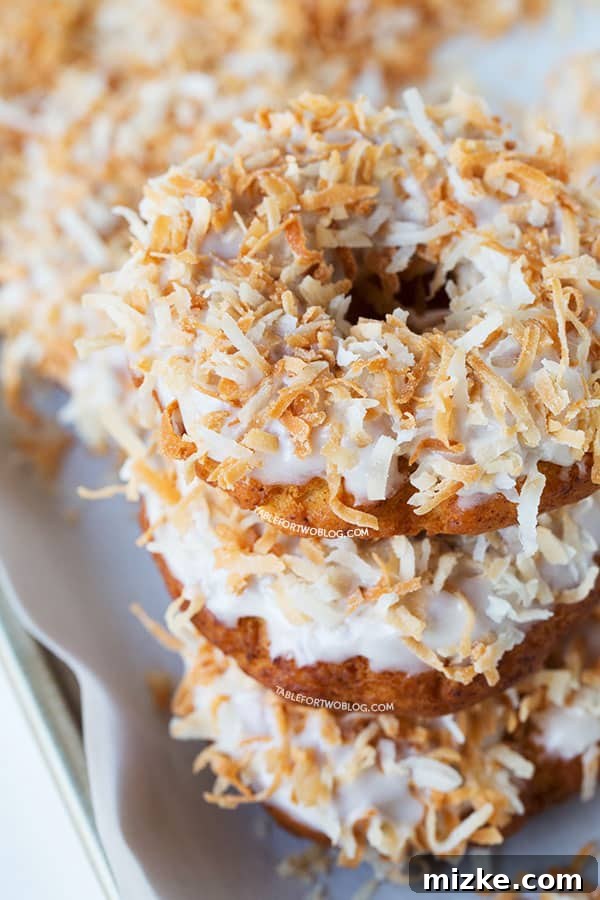
Then, a rich, velvety glaze, also bursting with coconut essence, provides a decadent coating. This second layer adds a smooth, sweet, and intensely coconutty shroud, enhancing the moistness of the donut while delivering another wave of flavor. Finally, the glorious finishing touch: perfectly toasted shredded coconut, adding an irresistible crunch and a profound, nutty depth of flavor that lingers beautifully on the palate. This third layer not only provides textural contrast but also a concentrated, caramelized coconut taste that is truly addictive.
The aroma of toasted coconut, to me, is one of the most amazing scents in the world – warm, sweet, and nutty, it’s pure olfactory bliss. I often find myself toasting extra coconut just to sprinkle into my morning yogurt or blending leftover coconut milk into my smoothies. It’s an instant passport to coconut heaven, transforming ordinary meals into a miniature tropical paradise. Coconut inherently evokes images of pristine white sands, crystal-clear turquoise oceans, and the glorious warmth of the sun. It’s the taste and smell of beach paradise, an unending vacation for your senses! Imagine biting into that perfect combination of soft dough, creamy glaze, and crisp coconut, and instantly feeling like you’ve been whisked away to a sunny beach with palm trees swaying.
The Art of Frying: Conquering the Deep Fryer for Perfect Donuts
For a long time, my donut-making adventures were confined to the oven. While baked donuts certainly have their place – they’re undeniably easier to prepare and often touted as the “healthier” option – a part of me always yearned for the authentic experience of a truly fried donut. Let’s be honest, when you crave a classic donut, do you head to your favorite shop asking for a baked version? Probably not! The distinctive crispy exterior and airy, tender interior of a classic fried donut are simply unmatched, offering a texture and richness that baking can’t quite replicate. This craving for authenticity finally spurred me to take on the challenge of deep-frying, not just for one, but for three different types of donuts during a dedicated donut week!
My initial apprehension about frying involved visions of greasy kitchens, endless splattering, and a chaotic mess. I imagined a complicated, dangerous, and time-consuming process that would leave my kitchen looking like a disaster zone. To my pleasant surprise, the reality was far less daunting than I had imagined. With the right equipment, specifically a proper Dutch oven for its heat retention and depth, and a reliable frying thermometer, the process was remarkably controlled. I discovered that careful handling and maintaining the correct oil temperature minimizes mess significantly. There was barely any splattering, and the frying itself flew by, with batches completing in almost 20 minutes. The efficiency was a pleasant surprise, transforming a perceived chore into an enjoyable part of the baking process.
Yes, my house did carry the distinct scent of fried oil afterward, a common byproduct of deep-frying. However, nothing a few open windows, a good blast of fresh outdoor air, and perhaps a simmering pot of citrus peels couldn’t remedy within an hour or two. The end result? Donuts that were perfectly golden, wonderfully fluffy, and tasted just like they came from a gourmet bakery. The satisfaction of mastering this technique was immense, and the superior texture and flavor of a fried donut made every step worth it. If you’ve been hesitant to try frying, I encourage you to give it a go; the rewards, especially with these Triple Coconut Donuts, are truly worth the minimal effort and cleanup.
Triple Coconut Donut Recipe: Your Guide to Tropical Perfection
Ready to create these little pieces of paradise in your own kitchen? This recipe is designed to guide you through each step, ensuring a delicious outcome every time. Pay close attention to oil temperature for frying, as consistency is key to perfectly cooked donuts. Also, be mindful when toasting your coconut – it can go from perfectly golden to burnt in a flash! Follow these instructions carefully for the best Triple Coconut Donuts you’ve ever tasted.

Triple Coconut Donut
By: Julie Chiou
Coconut lovers will adore this triple coconut donut! The crunchy toasted shredded coconut atop a cake-like dough base reminds you of island paradise!
Prep Time: 25 minutes
Cook Time: 15 minutes
Total Time: 40 minutes
Servings: 12 donuts
Print Recipe
Equipment You’ll Need
- Stand mixer: This kitchen workhorse is essential for efficiently mixing the dough to the perfect soft and sticky consistency.
- Dutch oven: Ideal for deep-frying due to its heavy construction, which provides excellent and even heat distribution, making the frying process safer and more controlled.
- Frying thermometer: Absolutely crucial for maintaining the precise oil temperature. This ensures your donuts cook evenly, without becoming greasy or burning.
- Slotted spoon or spider strainer: These tools are perfect for safely lowering and removing donuts from the hot oil.
- Wire rack: Essential for allowing excess oil to drain from the freshly fried donuts and for cooling them completely before glazing.
- Parchment paper: Useful for lining baking sheets, especially when toasting coconut, to prevent sticking and make cleanup easier.
- Small biscuit cutter (optional): For creating perfectly round donut holes.
Ingredients for Your Tropical Treat
For the Donuts:
- 3 ½ cups (438 g) bread flour: Provides a good structure and slight chewiness to the donut.
- 1 tablespoon baking powder: A leavening agent that helps the donuts puff up beautifully.
- ½ teaspoon baking soda: Works with other ingredients to create a light and airy texture.
- 1 teaspoon kosher salt, divided: Enhances all the flavors in the dough and glaze.
- ¼ teaspoon ground nutmeg: Adds a classic, warm, subtly spiced note to the donuts.
- ½ cup (100 g) sugar: For sweetness in the donut dough.
- 4 tablespoon (56 g) unsalted butter, melted: Adds richness and tenderness.
- 4 teaspoons coconut extract, divided: The key to infusing a vibrant coconut flavor into both the dough and the glaze.
- 2 teaspoons vanilla extract, divided: Complements the coconut and adds a layer of classic sweetness.
- 1 ¼ cups (296 ml) canned coconut milk, divided: Provides moisture, richness, and essential coconut flavor to the dough and glaze.
- 1 large egg: Acts as a binder and contributes to the donut’s structure and richness.
- Canola oil, for forming and frying (approx. 1 quart / 4 cups): For deep-frying the donuts until golden and delicious.
For the Glaze and Topping:
- 2 cups (160 g) shredded coconut, sweetened: This will be toasted for the irresistible crunchy topping.
- 2 cups (240 g) confectioners’ sugar: Forms the base of our smooth and sweet coconut glaze.
Step-by-Step Instructions
- In a medium bowl, whisk together the bread flour, baking powder, baking soda, ½ teaspoon of kosher salt, and ground nutmeg. Whisking ensures all dry ingredients are evenly distributed, which is crucial for a consistent donut texture and proper leavening.
- In the bowl of a stand mixer fitted with the paddle attachment, beat together the sugar, melted unsalted butter, 2 teaspoons of coconut extract, 1 teaspoon of vanilla extract, 1 cup of canned coconut milk, and the large egg until all ingredients are thoroughly incorporated and the mixture is smooth. Scrape down the sides of the bowl as needed.
- Gently add the whisked dry ingredients to the wet mixture in the stand mixer bowl. Mix on low speed, just until a soft and slightly sticky dough forms. Be careful not to overmix, as this can lead to tough donuts; stop mixing as soon as no dry streaks of flour remain.
- In a 5 ½ quart Dutch oven, or a similar heavy-bottomed pot, heat approximately 1 quart (4 cups) of canola oil over medium-high heat until it reaches a steady temperature of 370°F (188°C). A clip-on candy or frying thermometer is highly recommended here to monitor the temperature accurately throughout the frying process.
- While the oil is heating, prepare your donut shapes. Lightly oil your hands to prevent the sticky dough from adhering. Scoop about ¼ cup of dough and gently roll it into a loose ball. Lightly pat it down to form a disc, about ½-inch thick. Using your thumb, create a 1 ½-inch hole in the center of the disc to form a donut ring. Alternatively, you can use a round cookie cutter (around 3 inches) and a smaller cutter (around 1 inch) for perfectly uniform centers. Repeat this process for the remaining dough.
- Once the oil reaches the correct temperature, carefully lower 2-3 donuts into the hot oil at a time. It’s important not to overcrowd the pot, as this will drastically lower the oil temperature and result in greasy donuts. Fry for about 3 minutes, flipping the donuts halfway through, until they are beautifully puffed up and golden brown on both sides.
- Using a slotted spoon or spider strainer, carefully transfer the freshly fried donuts to a wire rack that has been covered with two layers of paper towels. This setup allows excess oil to drain off and helps them cool completely. Continue frying the remaining donuts, making sure to adjust the heat as needed to maintain the consistent oil temperature.
- While the donuts cool, prepare the delicious topping. First, preheat your oven broiler and line a large baking sheet with parchment paper. Spread the 2 cups of sweetened shredded coconut in an even layer on the prepared baking sheet.
- Place the baking sheet under the broiler. This step requires constant vigilance and should not be left unattended! Coconut toasts extremely fast under a broiler and can go from perfectly golden to burnt in a matter of seconds. Watch it carefully; as soon as you see the slightest hint of golden brown on the edges or tips of the coconut flakes, immediately remove it from the oven. The coconut will continue to “cook” and toast slightly further from residual heat as it cools. Removing it too late can result in burnt, black, and bitter coconut.
- In a medium bowl, large enough for dipping donuts, whisk together the remaining ½ teaspoon of kosher salt, the remaining coconut extract (typically 2 teaspoons), the remaining vanilla extract (typically 1 teaspoon), the remaining coconut milk (approx. ¼ cup), and the 2 cups of confectioners’ sugar until a smooth, pourable, and lump-free glaze forms. Adjust the consistency with a tiny bit more coconut milk or confectioners’ sugar if necessary.
- Set up an efficient assembly line for topping your donuts: place your cooled donuts first, followed by the coconut glaze bowl, and then a shallow dish with the toasted coconut. Take one cooled donut, dip one top half into the smooth glaze, allowing any excess to drip back into the bowl for a clean finish. Immediately after glazing, dip the glazed side into the toasted coconut, gently pressing to adhere a generous layer. Repeat this delightful process until all your donuts are beautifully topped.
- Store your Triple Coconut Donuts in an airtight container at room temperature for no longer than 3 days to maintain their freshness, tenderness, and delicious texture. For optimal flavor and texture, they are best enjoyed within the first 24 hours.
Chef’s Notes & Tips for Perfection
- **Oil Temperature is Key:** Maintaining a steady oil temperature of 370°F (188°C) is paramount for perfectly fried donuts. If the oil is too cool, your donuts will absorb too much oil and become greasy and heavy. If the oil is too hot, they’ll burn on the outside before cooking through, leaving a raw interior. A candy/frying thermometer that clips to the side of your pot is an indispensable tool for consistent results.
- **Temperature Management During Frying:** Keep a close eye on your thermometer. If you notice your oil getting too hot (indicated by smoke or rapidly browning donuts), temporarily reduce the heat or remove the pot from heat for a moment to let it cool down. Conversely, if the temperature drops too rapidly (likely when adding too many cold donuts at once), increase the heat slightly or fry fewer donuts at a time until the temperature stabilizes. Patience is a virtue here.
- **Alternative Coconut Toasting Wisdom:** As mentioned, toasting coconut under a broiler is quick but requires undivided attention. Alternatively, you can toast it in a dry skillet over medium-low heat on the stovetop, stirring frequently, or spread it on a baking sheet and bake at 325°F (160°C) for 5-10 minutes, stirring every couple of minutes, until golden. These alternative methods offer a bit more control and are less prone to sudden burning.
- **Dough Consistency:** The dough should be soft and slightly sticky. This stickiness is normal for a tender donut. If it’s too sticky to handle comfortably, lightly oil or flour your hands, but avoid adding too much extra flour to the dough itself, as this can make the finished donuts tough and dry.
- **Donut Cutters for Uniformity:** While using your thumb is a charming and classic method for forming donut holes, a set of round cookie cutters (about 3 inches for the donut and 1 inch for the center hole) will give you perfectly uniform donuts that cook more evenly and look professionally made.
- **Best Enjoyed Fresh:** While these Triple Coconut Donuts store well for a few days, they are truly at their absolute best enjoyed warm, shortly after glazing. The crispness of the toasted coconut and the tenderness of the fried dough are most pronounced when fresh.
Source for the original recipe inspiration: Saveur
Nutrition Information (Approximate Per Donut)
Serving Size: 1 Donut
Calories: 347 kcal
Carbohydrates: 67 g
Protein: 7 g
Fat: 6 g
Fiber: 1 g
Sugar: 36 g
Important Disclaimers
This website provides approximate nutrition information for convenience and as a courtesy only. Nutrition information can vary significantly for a variety of reasons, including specific brands of ingredients used, variations in preparation methods, and portion sizes. For the most precise nutritional data, we strongly recommend using your preferred nutrition calculator based on the actual ingredients and quantities you used in the recipe.
The default measuring system for this website is US Customary. Unit conversions are provided for convenience and as a courtesy only. While we strive to provide accurate unit conversions, please be aware that there may be some discrepancies due to rounding or inherent differences in measurement systems. Always refer to the original measurements for the most reliable results, especially in baking where precision is key.
This post contains affiliate links. This means that if you click on a link and make a purchase, I may receive a small commission at no extra cost to you. These commissions help support this blog and allow me to continue bringing you delicious recipes and content. Thank you for your support!