
Mastering Grilled Pizza: Your Guide to a Crispy, Flavorful Homemade Feast
If you’ve been following my culinary adventures on Instagram, you’ll know that Jason and I have developed a serious obsession with making a lot of grilled pizzas lately. This isn’t just a fleeting trend in our kitchen; it’s become a weekly ritual, transforming our dinners into exciting, flavorful events. Initially, the idea of grilling pizza felt incredibly daunting. I pictured dough slipping through the grates, creating a colossal mess, and leading to a ruined dinner. However, fueled by curiosity and a desire for delicious, unique flavors, I took the plunge, conquered that initial fear, and now we enjoy perfectly grilled pizzas all the time!
Why Grilled Pizza Will Become Your New Obsession
Forget everything you thought you knew about homemade pizza. Grilling pizza isn’t just an alternative cooking method; it’s a superior one that delivers results you simply can’t achieve in a conventional oven. The direct heat from the grill cooks the crust quickly and evenly, creating an unparalleled crispness on the bottom that mimics a traditional brick oven. Imagine that delightful crunch with every bite, followed by a tender, perfectly cooked interior. The smoky flavor imparted by the grill adds another layer of complexity that elevates your pizza from good to extraordinary. It’s truly a game-changer that makes even the best pizzerias seem lackluster in comparison.
Beyond the incredible taste and texture, grilling pizza transforms dinner into an interactive and enjoyable experience. It’s perfect for entertaining, family gatherings, or simply a fun weeknight meal. The outdoor setting, the sizzle of the grill, and the anticipation of a customized, piping hot pizza fresh off the grates make it more than just a meal – it’s an event. Plus, by preparing the dough and toppings beforehand, the actual cooking process is surprisingly quick, leaving more time for savoring the moment.
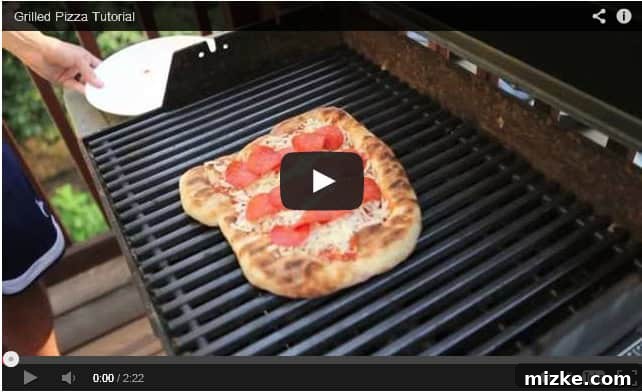
Watch Our Step-by-Step Grilled Pizza Video Tutorial!
You’ve been asking for our grilled pizza secrets, and many of you requested a visual guide. Well, your wish is our command! Below, you’ll find our comprehensive grilled pizza video tutorial. We filmed this specifically to walk you through every step, helping you overcome any intimidation you might feel. Rest assured, the dough will not fall through the grill grates – we demonstrate exactly how to handle it with confidence. This video is designed to empower you, showing you just how easy it is to achieve that coveted crispy crust and perfectly cooked pizza right in your backyard.
Our goal with this tutorial is to demystify the process and prove that anyone can make phenomenal grilled pizza at home. From handling the dough to achieving that perfect char, we cover it all. You’ll see firsthand how the grill transforms simple dough into a crispy, flavorful canvas for your favorite toppings. Get ready to impress yourself and your guests with your newfound grilling prowess!
The Secret to Success: The Perfect Pizza Dough
The foundation of any great pizza is its dough, and our recipe for grilled pizza dough is incredibly simple to make, yielding consistent, delicious results every time. We specifically recommend using bread flour for its higher protein content, which develops excellent gluten structure, giving your crust that desirable chewiness and resilience needed for grilling. The inclusion of ice water is crucial here; it helps to slow down gluten development during mixing, giving you more control and a better texture, while also keeping the dough cool, which is beneficial for a longer fermentation if you choose to refrigerate it.
What makes this dough truly amazing is its versatility and ease of preparation. You can whip up a batch of four dough balls, individually wrap them tightly in plastic wrap, and store them in a freezer bag. This means you’ll always have homemade pizza dough on hand, ready for impromptu pizza nights! When the craving strikes, simply transfer a ball of dough from the freezer to the fridge the night before, and by the time you return home from work the next day, it will be perfectly defrosted and ready to be transformed into a masterpiece.
Tips for Perfect Dough Preparation:
- Measure Accurately: Especially for flour, using a kitchen scale for grams (as provided in the recipe) will give you the most consistent results.
- Don’t Rush the Rest: The initial 10-minute rest after incorporating the water allows the flour to fully hydrate, making the dough easier to work with.
- Refrigeration is Key: While you can use the dough sooner, refrigerating it for 24-72 hours allows for a slow, cold fermentation, which deepens the flavor and improves the texture significantly. This is a step worth planning for!
- Proper Storage: Tightly wrapping individual dough balls prevents freezer burn and maintains their quality for weeks.
Now, let’s dive into the full recipe and detailed instructions below. Don’t hesitate to ask if you have any questions along the way!
Dough for Grilled Pizzas
Julie Chiou
1 hour 15 minutes
12 minutes
1 hour 27 minutes
1 (9-inch pizza)
Ingredients
For the crust:
- 3 cups (375 g) bread flour
- 2 teaspoons granulated sugar
- ½ teaspoon instant yeast
- 1 ⅓ cups (316 ml) ice water
- 1 tablespoon vegetable oil
- 1 ½ teaspoons salt
- Handful of cornmeal, for dusting
Instructions
- Prepare the Dough: In the bowl of a food processor fitted with the metal blade, combine the bread flour, granulated sugar, and instant yeast. Pulse a few times to ensure they are well mixed.
- Add Water and Rest: With the machine running, slowly add the ice water through the feed tube. Process until the dough comes together and all ingredients are incorporated, which should take approximately 10 seconds. Stop the machine and let the dough rest for 10 minutes. This resting period (autolyse) allows the flour to fully hydrate.
- Finish Kneading and Refrigerate: Add the salt and vegetable oil to the dough. Process again until the dough forms a smooth, slightly tacky ball that no longer sticks excessively to the sides of the bowl. Remove the dough from the food processor and briefly knead it by hand on a lightly oiled or floured work surface for about 1 minute. Transfer the kneaded dough to a lightly oiled bowl, cover it tightly with plastic wrap, and refrigerate for 24 hours or up to 3 days. This cold fermentation develops deeper flavor. (For future use, after refrigeration, the dough can be individually wrapped tightly in plastic wrap, placed in a freezer bag, and frozen for up to a month. Thaw in the refrigerator overnight before use.)
- Preheat Grill & Prepare Dough for Grilling: When ready to make pizza, preheat your outdoor grill to high heat (typically around 450-500°F or 230-260°C). Roll out one ball of dough on a lightly floured surface generously sprinkled with cornmeal. The cornmeal helps prevent sticking and adds an extra crispy texture. Gently stretch and pull the dough to fit a 9-inch pizza pan or to your desired shape and thickness.
- First Grill Side: Carefully transfer the dough directly onto the hot grill grates (a pizza peel dusted with cornmeal can be very helpful here). Close the lid and grill for 3-5 minutes. It’s crucial to check frequently to ensure the bottom doesn’t get overly charred, as grill temperatures can vary significantly. You’re looking for a firm, bubbly crust with visible grill marks.
- Second Grill Side: Using tongs or a large spatula, flip the partially cooked dough to the other side. Close the lid and grill for another 3-5 minutes, again monitoring closely for charring. Both sides should be firm and have some grilled marks.
- Assemble Toppings: Once both sides of the crust are grilled, carefully bring the dough inside to assemble your toppings. A classic combination we love is a base of rich tomato sauce, followed by freshly shredded whole milk mozzarella, and your choice of pepperoni or sausage. However, the beauty of homemade pizza is customization – feel free to get creative! We’ve even experimented with a vibrant pesto base, which is fantastic.
- Final Grill & Melt: Return the assembled pizza to the grill. Turn the grill heat down to LOW. Place your topped pizza creation back on the grates. Close the lid and continue to grill until the cheese is completely melted, bubbly, and the toppings are warmed through. This typically takes another 5-10 minutes, depending on your toppings and grill temperature.
- Slice and Serve: Once the cheese is perfectly melted and the crust is golden, turn off the grill. Carefully transfer your glorious grilled pizza inside, slice it into wedges, and serve immediately.
- Enjoy: Savor the incredible flavor and texture of your homemade grilled pizza!
Notes
Nutrition Information (per 9-inch pizza)
Serving: 1 pizza,
Calories: 1524 kcal,
Carbohydrates: 282g,
Protein: 47g,
Fat: 20g,
Saturated Fat: 3g,
Polyunsaturated Fat: 11g,
Monounsaturated Fat: 4g,
Trans Fat: 0.1g,
Sodium: 3515mg,
Potassium: 433mg,
Fiber: 11g,
Sugar: 9g
Disclaimers
This website provides approximate nutrition information for convenience and as a courtesy only. Nutrition information can vary for a variety of reasons. For the most precise nutritional data use your preferred nutrition calculator based on the actual ingredients you used in the recipe.
The default measuring system for this website is US Customary. Unit conversions are provided for convenience and as a courtesy only. While we strive to provide accurate unit conversions, please be aware that there may be some discrepancies.
Creative Topping Combinations for Your Grilled Pizza
One of the most exciting aspects of making grilled pizza is the endless possibility of toppings. While classic combinations like Margherita or pepperoni are always a hit, don’t be afraid to experiment and create unique flavor profiles. Here are a few ideas to inspire your next grilled pizza masterpiece:
- BBQ Chicken Pizza: Use a smoky barbecue sauce as your base, top with shredded cooked chicken, red onion slices, cilantro, and a blend of mozzarella and smoked gouda.
- Mediterranean Delight: A pesto base, sun-dried tomatoes, Kalamata olives, artichoke hearts, feta cheese, and a sprinkle of fresh oregano make for a bright and savory pizza.
- Spicy Sausage & Broccolini: A red sauce base, crumbled spicy Italian sausage, thinly sliced broccolini (blanched first, if desired), red pepper flakes, and provolone cheese.
- Fig & Prosciutto: A sophisticated option with a base of fig jam, thinly sliced prosciutto, crumbled goat cheese, and a drizzle of balsamic glaze after grilling.
- Breakfast Pizza: Scramble some eggs, use a white sauce (like béchamel or ricotta), add cooked bacon or sausage, shredded cheddar, and a sprinkle of chives. Perfect for brunch!
- Veggie Garden Fresh: Light tomato sauce, bell peppers, mushrooms, zucchini, cherry tomatoes, and fresh basil, topped with mozzarella and a touch of Parmesan.
Remember, less is often more when it comes to pizza toppings, especially on the grill. Overloading the pizza can make it soggy or difficult to cook evenly. Aim for a balanced distribution of flavors and textures.
Essential Grilling Tips for Pizza Perfection
Achieving the perfect grilled pizza is a skill that improves with practice. Here are some pro tips to ensure your success:
- Clean Grates are Key: Start with impeccably clean grill grates. Any residue from previous grilling sessions will cause your dough to stick and tear.
- Oil Your Grates: Once hot, lightly oil your grill grates using a paper towel dipped in high-smoke-point oil (like vegetable or grapeseed oil) and held with tongs. This creates a non-stick surface.
- Preheat Thoroughly: A hot grill is essential for a quick, crispy crust. Don’t rush the preheating process. High heat creates the initial sear that prevents sticking and builds flavor.
- Use Cornmeal: Dusting your pizza peel and workspace generously with cornmeal is vital. It acts like tiny ball bearings, helping the dough slide effortlessly onto the grill.
- Work Quickly: Once the dough is on the grill, the first side cooks fast. Be prepared to check and flip within a few minutes.
- Don’t Overload: As mentioned, too many toppings can lead to a soggy pizza that takes longer to cook. Keep it moderate for best results.
- Zone Grilling (Optional): If your grill has multiple burners, you can set up a direct heat zone for the initial crust cooking and an indirect heat zone for melting the toppings. This provides more control.
- Pizza Peel Essential: A pizza peel is an invaluable tool for safely transferring dough to and from the grill. Make sure it’s dusted with cornmeal or flour.
- Keep an Eye on the Heat: Every grill is different. Learn your grill’s hot spots and adjust accordingly. Don’t walk away from your pizza during the grilling process, especially the initial crust cooking.
With these tips and our perfected dough recipe, you’re well on your way to becoming a grilled pizza master. The satisfaction of pulling a perfectly cooked, crispy-crusted pizza off your own grill is immense, and we promise it’s worth every step.
A huge thank you to Jason for his expert grilling skills and to my wonderful hair stylist and dear friend, Joy, for her invaluable help with the video production! Your contributions made this guide possible. Happy grilling, everyone!