
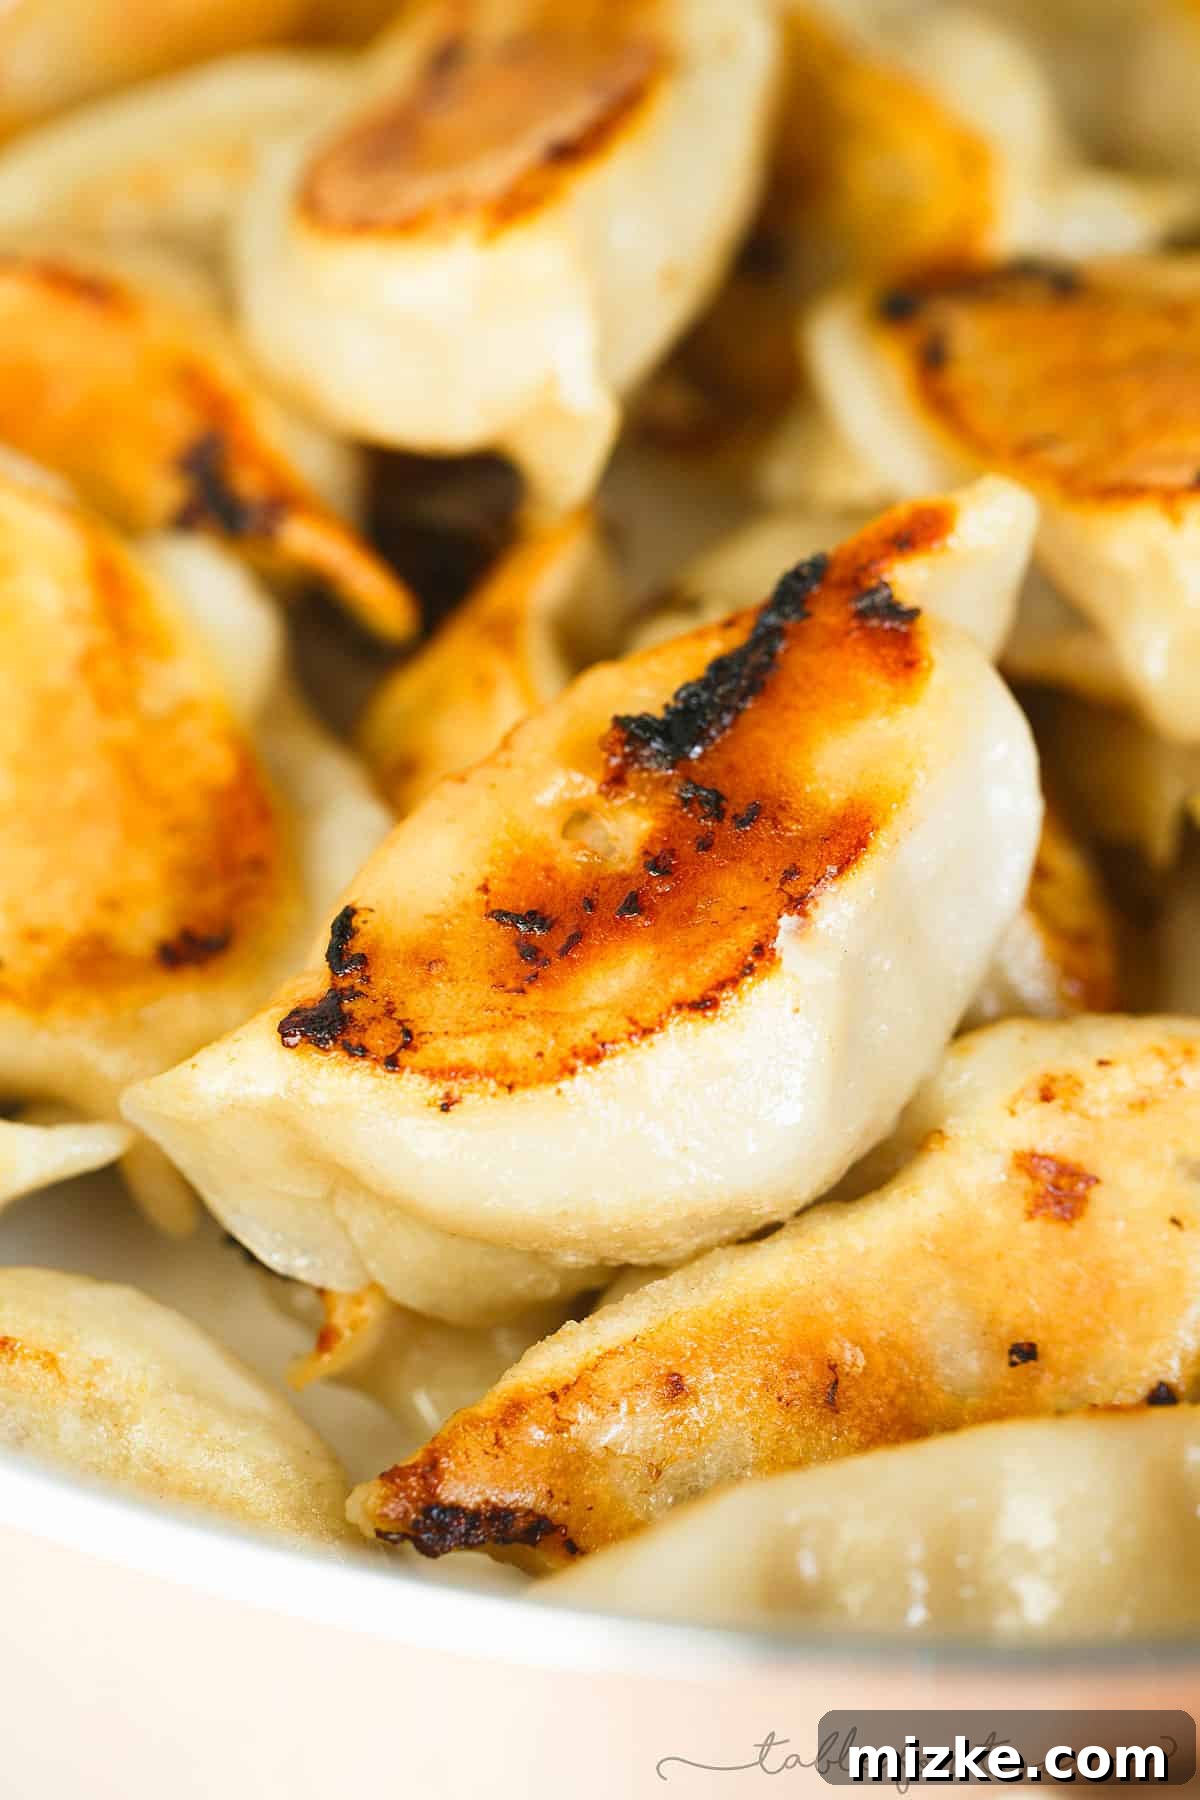
Are you ready to transform your potsticker game forever? Prepare to discover the ultimate secret to making your potstickers unbelievably crispy – a culinary trick so effective, you’ll want to commit it to memory and use it time and time again!
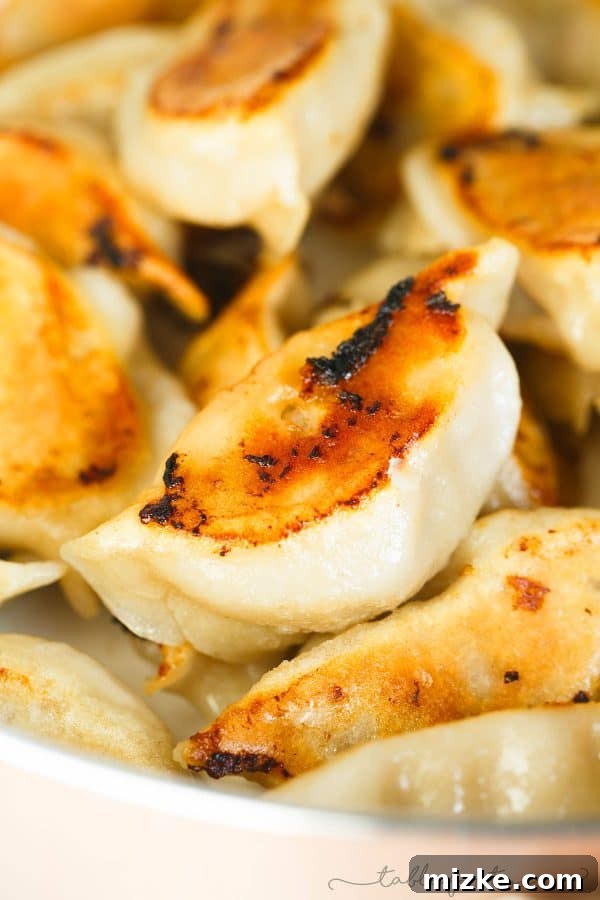
Unlocking a Family Culinary Legacy: The Perfect Potsticker
There are some culinary secrets that become cherished traditions, passed down from one generation to the next. This particular method for achieving perfectly crispy potstickers is one such treasure, a technique I learned directly from my mother, and one that has absolutely revolutionized my cooking. Growing up, Sundays at our house meant one thing: potstickers for lunch. It wasn’t just a meal; it was a ritual, a comforting certainty that we all eagerly anticipated, marking the close of a week with delicious, shared enjoyment.
My mom consistently made the most incredible potstickers. They were legendary. Each dumpling boasted bottoms that were exquisitely crispy and golden-brown, yielding an irresistible crunch with every bite. Yet, miraculously, they were never burnt, and the succulent fillings inside were always cooked to perfection, tender and juicy. For years, I simply enjoyed them, marveling at her seemingly magical touch in the kitchen. Eventually, my curiosity got the better of me. I had to understand the “how.” How did she achieve such consistent perfection, producing potstickers that were both crunchy and perfectly cooked through, every single time?
One day, I finally gathered the courage to ask her for her secret. And she told me! The simplicity of her method was astounding, almost deceptively easy. From that day forward – I believe I was around 19 or 20 when I finally got around to asking, yes, it took me a while to inquire about this long-standing mystery! – I have prepared my potstickers using this exact same technique. And without fail, every single time, they emerge from the skillet with that coveted extra crispiness and flawless texture. It’s a game-changer, plain and simple, guaranteeing perfect results whether I’m cooking for myself or a crowd.
Now, it’s my turn to share this treasured knowledge with you. I’m thrilled to let you in on Mama Chiou’s time-tested secret, a method that guarantees delicious results that will elevate your potsticker experience. That woman truly is a culinary genius, and I’m eternally grateful for her wisdom!
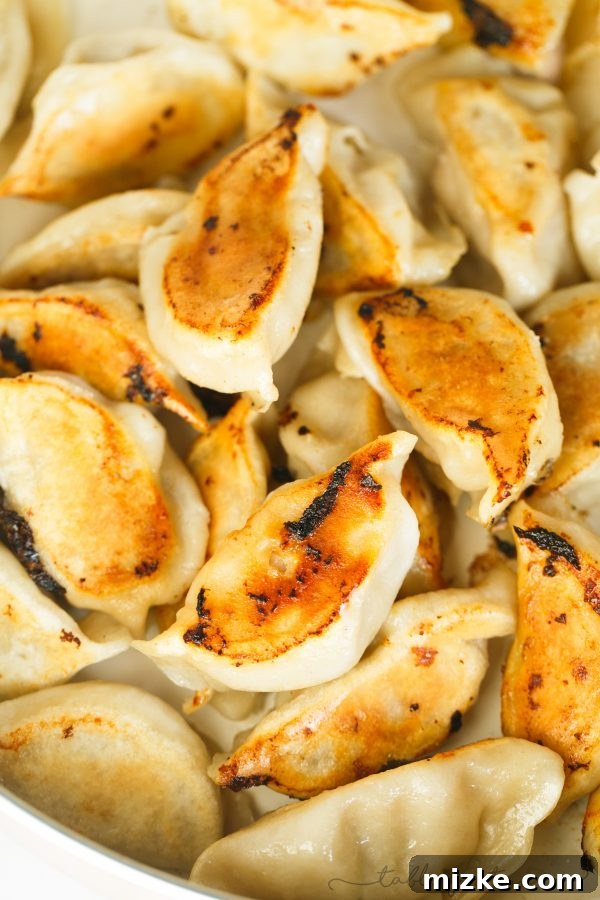
The Science Behind the Crisp: Understanding the Steam-Fry Method
Before we dive into the step-by-step process, let’s briefly understand the genius behind this cooking technique. It’s often referred to as the “steam-fry” method, and it ingeniously combines two essential cooking principles to deliver superior results. First, the potstickers are steamed in a covered skillet with a small amount of water. This crucial step ensures that the filling cooks thoroughly from the inside out, making them tender and juicy while simultaneously softening the dumpling wrapper. Secondly, once all the water has evaporated, the potstickers continue to cook in the oil, directly frying the bottoms and developing that signature crispy, golden-brown crust. It’s a perfectly balanced approach that prevents raw interiors while achieving maximum crispness on the exterior. This dual-action process is what sets this method apart and guarantees consistently delicious outcomes, transforming ordinary dumplings into culinary masterpieces.
I’ve put together a quick video demonstration to visually guide you through the process, which you’ll find embedded below. However, for those who prefer detailed written instructions and the ability to reference them at their own pace, I’ve meticulously detailed every step below to ensure you have all the information you need right at your fingertips to recreate this magic in your own kitchen.
Choosing Your Potstickers: Fresh, Frozen, or Homemade Delights
The beauty of this method is its incredible versatility. Whether you’re using convenient store-bought frozen potstickers – a staple in many busy households – or refrigerated fresh dumplings, or even homemade batches that you’ve lovingly prepared (perhaps even freezing them for future enjoyment), this technique works perfectly across the board. The key principles remain the same, ensuring uniformly excellent results regardless of your starting point or the type of dumpling you choose.
When selecting your potstickers, consider the delightful array of fillings available – from the classic savory pork and cabbage, to flavorful chicken and vegetable, or vibrant and wholesome vegetarian options. For store-bought varieties, always check the packaging for any specific cooking recommendations, though you’ll find that this general method will likely supersede them for superior crispiness and overall texture. If you’re making your own from scratch, ensure they are well-sealed to prevent the delicious filling from escaping during the steaming process, which could lead to a less enjoyable texture and flavor. This method truly works for all dumpling types, transforming them into a crispy delight.
Step-by-Step Guide to Perfectly Crispy Potstickers
Ready to create potstickers that will impress everyone (including yourself) with their irresistible texture and flavor? Follow these precise steps for undeniable crispiness and tender, flavorful interiors every single time.
- Prepare Your Skillet: The Foundation for Crispiness
Begin by selecting a high-quality nonstick skillet. This is absolutely critical for preventing your potstickers from adhering to the pan and ensuring they release easily with that perfect golden crust. A well-seasoned cast iron skillet can also work, but nonstick is generally more forgiving. Add approximately 1-2 tablespoons of a neutral cooking oil, such as vegetable oil, canola oil, grapeseed oil, or even a light olive oil, to the bottom of the pan. The oil provides the medium for direct frying and helps create that coveted crispy texture and beautiful golden-brown color. Swirl the oil gently to coat the entire cooking surface evenly, ensuring every potsticker bottom has direct contact. - Arrange the Potstickers: Single Layer for Even Cooking
Carefully place your potstickers into the skillet. It’s vital to arrange them in a single layer, ensuring that their flat, uncooked bottoms are directly in contact with the oiled surface of the pan. This direct contact is essential for developing a uniform crisp. Avoid overcrowding the skillet; leave a little space between each potsticker, as this allows steam to circulate and heat to distribute evenly. Overcrowding can lower the pan’s temperature, leading to uneven cooking and less crispiness. If you have too many potstickers, it’s always better to cook them in two or more smaller batches rather than cramming them all into one pan. - Initiate Heat: Getting Things Started
Turn the heat up to medium-high. This initial burst of heat helps to quickly bring the oil up to temperature and begin the searing process on the bottom of the potstickers. This quick initial heat lays the groundwork for that beautiful, deep crisp that we’re aiming for. It also kickstarts the steaming process once the water is added. - Add the “Magic” Water: Introducing Steam for Internal Perfection
Now for the unique trick that separates good potstickers from truly great ones! Carefully pour about 1/2 cup of water directly into the skillet. The water doesn’t need to be hot; room temperature or cold water works perfectly fine. Be cautious as the water will sizzle vigorously when it hits the hot pan – this is normal. This water is the secret to steaming the potstickers, ensuring they cook through evenly from the inside out, making the wrapper tender and the filling perfectly cooked before the crisping phase begins. - Cover and Steam: The Non-Negotiable Step for Tender Interiors
Immediately and securely cover the skillet with a tight-fitting lid. This step is paramount. The trapped steam within the covered pan will gently cook the potstickers from the inside out, making the wrapper supple and the filling perfectly cooked and juicy. And here’s a critical rule, one that cannot be overstated: DO NOT open the lid at any point during this steaming process. Opening the lid allows the precious steam and heat to escape, disrupting the consistent cooking environment and essentially forcing you to start all over again, or resulting in undercooked interiors and an uneven texture. Let the steam do its vital work undisturbed, locking in moisture and flavor. - Watch for Water Evaporation: The Transition to Frying
Allow the potstickers to steam for approximately 7-10 minutes. The exact time may vary slightly depending on your stove and the size of your potstickers. During this period, the water will gradually cook off and evaporate entirely. You can usually tell the water has cooked off when you no longer hear the vigorous sizzling sound of water and oil together, but rather a more subdued, gentle frying sound. Once you observe that all the water has essentially evaporated and the pan is dry again (you might hear crackling sounds as the oil takes over), reduce the heat to medium. This adjustment prevents the potstickers from burning as they transition into their dedicated crisping and frying stage. - Fry for Crispiness: The Golden Moment You’ve Been Waiting For
Once the water has evaporated, let the potstickers continue to fry on medium heat for another 5-7 minutes. This is where the true magic happens – the bottoms will transform into that irresistible golden-brown, extra-crispy texture. Remember, the longer they fry (within reason, and with careful monitoring), the crispier they will become. However, exercise caution: don’t leave them unattended for too long, as you don’t want them to burn. Crucially, during this dedicated frying stage, again, do not open the lid or attempt to move the potstickers. Any disturbance will prevent an even, uninterrupted crust from forming, compromising the crispiness. Let them sit undisturbed and develop that glorious, audible crunch. - The Big Reveal: Open and Flip
After 5-7 minutes of dedicated frying, you should start to hear a distinct, satisfying sizzle and perhaps even smell the delicious aroma of toasted dumplings – a clear sign that they are ready! This is your cue! Now, you can finally open the lid. Using a sturdy, flat spatula, gently begin to lift and flip each potsticker. You should be greeted with a beautifully golden-brown, wonderfully crispy bottom – the undeniable hallmark of success! - Admire the Crisp: Mission Accomplished!
At this stage, you should have achieved perfectly extra-crispy bottoms on all your potstickers. They’re ready to be enjoyed immediately, showcasing your newfound culinary prowess! - Final Touches and Serving: From Skillet to Plate
While the bottoms are already perfectly crispy, some prefer a slightly more all-around browning for aesthetic appeal or an extra textural dimension. If you desire, you can continue to cook them for another minute or two, carefully flipping them to lightly brown the other sides. However, typically, once the bottoms are golden and crunchy, I simply turn off the heat and let the potstickers rest in the skillet for about 5 minutes. This brief resting period helps them set and prevents them from becoming soggy upon serving. Then, transfer them onto a large serving plate and serve immediately with your favorite dipping sauces.
Enhancing Your Potsticker Experience: Dipping Sauces and Pairings
No potsticker feast is complete without the perfect dipping sauce! While a simple soy sauce is always a classic, elevating your sauce can take your crispy potstickers to the next level. Consider a mix of low-sodium soy sauce, rice vinegar (for a tangy kick), a touch of sesame oil (for nutty depth), freshly grated ginger, minced garlic, and a dash of chili oil or sriracha for a spicy kick. Experiment with different ratios to find your personal favorite, customizing it to your palate. These crispy delights make a fantastic appetizer, but they can also be a satisfying light lunch or dinner when paired with a fresh, vibrant Asian-inspired salad or a comforting bowl of hot noodle soup. They are also excellent additions to a larger dim sum spread or as a delicious snack anytime.
Troubleshooting Common Potsticker Problems
Even with a foolproof method, sometimes things can go slightly awry. Here’s a quick guide to common issues you might encounter and how to effectively resolve them, ensuring your next batch is perfect:
- My Potstickers are Sticking to the Pan: This is usually a clear sign that your skillet isn’t truly nonstick, or you haven’t used enough oil. Ensure your pan is in good condition and don’t skimp on the initial tablespoon or two of oil. Also, avoid trying to move them prematurely before the crispy crust has properly formed, as this can tear the delicate wrapper.
- They Aren’t Crispy Enough: The most common reason for a lack of crispiness is not enough frying time after the water has evaporated. Don’t be afraid to let them fry for the full 5-7 minutes (or even a minute or two longer if needed), keeping a close eye on them to prevent burning. Ensure the heat isn’t too low during this crucial crisping phase.
- The Insides Are Still Raw or Cold: This indicates insufficient steaming. Ensure your lid creates a tight seal and that you absolutely do not open it during the initial 7-10 minutes of steaming. The steam needs to be fully contained to thoroughly cook the filling through, especially if starting with frozen dumplings.
- The Bottoms Are Burnt: This can happen if the heat is too high during the final frying stage, or if you’ve left them frying for too long without supervision. Adjust your heat down to a steady medium and stay close to the pan during the crisping phase, actively monitoring their color.
- They’re Soggy After Cooking: Allowing them to sit in the pan with residual moisture or covering them tightly after cooking can lead to sogginess. Transfer them to a plate immediately after frying, and serve promptly for best texture.
Beyond the Recipe: Making Homemade Potstickers
While the secret to perfectly crispy potstickers lies predominantly in the cooking method, mastering the art of making them from scratch is another incredibly rewarding journey. My mom, the very same culinary inspiration who shared her crisping technique, has also guided me through the intricate yet satisfying process of crafting homemade potstickers from dough to delicious filling. It’s a labor of love that truly deepens the connection to this incredible dish, allowing for complete customization of flavors and textures. If you’re feeling adventurous and want to explore the world of homemade dumplings, here’s a video featuring my mom sharing her expertise, offering invaluable tips and techniques for crafting your own delectable potstickers:
Embrace the Crisp!
With Mama Chiou’s cherished technique, you’re now fully equipped to create potstickers that are consistently delicious, boasting that coveted extra-crispy bottom and a perfectly cooked, flavorful interior. Say goodbye to soggy or unevenly cooked dumplings and hello to potsticker perfection. This method is incredibly simple, yet profoundly effective, transforming even a humble frozen dumpling into a culinary delight that rivals your favorite restaurant. Give it a try this week, and prepare to be amazed at the difference a few simple, well-executed steps can make. Your family and friends will undoubtedly be asking for your secret! Happy cooking, and enjoy those perfectly crispy potstickers!