
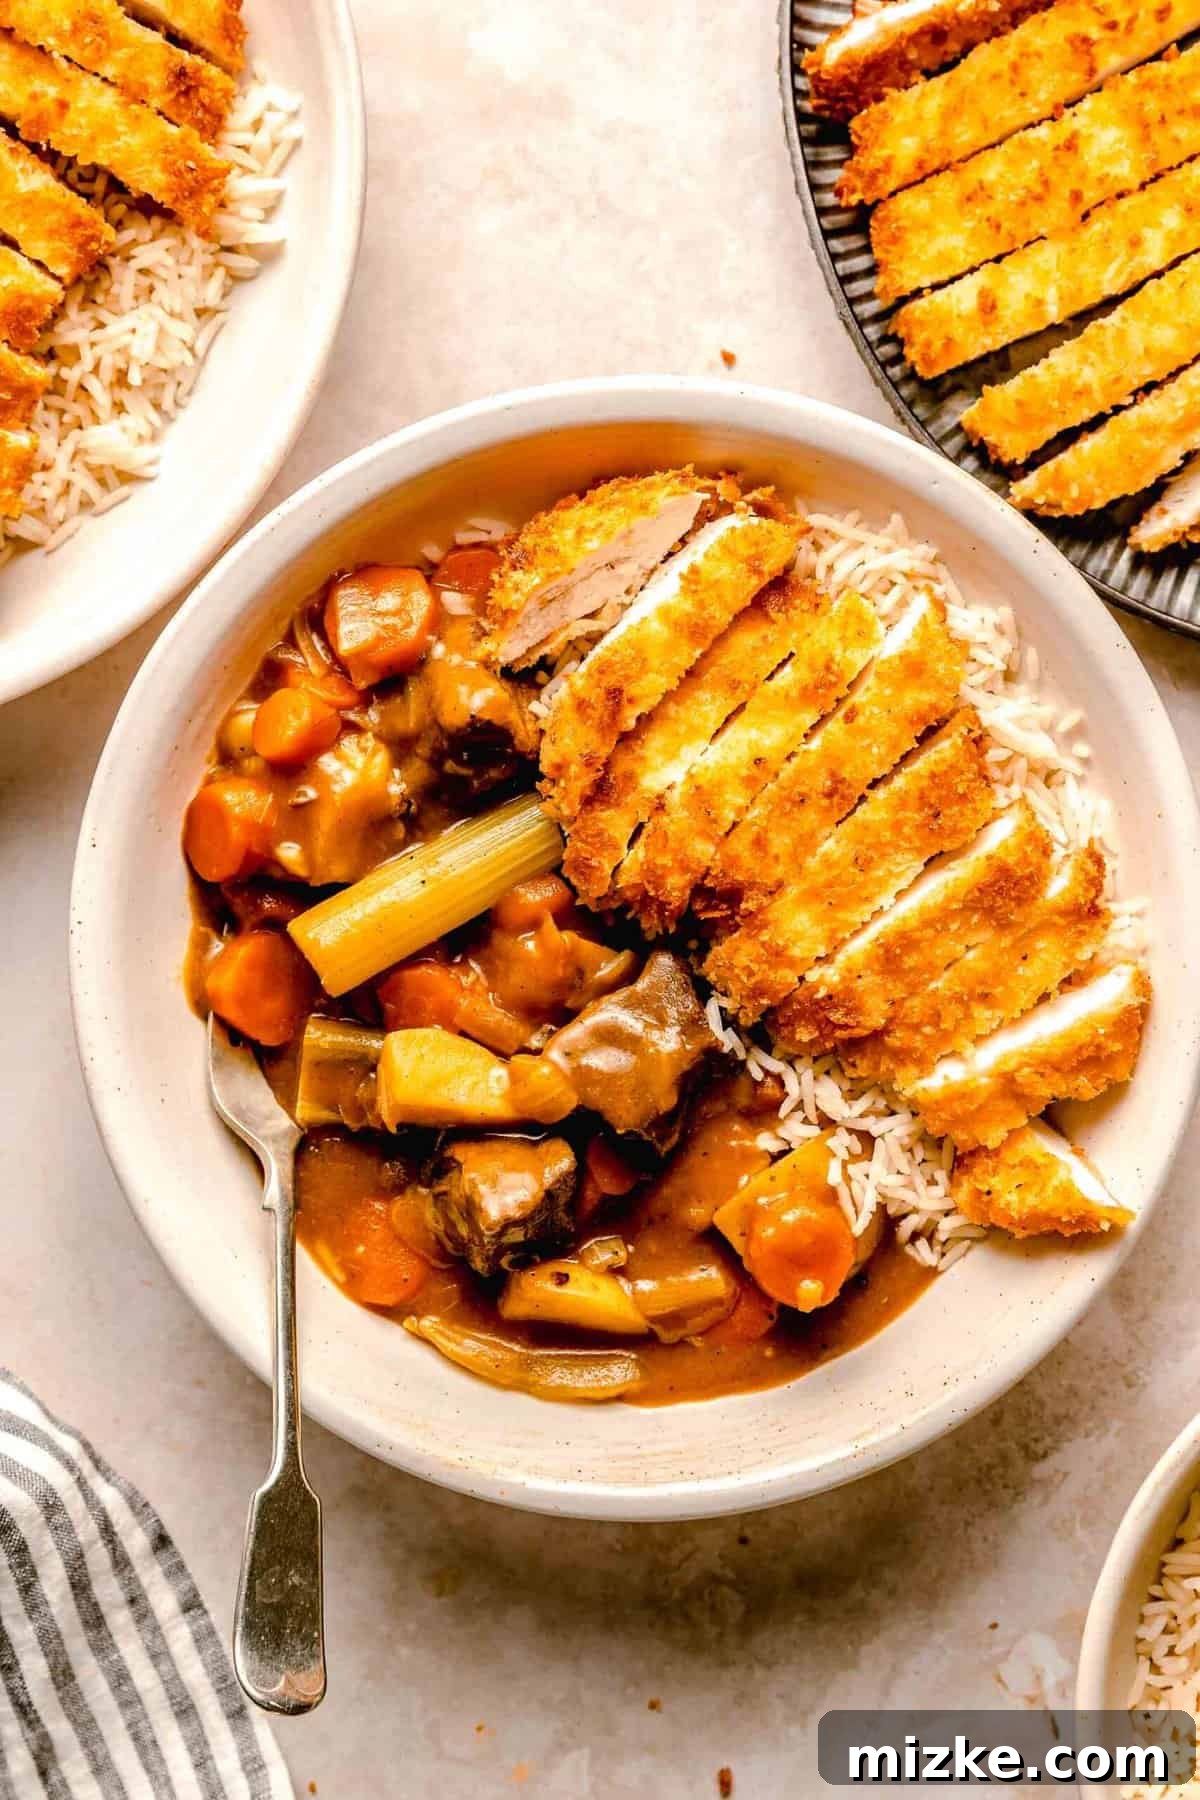
Ultimate Homemade Chicken Katsu Curry: Crispy Katsu & Savory Japanese Beef Curry
Indulge in the unparalleled comfort of homemade Chicken Katsu Curry, a magnificent dish that expertly marries two beloved Japanese culinary traditions. Imagine golden, perfectly crispy chicken katsu served alongside a rich, mildly sweet, and deeply satisfying beef curry, all nestled on a bed of fluffy white rice. This dynamic recipe promises an adventure for your taste buds, offering a delightful textural contrast that will have everyone asking for more. Get ready to transform your kitchen into a haven of aromatic flavors!
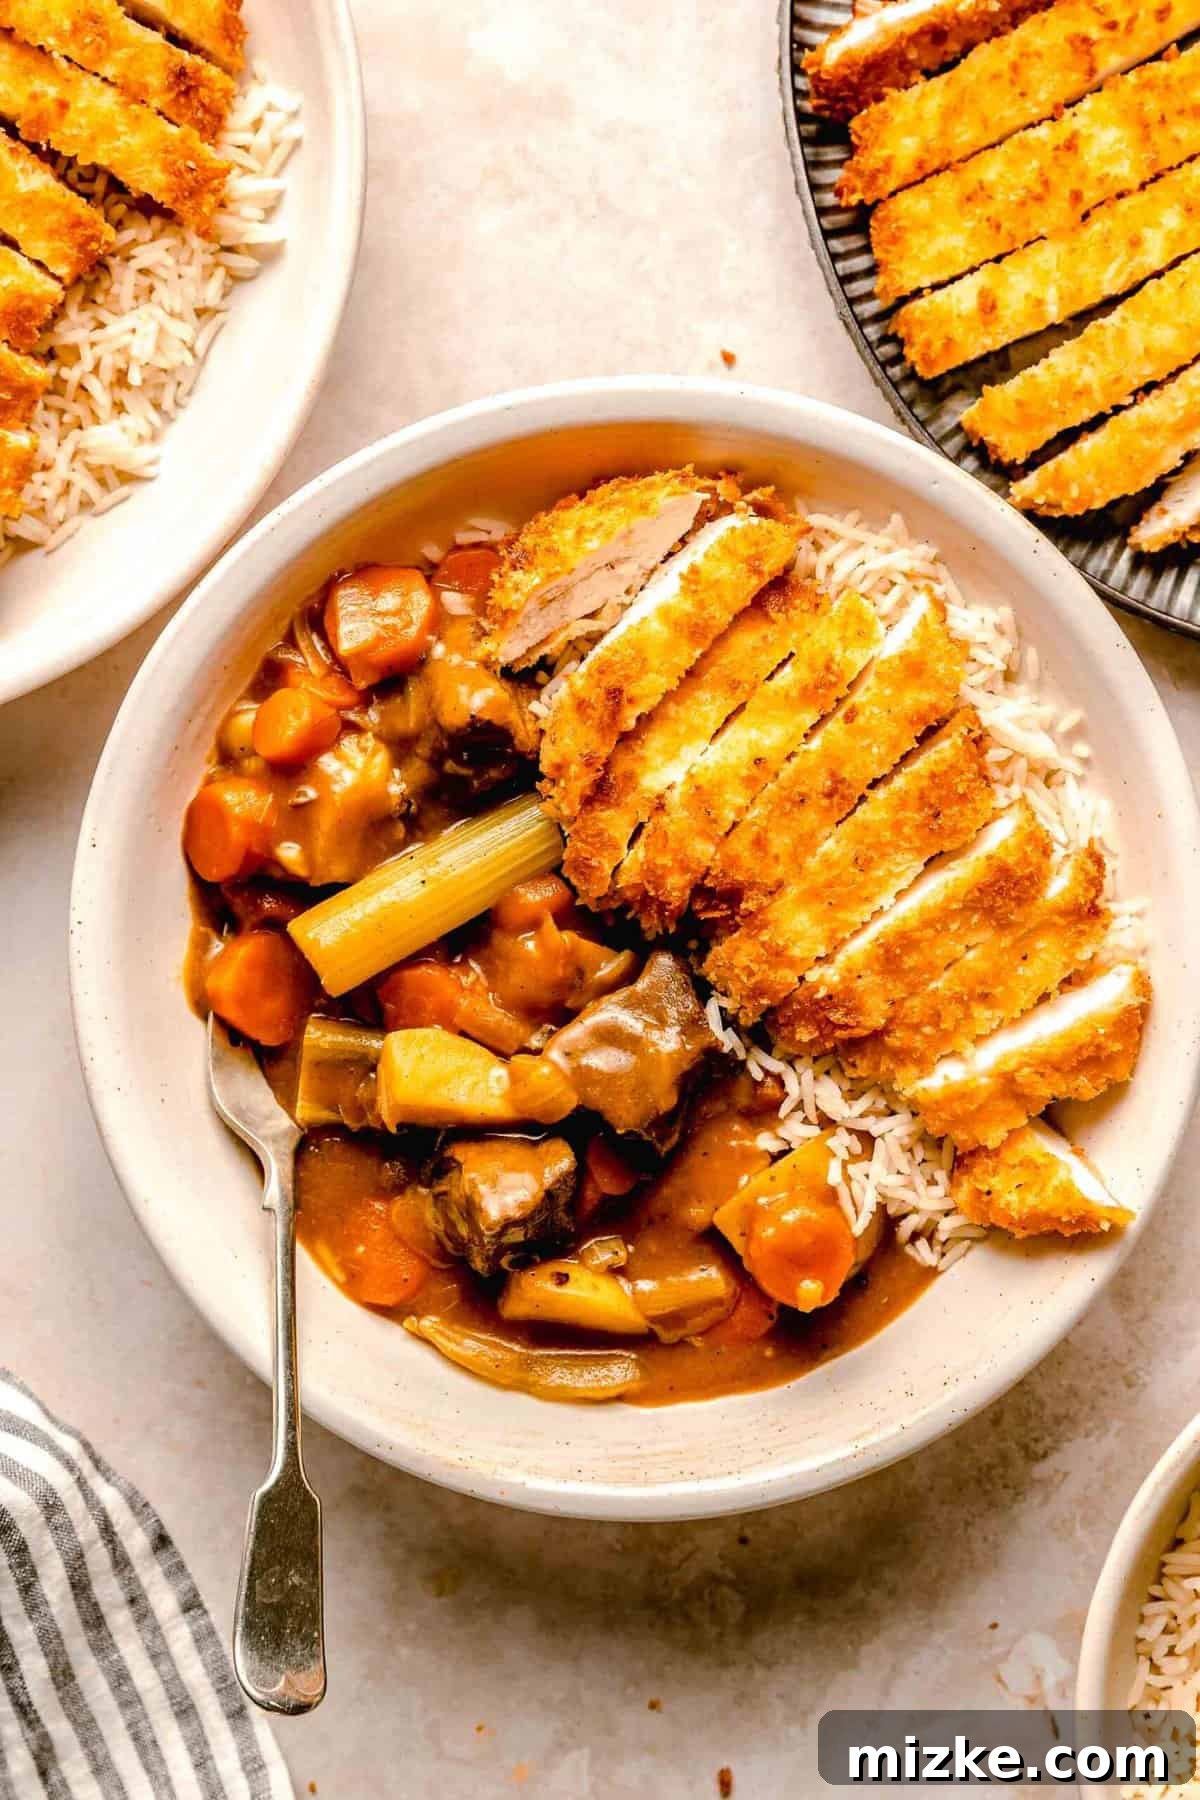
There’s nothing quite like a warm, hearty meal to lift your spirits, especially on a dreary day. This recipe brings together two of my absolute favorite Japanese comfort foods: the aromatic, deeply flavorful Japanese beef curry and the irresistibly crunchy chicken katsu [チキンカツ]. Combined, they create a meal that is truly greater than the sum of its parts – a glorious, satisfying experience that will undoubtedly become a staple in your home.
Picture this: your first bite offers the satisfying crunch of perfectly breaded, juicy chicken, followed by the succulent tenderness of slow-cooked beef, enveloped in a luscious, rich, and subtly sweet curry sauce that melts in your mouth. This harmonious blend of textures and tastes is what makes homemade chicken katsu curry an instant classic. The next time you crave a dish that provides warmth, flavor, and pure culinary joy, look no further. And for an extra special treat, consider pairing it with some crispy scallion pancakes to complete your feast!
Why This Homemade Chicken Katsu Curry Recipe Will Become Your Favorite
This exquisite katsu curry is celebrated for its multifaceted appeal, combining several elements into one magnificent entree. Beyond its incredible taste, here are some compelling reasons why this recipe stands out and is sure to win over your family and friends:
- A Symphony of Flavors and Textures: Every mouthful is an exciting journey for your senses. The delicate crispness of the panko-crusted chicken provides a brilliant counterpoint to the tender, slow-cooked beef, all unified by a rich, aromatic, and comforting curry sauce. This delightful interplay of crunchy, tender, sweet, and savory elements is a culinary experience you won’t want to miss.
- A Wholesome and Complete Meal: This isn’t just a dish; it’s a perfectly balanced meal in a single bowl. With abundant protein from both chicken and beef, essential carbohydrates from rice and potatoes, and a medley of nutritious vegetables like carrots, onions, and celery, it provides a wide spectrum of nutrients. You won’t need to scramble for additional side dishes to complete your meal, though feel free to add them if you desire!
- Surprisingly Simple to Master: The idea of preparing two distinct dishes – chicken katsu and beef curry – might initially seem daunting. However, both components are individually straightforward to make. By following our clear, step-by-step instructions, you’ll find the process enjoyable and rewarding, leading to a gourmet-quality meal with relative ease. It’s a perfect project for home cooks looking to impress without stress.
- Perfect for Diverse Palates (Even Picky Eaters!): We all have those family members or guests with specific preferences. This chicken katsu curry recipe is a lifesaver! If someone isn’t keen on curry, they can enjoy the succulent chicken katsu on its own. Conversely, those who prefer curry can savor the rich beef and vegetable stew. This versatility makes it an ideal dish for gatherings and ensures everyone finds something they love.
- Authentic Japanese Comfort: This recipe brings the authentic taste of Japanese comfort food right into your home. Using traditional Japanese curry roux and panko breadcrumbs, you’ll recreate the beloved flavors found in Japanese restaurants, evoking a sense of warmth and nostalgia with every bite.
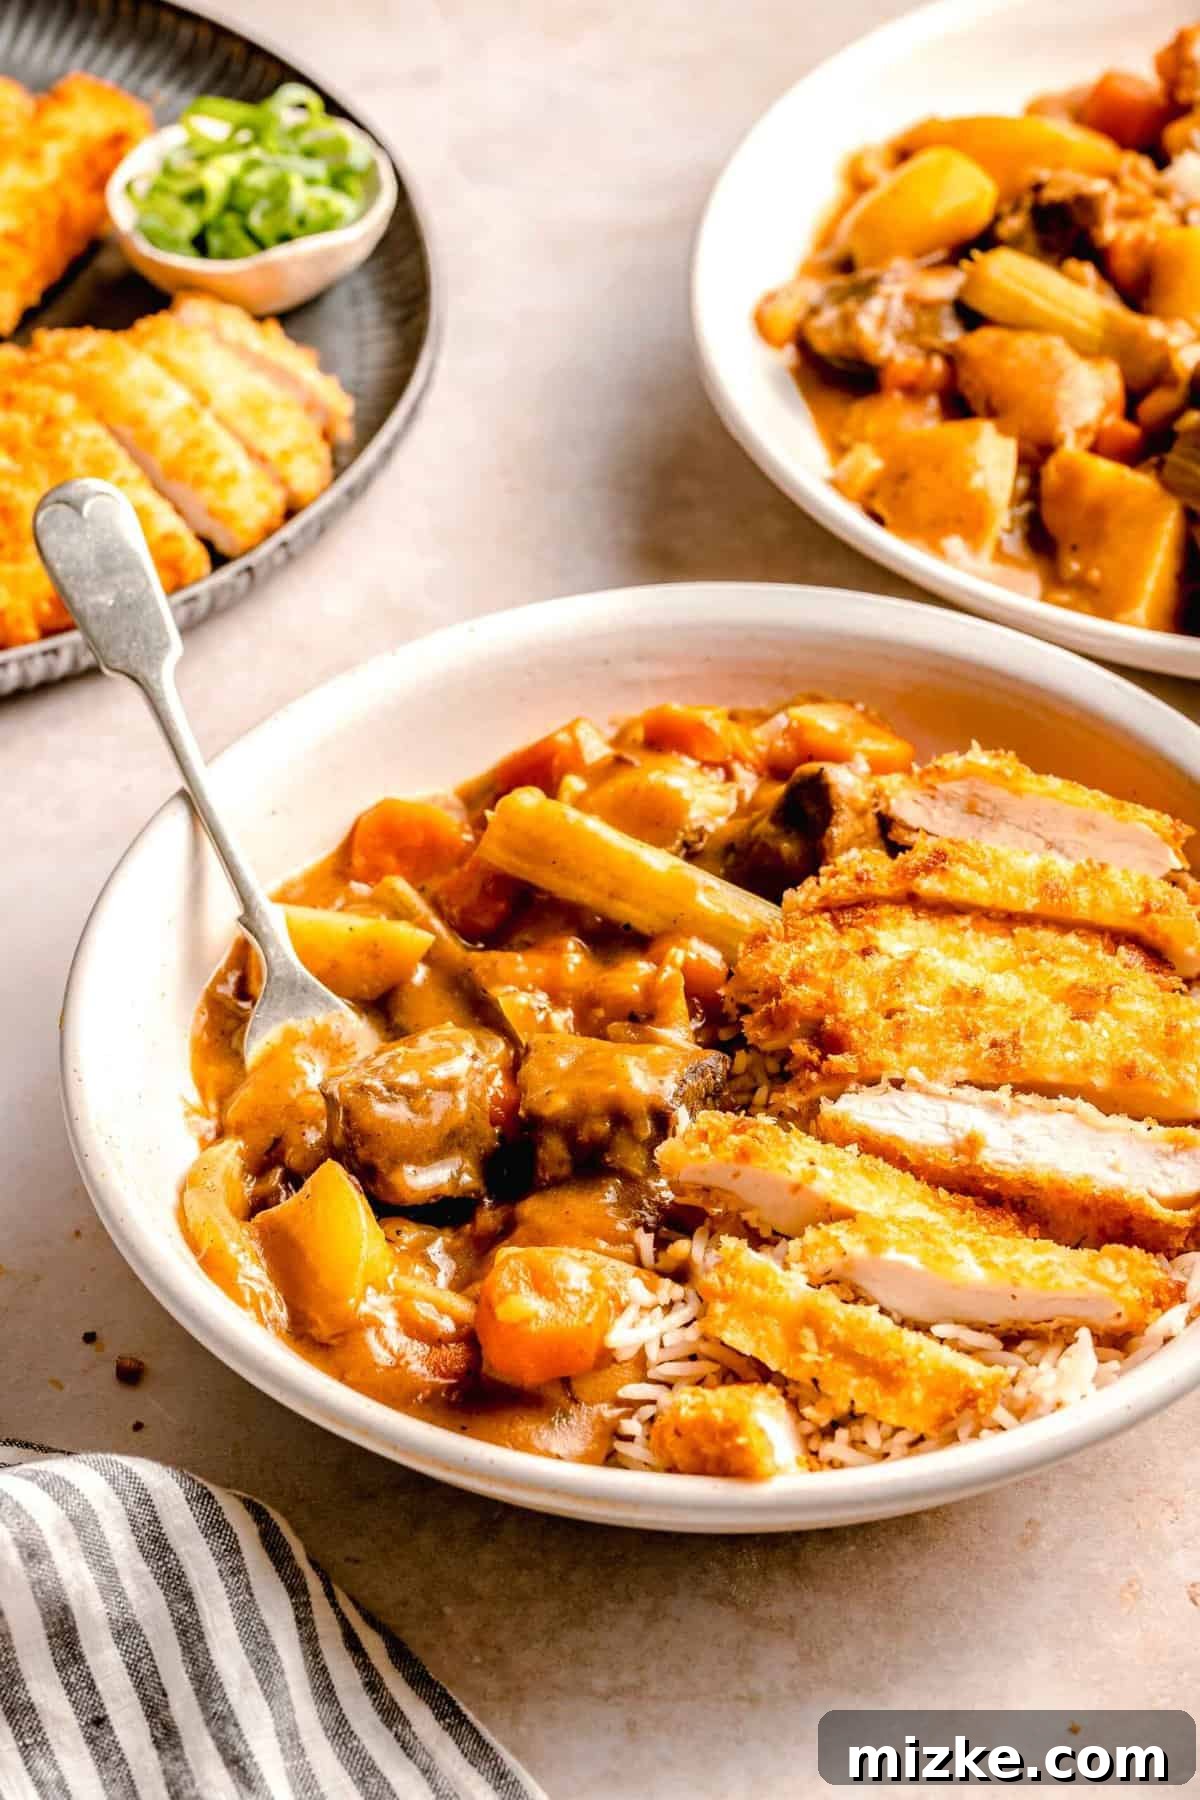
Understanding Katsu Curry: A Japanese Culinary Staple
Katsu curry is a cornerstone of Japanese comfort cuisine, a dish that has captivated palates worldwide with its unique combination of textures and flavors. But what exactly is it?
At its heart, “Katsu” refers to a method of preparing meat, typically chicken or pork. This preparation involves coating the protein in light, airy Japanese Panko breadcrumbs, then frying it to achieve an exquisite golden-brown crispness. The result is a cutlet that is incredibly juicy on the inside and wonderfully crunchy on the outside. Katsu is incredibly popular in Japan and is often enjoyed simply over rice with a tangy katsu sauce (tonkatsu sauce) or even in sandwiches (katsu sando).
To transform a simple katsu into “Katsu Curry,” this delectable fried cutlet is paired with a thick, rich, and aromatic Japanese-style curry. Unlike Indian or Thai curries, Japanese curry has a milder, sweeter profile and a thicker consistency, often achieved with a roux. Our version features tender, stewed chuck beef alongside hearty vegetables such as potatoes, carrots, and onions, all simmered in a savory broth infused with special curry cubes. Served generously over a bed of steaming white rice, the combination of crispy katsu and comforting curry creates a truly satisfying and complete meal that is both hearty and immensely flavorful.
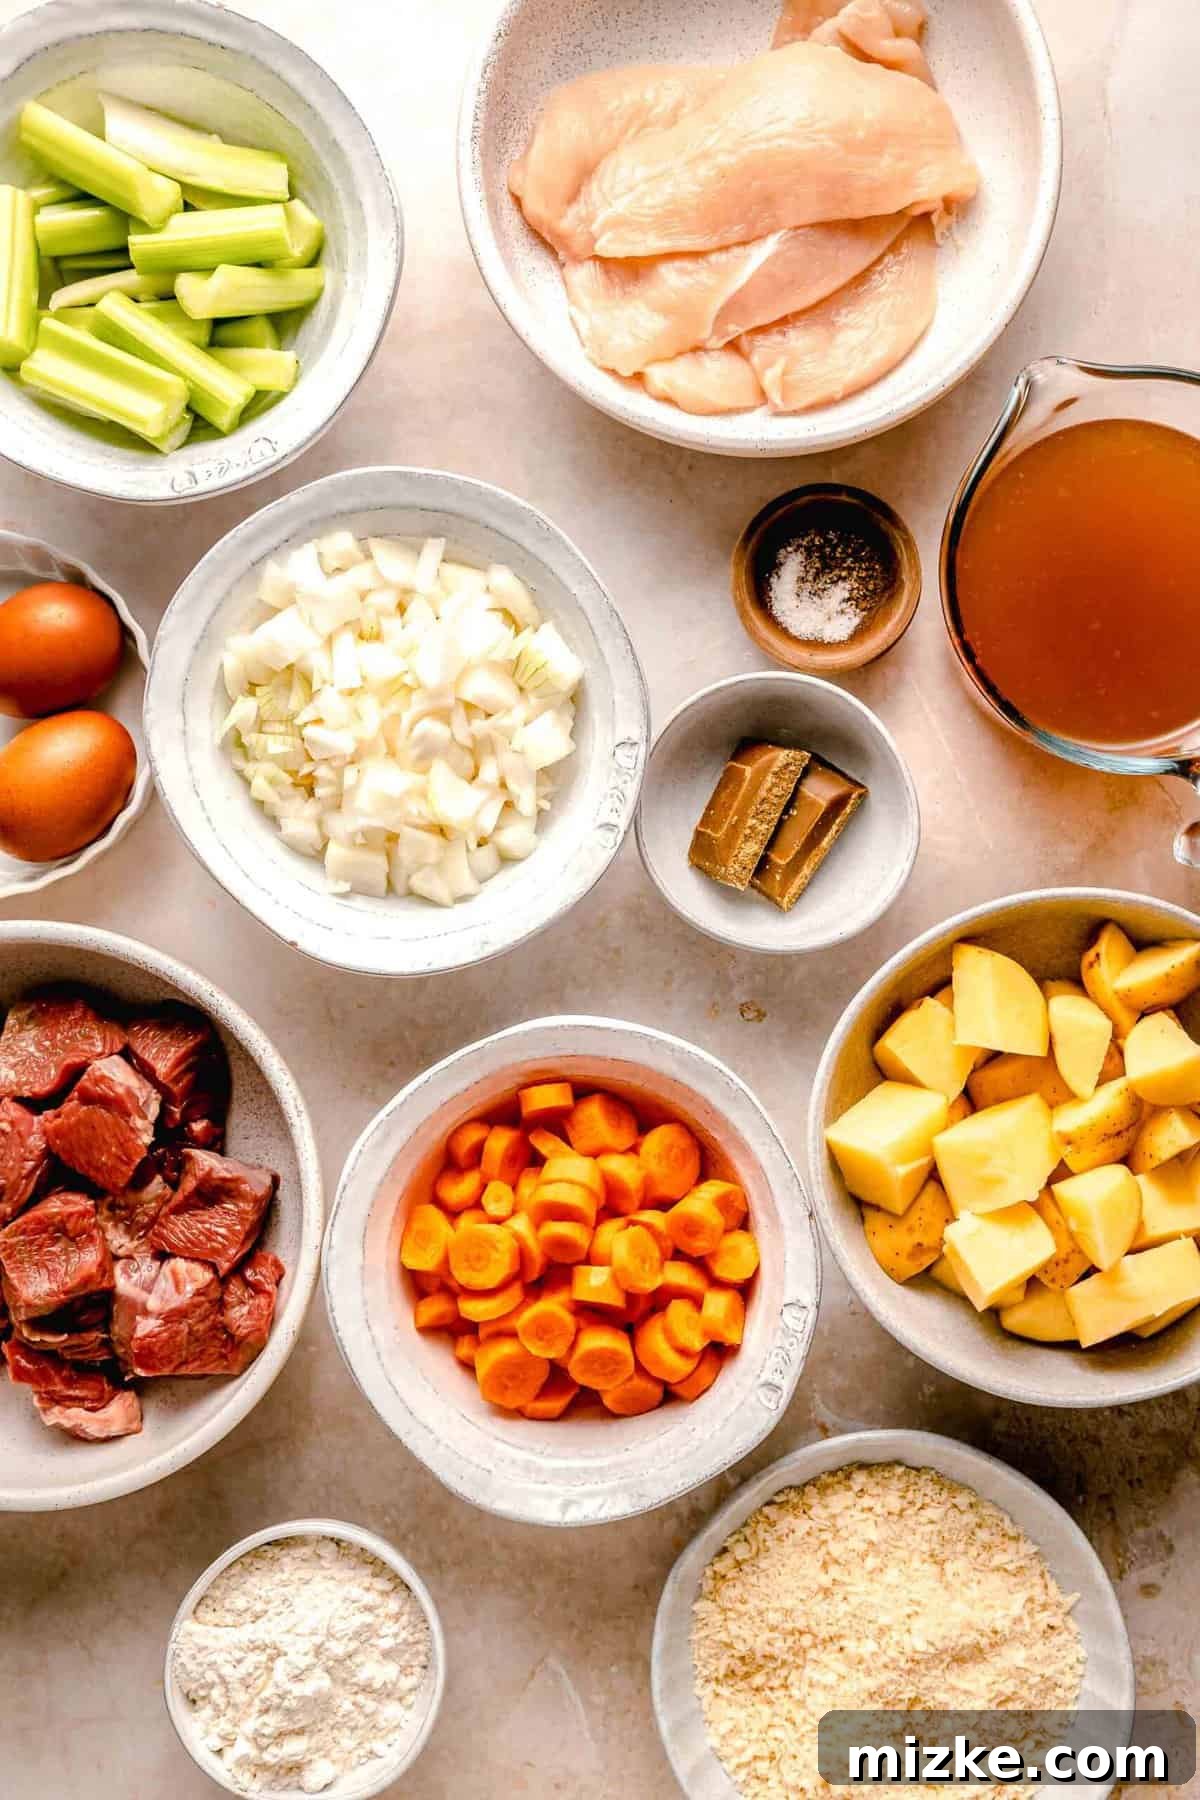
Essential Ingredients for Your Perfect Chicken Katsu Curry
Crafting this incredible chicken katsu curry requires a selection of fresh, high-quality ingredients. Each component plays a vital role in building the layered flavors and textures that make this dish so special. Below is a detailed list of what you’ll need. For precise measurements and quantities, please refer to the comprehensive recipe card located further down the page.
For the Rich & Flavorful Beef Curry:
- Chuck Roast: This is the undeniable star of our curry. While “beef stew meat” might seem like an easy substitute, I strongly advise against it. Chuck roast, with its marbling and connective tissue, breaks down beautifully during slow simmering, resulting in exceptionally tender, melt-in-your-mouth beef that truly elevates the curry. Cut it into 1-inch cubes for optimal tenderness and flavor absorption.
- Hearty Vegetables: My preferred medley for this Japanese curry includes classic yellow onion (diced for sweetness and depth), large carrots (sliced into thick rounds for robust texture), potatoes (quartered into 1-inch pieces, offering comforting starchiness), and celery stalks (cut into 2-inch pieces for a subtle aromatic base). These vegetables absorb the curry flavors wonderfully and add essential nutrients.
- Low-Sodium Beef Stock or Broth: This provides the liquid base for our curry. Japanese curry cubes are typically quite flavorful and can contain a fair amount of salt. Opting for a low-sodium stock allows you to control the overall saltiness of the dish, ensuring it’s perfectly seasoned to your preference without being overly salty.
- Japanese Curry Cubes (Roux): These are the secret weapon for authentic Japanese curry flavor and thickness. Available in most Asian markets or international aisles, they come in various spice levels. I recommend a standard sweet or mild variety for a classic profile, but feel free to choose spicy curry roux cubes if you crave more heat. They dissolve easily, creating a velvety, aromatic sauce.
- Salt and Freshly Ground Black Pepper: Essential for seasoning the beef before browning and adjusting the final taste of your curry. I always recommend using kosher salt for its even salinity and freshly ground black pepper for its superior aroma and flavor.
For the Crispy Golden Chicken Katsu:
- Boneless, Skinless Chicken Breasts: These are ideal for katsu due to their lean nature and ease of pounding into thin cutlets. For added convenience, you can also use boneless, skinless chicken thighs or pre-sliced thin chicken cutlets. Ensure they are pounded to an even thickness for uniform cooking.
- All-Purpose Flour: This forms the initial coating for the chicken, helping the egg wash adhere evenly. For those with gluten sensitivities, a good quality 1:1 gluten-free flour blend, such as King Arthur’s Measure for Measure Flour, works beautifully as a substitute.
- Salt and Pepper: Crucial for seasoning the flour dredge, ensuring the chicken itself is flavorful even before the curry is added.
- Large Eggs: Whisked eggs create the vital binding layer between the flour and the panko breadcrumbs, ensuring a perfectly crispy and adherent crust when fried.
- Panko Breadcrumbs: This is non-negotiable for authentic, super-crispy katsu! Panko (Japanese breadcrumbs) are distinctly lighter, flakier, and coarser than traditional breadcrumbs, resulting in an unparalleled crunch. If gluten is an issue, finely ground almond flour can be used as a gluten-free alternative, though the texture will be denser.
- Neutral Vegetable Oil for Frying: You’ll need enough oil for shallow frying. Choose a neutral-flavored oil with a high smoke point, such as canola, grapeseed, or sunflower oil, to ensure a clean fry without imparting unwanted flavors.
Step-by-Step Guide: Crafting Your Chicken Katsu Curry
While this recipe combines two distinct dishes, don’t let the thought of making both simultaneously intimidate you! The process is surprisingly straightforward when approached methodically. I’ve meticulously broken down the instructions into easy-to-follow sections to guide you. Below is a basic overview; for comprehensive details, please consult the full recipe card.
Preparing the Savory Beef Curry:
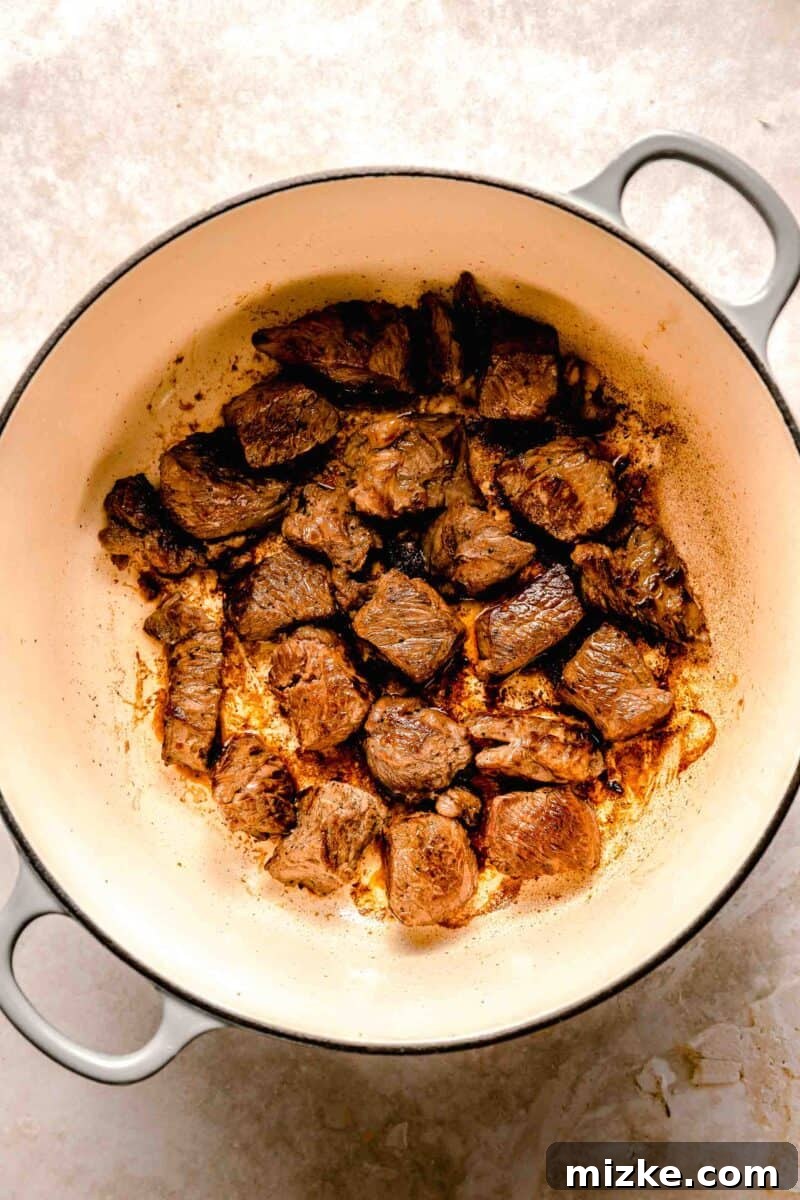
- Brown the Beef to Perfection: Begin by heating a tablespoon of olive oil in a large, heavy-bottomed skillet or Dutch oven over medium-high heat. Add your seasoned chuck roast cubes in a single layer, making sure not to overcrowd the pan. Brown them on all sides until a beautiful crust forms, which locks in flavor. You don’t need to cook them through at this stage. Once browned, transfer the beef to a plate and set it aside.
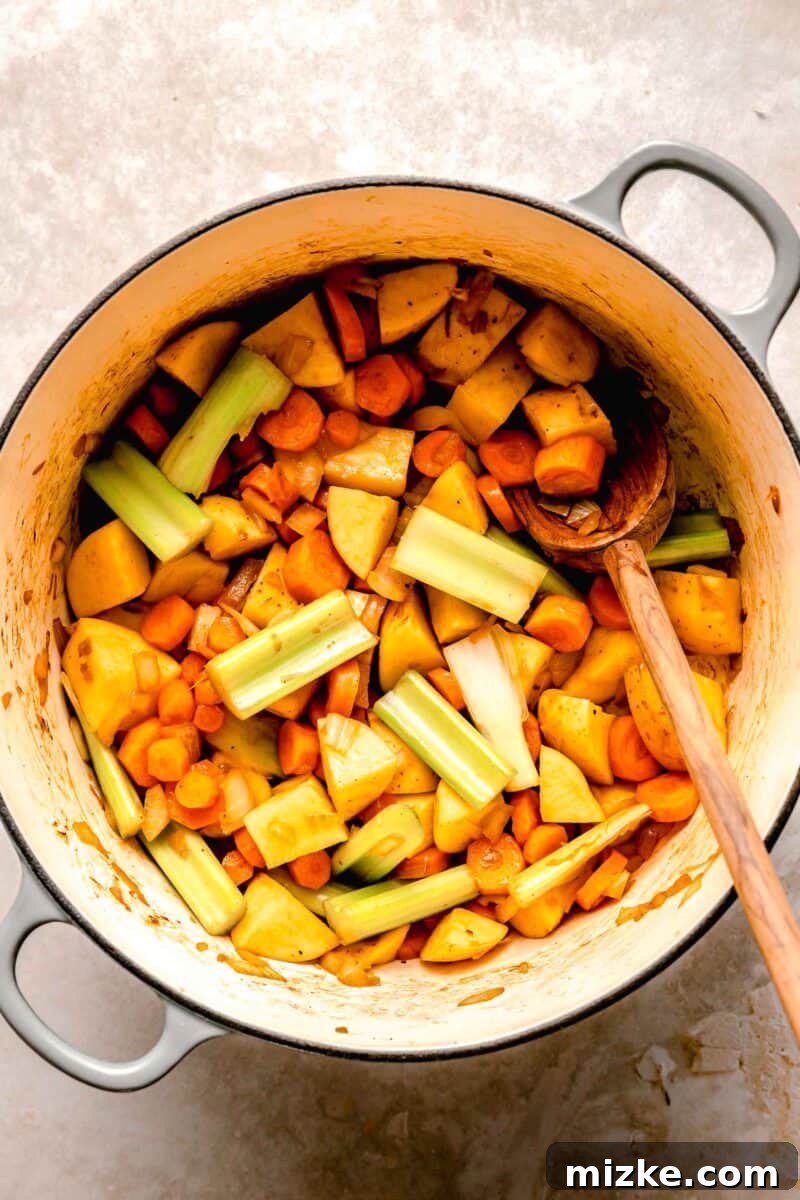
- Sauté the Aromatic Vegetables: In the same skillet, add the diced onion and sauté gently until it becomes translucent and fragrant, typically for 3-5 minutes. Next, introduce the potatoes, carrots, and celery to the pan. Cook these for a few more minutes, stirring occasionally, allowing them to soften slightly and absorb some of the residual flavors from the browned beef.
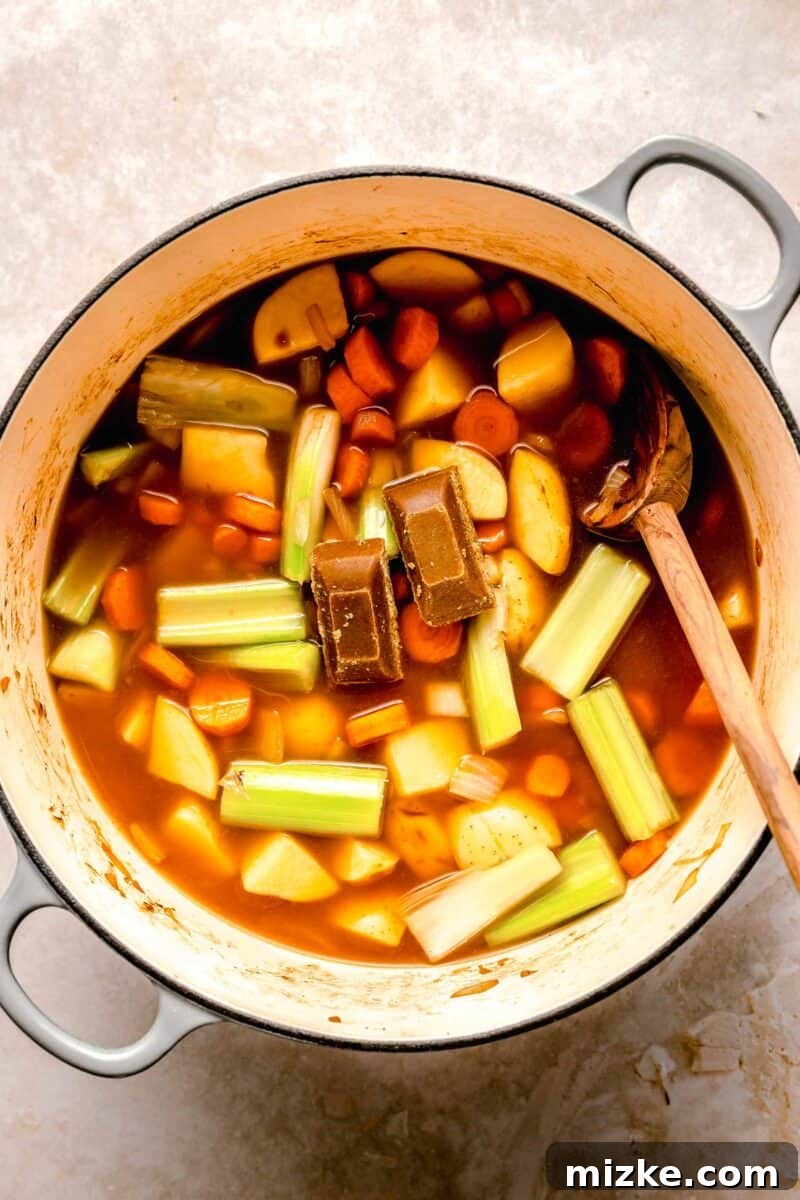
- Simmer to Perfection: Pour in enough low-sodium beef stock or broth to generously cover all the vegetables. Bring this mixture to a gentle boil. Once boiling, reduce the heat to a simmer, then carefully add the Japanese curry cubes. These cubes are designed to dissolve as they cook, naturally thickening the sauce and infusing it with their signature sweet and savory spices. Return the browned chuck roast to the pot. Stir everything thoroughly, cover the pot, and let it simmer for 30-40 minutes. The curry should become wonderfully thick, and the beef and vegetables should be fork-tender. If the curry seems too thick for your liking, you can add a little more beef stock to thin it out to your preferred consistency.
- Final Seasoning: Before serving, taste the curry and adjust the seasoning with additional salt and freshly ground black pepper as needed. Remember, the curry cubes already contribute some salt, so add gradually.
Creating the Crispy Chicken Katsu:
- Pound the Chicken Evenly: For uniformly cooked and tender katsu, place each boneless, skinless chicken breast inside a plastic bag or between two sheets of parchment paper. Using the flat side of a meat tenderizer or a rolling pin, pound the chicken to an even thickness of about ½ inch. If you’re using pre-sliced thin cutlets, this step might not be necessary.
- Set Up Your Breading Station: Prepare three shallow dishes. In the first, combine the all-purpose flour with a generous pinch of salt and black pepper. In the second, whisk the eggs until smooth. In the third dish, spread out the panko breadcrumbs. Arrange these dishes in a logical assembly line: flour, then eggs, then panko.
- Prepare the Frying Pan: Heat about 1 inch of vegetable oil in a heavy-bottomed skillet over medium-high heat. The oil should be hot enough to sizzle when a small piece of breadcrumb is dropped in, but not smoking.
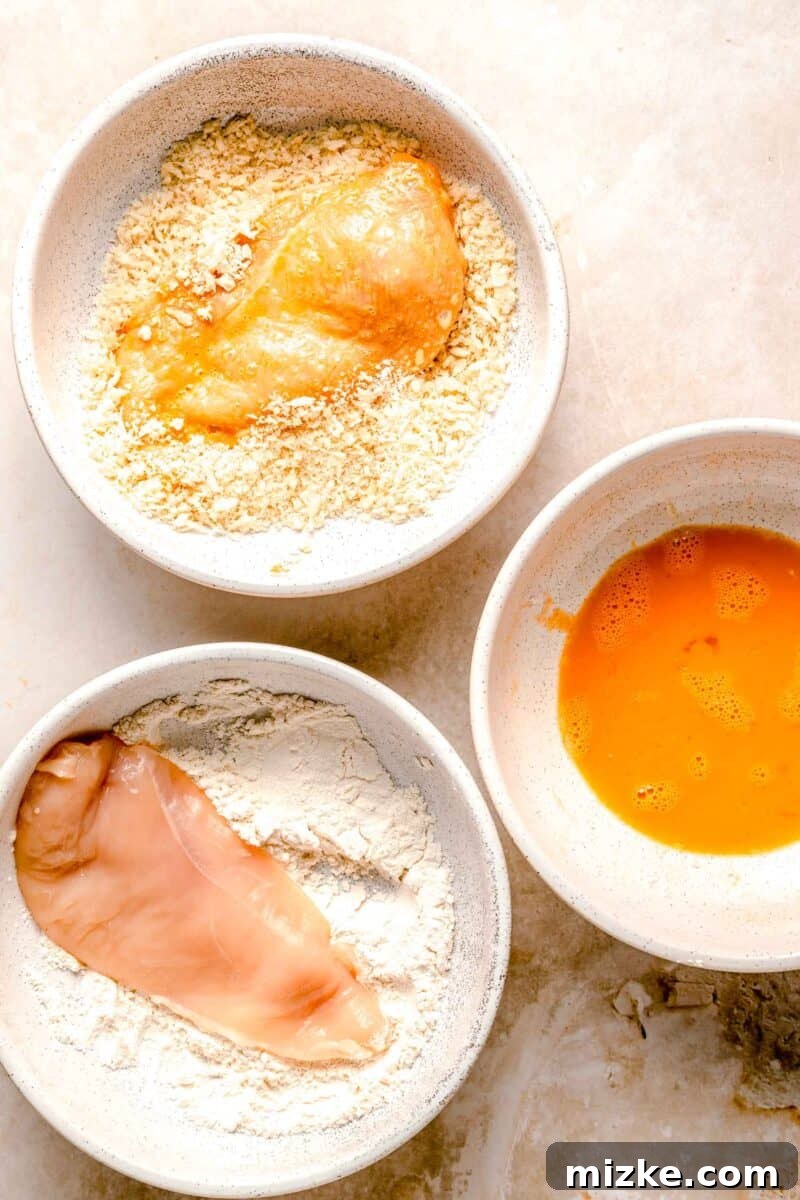
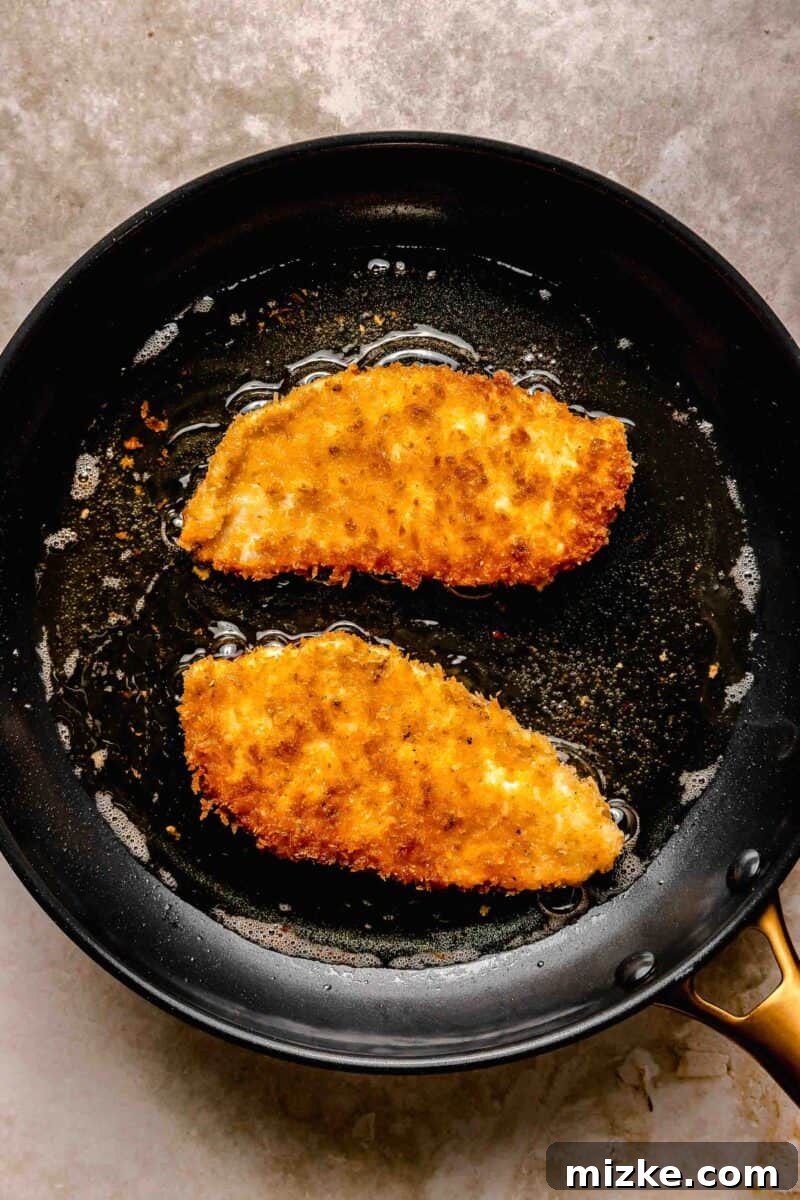
- Bread the Chicken (Two-Hand Technique): Take one pounded chicken cutlet. First, dredge it thoroughly in the seasoned flour, shaking off any excess. Next, dip it into the beaten eggs, ensuring it’s fully coated. Finally, transfer it to the panko breadcrumbs, pressing gently to ensure a thick, even coating. This “dry hand, wet hand” technique prevents your hands from becoming caked with a gummy mess.
- Fry Until Golden & Crispy: Carefully place the breaded chicken cutlet into the hot oil. Fry for 3-4 minutes on each side, or until it achieves a beautiful golden-brown color and is cooked through. Since the chicken is pounded thin, it will cook relatively quickly.
- Repeat for Remaining Katsu: Remove the cooked katsu from the pan and place it on a wire rack set over a baking sheet to drain any excess oil and keep it crisp. Before frying the next piece, use a spatula to remove any stray panko crumbs from the oil, as they can burn and impart a bitter taste. Repeat the breading and frying process for the remaining chicken cutlets.
Assembling Your Masterpiece:
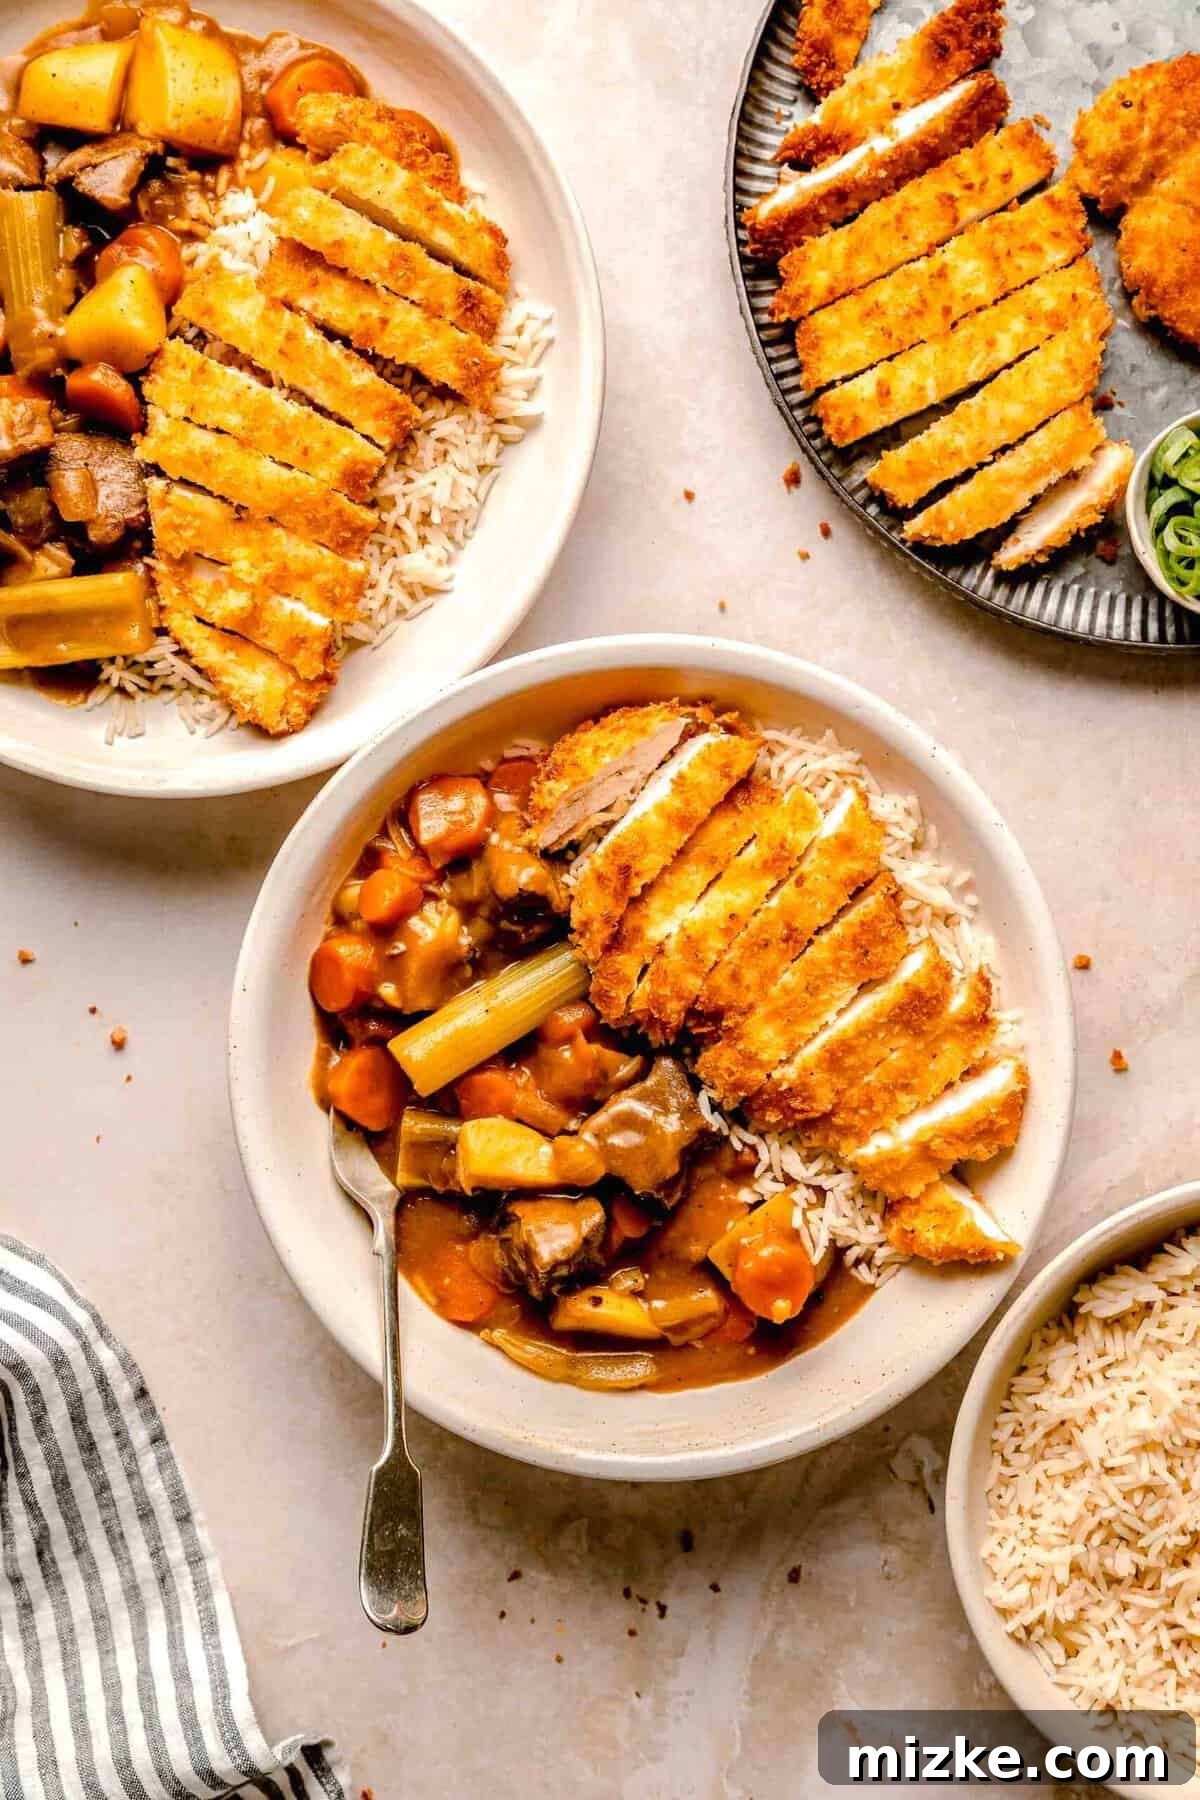
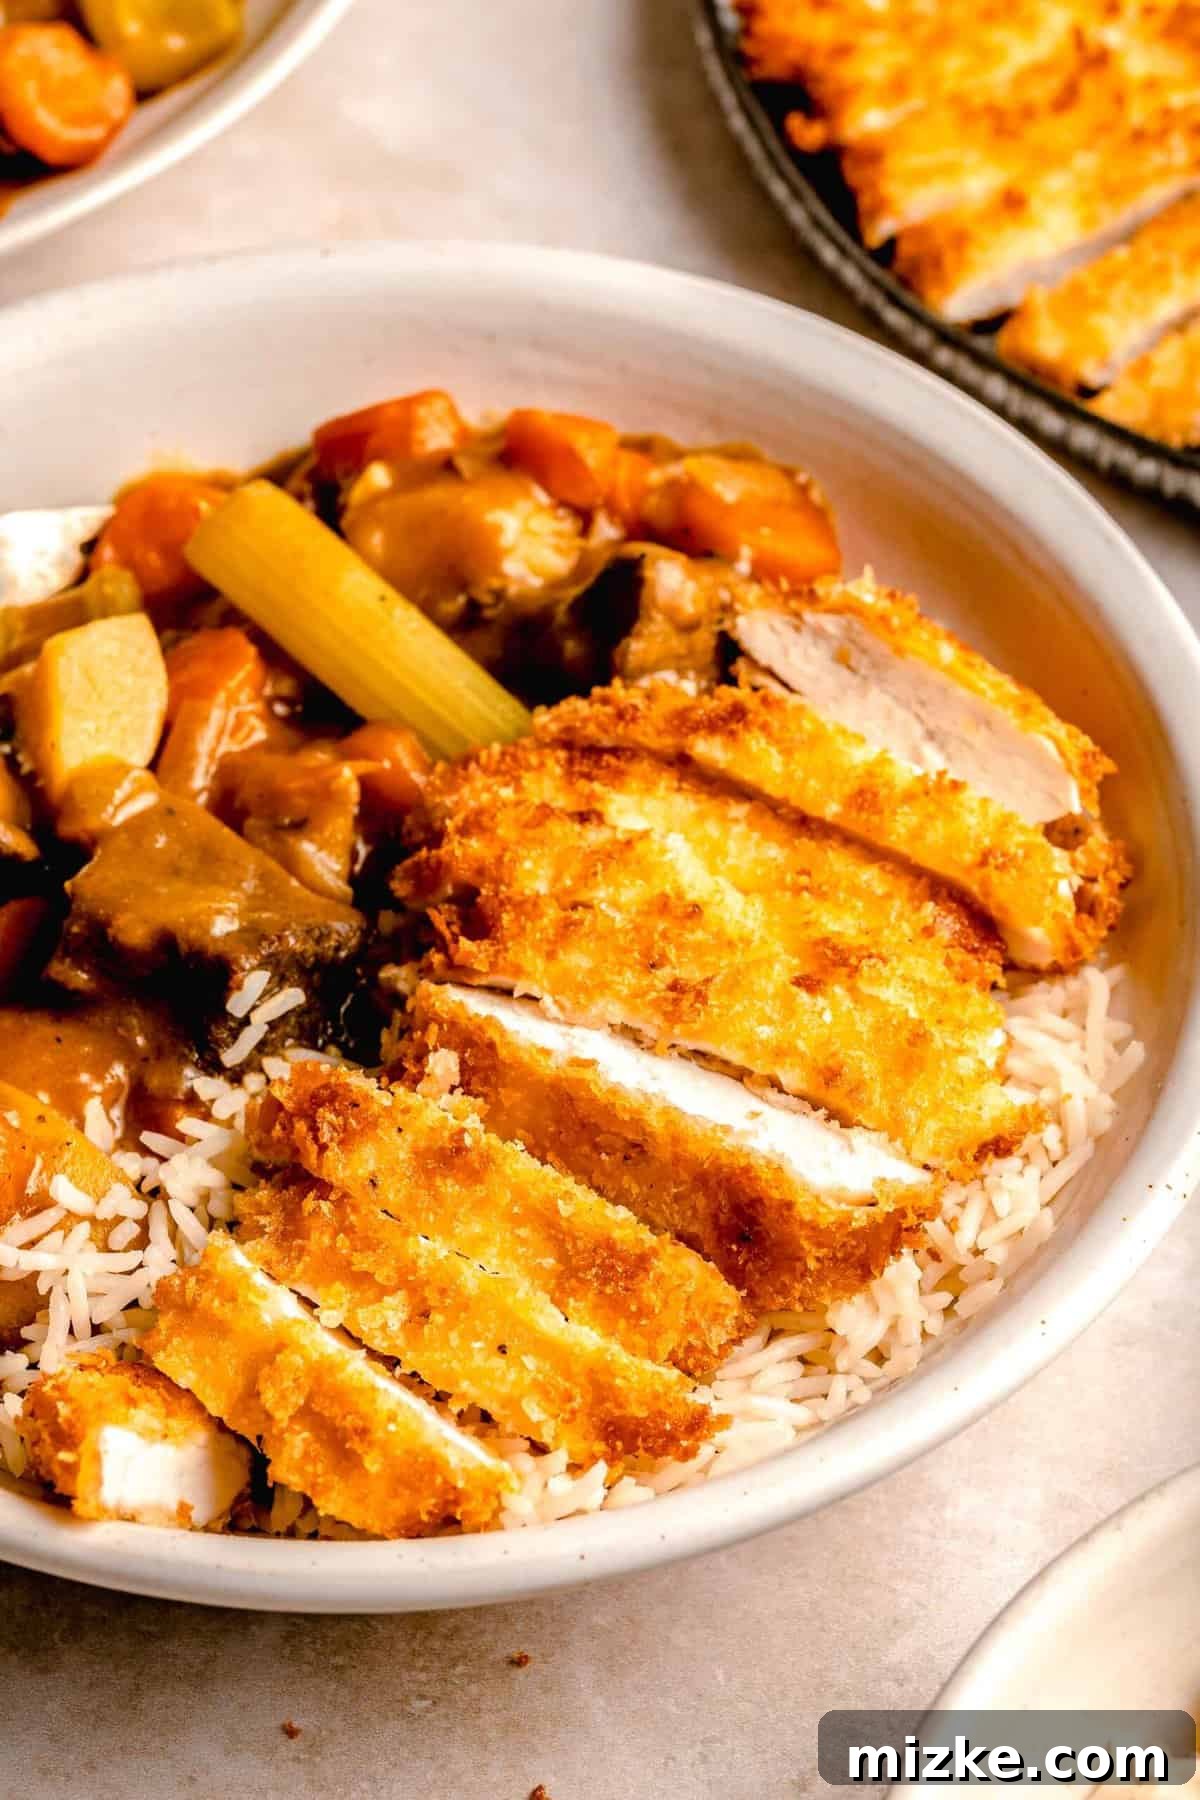
- The Grand Finale: To serve, create a generous bed of freshly cooked white rice on your plate. Ladle a hearty portion of the rich beef curry next to or over the rice. Take your perfectly fried chicken katsu, slice it into thin, manageable strips (as often seen in traditional presentations), and artfully arrange it alongside the curry. Garnish with a sprinkle of finely chopped scallions or a drizzle of katsu sauce if desired. Serve immediately and savor every incredible bite!
Expert Tips for Katsu Curry Perfection
While this recipe is designed to be user-friendly, a few insider tips and tricks can elevate your chicken katsu curry from great to truly extraordinary. Pay attention to these details for consistently perfect results:
- Master the Two-Hand Breading Technique: This is a game-changer for cleanliness and efficiency. Designate one hand as your “dry hand” for handling the flour and panko, and the other as your “wet hand” for dipping in the egg. This prevents sticky clumps from forming on your hands and ensures a smooth, even breading process. Trust me, your clean-up will be much easier!
- Pound Chicken to Uniform Thickness: Consistency is key for even cooking. Aim for approximately ½ inch thick for each chicken cutlet. While a measuring tape isn’t necessary, visual judgment is usually sufficient. Unevenly pounded chicken will result in some parts being overcooked and dry, while others might still be raw.
- Avoid Overcrowding the Pan: Whether you’re browning the beef or frying the chicken katsu, resist the urge to cram too many pieces into the pan at once. Overcrowding significantly drops the oil or pan temperature, leading to steaming instead of browning or frying. This results in less flavor for your beef and soggy, rather than crispy, katsu. If necessary, work in batches to ensure each piece gets adequate space and heat.
- Maintain Optimal Oil Temperature for Frying: The temperature of your frying oil is paramount for crispy katsu. If the oil is too hot, the panko will burn before the chicken cooks through. If it’s too cool, the katsu will absorb too much oil, becoming greasy and soggy. A simple test: drop a tiny pinch of panko into the oil. If it immediately sizzles and floats, the oil is ready. If it sinks without much activity, the oil needs more time to heat up. If it sputters violently, it might be too hot – reduce the heat slightly. If you see smoke, immediately lower the heat and consider adding a little fresh oil.
- Use a Wire Rack for Cooked Katsu: After frying, always transfer your chicken katsu to a wire rack placed over a baking sheet. This allows air to circulate around the entire cutlet, preventing the bottom from becoming soggy as it cools. Paper towels can trap steam, so a wire rack is preferred for maximum crispness.
Creative Substitutions & Delicious Recipe Variations
One of the joys of cooking is the ability to customize dishes to suit your taste and dietary needs. This chicken katsu curry recipe is wonderfully adaptable, allowing for several delightful variations. Don’t hesitate to experiment and make it your own!
- Embrace Pork Katsu: If you’re a devoted pork fan, feel free to substitute boneless pork loin chops or tenderloin for the chicken in the katsu component. The preparation method remains the same, resulting in an equally delicious pork katsu. You can even swap the chuck roast for stewed pork if you prefer an all-pork curry!
- Explore Different or Additional Vegetables: The beauty of curry is its flexibility. While our recipe uses traditional vegetables, don’t shy away from adding or swapping in your favorites. Sliced mushrooms (added with onions), bell peppers (for a touch of sweetness and color), or even swapping regular potatoes for sweet potatoes can introduce interesting new dimensions to your curry. Feel free to incorporate seasonal produce for a fresh twist.
- Gluten-Free Adaptation: For those managing gluten intolerance, a delicious katsu curry is still absolutely achievable. Simply use your preferred 1:1 gluten-free flour blend for the initial dredge instead of conventional all-purpose flour. For the breading, finely ground almond flour or gluten-free panko breadcrumbs (now widely available) can replace traditional panko. While the texture might vary slightly, the flavor will remain wonderfully authentic, ensuring everyone can enjoy this comforting dish.
- Spice Level Adjustment: Control the heat to your preference! If you love a fiery kick, seek out “hot” or “extra hot” Japanese curry roux cubes. Alternatively, you can add a pinch of cayenne pepper or a dash of sriracha to the curry while it simmers for a customizable spice level. For a milder flavor, stick to the sweet or mild curry cubes.
- Vegetarian/Vegan Katsu Curry: While this recipe features meat, it’s possible to adapt it. For a vegetarian version, swap the beef for hearty vegetables like eggplant, mushrooms, and firm tofu in the curry. For the katsu, use thick slices of firm tofu or tempeh, breaded and fried in the same manner as the chicken, ensuring to use a vegan egg wash substitute. Replace beef stock with vegetable stock.
Perfect Pairings: What to Serve with Chicken Katsu Curry
While this chicken katsu curry is undeniably a complete and satisfying meal all on its own, it’s always fun to complement it with a few thoughtfully chosen side dishes. Traditionally, it’s most often served over fluffy steamed white rice, sometimes with a drizzle of Tonkatsu sauce over the katsu. If you’re looking to expand your culinary experience, here are some fantastic accompaniments that beautifully enhance this heartwarming entree:
- Garlic Roasted Green Beans: Simple, vibrant, and packed with flavor, these garlic roasted green beans offer a crisp, fresh contrast to the rich curry. Their bright green color and slight crunch make them a universal crowd-pleaser that pairs wonderfully with almost any main course.
- Chilled Garlic Soy Cucumbers: For a refreshing palate cleanser, try crisp chilled garlic soy cucumbers. Their cool, tangy, and subtly savory profile cuts through the richness of the curry, offering a delightful balance. They are surprisingly easy to make and add an authentic touch to your Japanese meal.
- Easy 15-Minute Miso Soup: A light, savory bowl of miso soup is a classic Japanese accompaniment. Its subtle umami notes and soothing warmth make it an excellent choice to start your meal or enjoy alongside the main dish, adding another layer of traditional flavor without being too heavy.
- Additional Vegetable Sides: Consider serving a simple side of steamed broccoli for a clean, green addition. A Chinese cabbage stir fry can also add a delightful crunch and a different vegetable texture. For an authentic Japanese touch, a small dish of Japanese pickled vegetables (tsukemono) offers a tangy, salty contrast that enhances the entire meal.
- Japanese Potato Salad: Creamy and slightly sweet, Japanese potato salad is another popular side that complements the rich flavors of katsu curry beautifully.
Storing & Reheating Your Delicious Katsu Curry Leftovers
One of the best things about homemade chicken katsu curry is that it often tastes even better the next day! To ensure your leftovers retain their quality and deliciousness, especially the crispness of the katsu, it’s crucial to store and reheat the components correctly. Preventing the crispy katsu from becoming soggy is key, which is why I highly recommend storing the chicken and curry separately.
- Proper Storage: Once cooled to room temperature, transfer the cooked chicken katsu to an airtight container. In a separate airtight container, store the beef and vegetable curry. Keep both containers in the refrigerator for up to 3 days. Storing them apart prevents the moisture and sauciness of the curry from softening the katsu’s crispy breading.
- Reheating for Optimal Results: When you’re ready to enjoy your leftovers, reheat the curry component first. Gently warm the curry in a pot on the stovetop over medium heat, stirring occasionally, until it is thoroughly heated through and simmering. Simultaneously, to revive the katsu’s crispness, place the chicken pieces in a toaster oven or a conventional oven preheated to 375 degrees F (190 degrees C). Bake for 6-7 minutes, or until the katsu is hot and crispy once more. Avoid microwaving the katsu, as this will make it rubbery and soggy. Serve the freshly reheated curry and katsu together over a fresh bed of steamed rice.
Can You Freeze Chicken Katsu Curry? Absolutely!
This recipe is excellent for meal prepping and freezing for future busy weeknights. Both the chicken katsu and the beef curry freeze remarkably well, allowing you to enjoy this comforting meal whenever a craving strikes. Just remember to freeze them separately to maintain quality.
- Freezing Instructions: After the cooked chicken katsu and beef curry have cooled completely, transfer them into separate, freezer-safe airtight containers or heavy-duty freezer bags. Ensure as much air as possible is removed from the bags to prevent freezer burn. They will keep beautifully in the freezer for up to 2 months.
- Reheating from Frozen: When you’re ready to indulge, first transfer both the frozen katsu and curry to the refrigerator and allow them to thaw completely overnight. Once thawed, follow the reheating instructions provided above. This ensures both components heat evenly and the katsu regains its desirable crisp texture.
Frequently Asked Questions (FAQ) About Chicken Katsu Curry
Here are some common questions about making and enjoying homemade Chicken Katsu Curry:
- What kind of rice should I serve with katsu curry?
Japanese curry is traditionally served with short-grain Japanese white rice. Its sticky texture is perfect for soaking up the rich curry sauce. However, you can also use medium-grain white rice or even brown rice for a healthier option.
- Can I make the curry less spicy?
Absolutely! Opt for “mild” or “sweet” Japanese curry roux cubes. Many brands offer a range of spice levels. You can also dilute the curry slightly with a bit more beef stock or water if you find it too potent, or add a spoonful of honey or grated apple for extra sweetness to balance the heat.
- How do I ensure my chicken katsu is extra crispy?
Several factors contribute to ultimate crispness: use genuine Panko breadcrumbs, pound your chicken to an even, thin thickness, maintain the correct oil temperature (not too low, not too high), and place the fried katsu on a wire rack to drain excess oil and prevent steam from making it soggy.
- Can I use a different cut of beef for the curry?
While chuck roast is highly recommended for its tenderness when slow-cooked, you can experiment with other stewing cuts like beef short ribs or brisket. Adjust cooking times accordingly, as tougher cuts may require longer simmering. Avoid very lean cuts as they can become dry.
- Is Japanese curry healthy?
Like many comfort foods, Japanese curry can be enjoyed in moderation as part of a balanced diet. It’s packed with protein and vegetables. To make it healthier, you can use leaner cuts of chicken or pork, increase the vegetable content, use low-sodium stock, and control portion sizes of rice.
Discover More Delicious & Easy Curry Recipes
The world of curry is incredibly diverse and endlessly flavorful, with countless variations across different cultures. While this chicken katsu curry holds a special place as a heartwarming favorite, I encourage you to explore other delightful curry dishes. Here are a few more easy-to-make curry recipes that are bursting with flavor and perfect for any home cook:
- Tofu and Shiitake Coconut Curry Bowls: A wonderfully aromatic and satisfying vegetarian option, blending the richness of coconut milk with earthy shiitake mushrooms and firm tofu. Perfect for a lighter, plant-based curry experience.
- Coconut Curry Ramen: A fusion masterpiece that combines the comforting warmth of ramen with the creamy, spicy notes of coconut curry. This bowl is packed with noodles, tender chicken (or tofu), and vibrant vegetables, making it a hearty and exotic meal.
- Thai Chicken Curry Noodles: Transport your taste buds to Thailand with this vibrant and fragrant dish. Featuring tender chicken, slurpable noodles, and a rich Thai curry sauce, it’s a quick and flavorful meal that’s perfect for a weeknight.
- Chicken Butternut Squash Red Curry: A delightful seasonal curry that marries the sweetness of butternut squash with tender chicken in a robust red curry sauce. It’s a comforting and nutritious dish, ideal for cooler weather.
Rate This Recipe
Print Recipe
Chicken Katsu Curry
Julie Chiou
30
50
1 20
4
Ingredients
For the curry:
- 1 pound (454 g) cubed chuck roast, seasoned with salt and pepper
- 1 onion, diced
- 2 large potatoes, quartered into 1 inch quarters
- 3 large carrots, sliced into thick rounds
- 3 celery stalks, cut into 2 inch long pieces
- 2 ½ – 3 cups (1301 ml) low-sodium beef stock or broth
- 2 curry cubes
- Salt and pepper, to taste
For the chicken katsu:
- 1 pound (454 g) boneless skinless chicken breasts, or thin sliced boneless skinless chicken breasts
- ½ cup (63 g) all purpose flour
- Couple pinches of kosher salt
- Ground black pepper
- 2 eggs
- ⅔ cup (40 g) Panko breadcrumbs
- Vegetable oil
Instructions
For the curry:
-
In a large heavy-bottom pan, such as a dutch oven, heat up 1 tablespoon of olive oil over medium-high heat then brown chuck roast cubes but do not cook all the way through. Remove from heat and put on a plate and set aside.
-
In the same skillet, add the onion and sauté until softened.
-
Add the potatoes, carrots, and celery. Cook for 5-7 minutes then add the beef stock (start with 2 1/2 cups) until it covers the ingredients. Bring to a boil then add the curry cubes. They dissolve themselves so don’t worry about them. Just throw them in. Add the chuck roast back into the pot. Once mixture comes to a boil, stir, then cover and let simmer for 30-40 minutes until mixture is nice and thick. If you see the mixture is too thick, add more liquid/beef stock to thin it out but we kind of like it thicker so it’s all preference.
-
Season with salt and pepper, to taste.
For the chicken katsu:
-
While the curry is cooking, in a plastic bag, pound your chicken breasts to a thin filet, one at a time, with the flat end of a meat tenderizer. If you’re using thin sliced, you may not have to do this step as it’s already thin enough. Make sure to have padding underneath your plastic bag so you don’t break your countertops!
-
In a shallow dish, add in flour, salt, and pepper. Mix around.
-
In another shallow dish, beat 2 eggs.
-
In yet another shallow dish, put your panko in.
-
Assemble the shallow dishes in the following order: flour, eggs, panko.
-
In a skillet, turn the heat on medium high and add a thin layer of vegetable oil to the pan, just enough to coat the bottom of the pan.
-
Take one of your chicken filets, dredge it in flour on both sides, then egg, then cover it in panko and shake off any excess.
-
Test the oil to see if it’s hot by flicking some water in it. If it sizzles, you’re good.
-
With tongs, put your breaded chicken in and cook on each side for about 3-4 minutes or until it’s brown (don’t burn it).
-
It shouldn’t take long for the chicken to cook all the way through since they’ve been pounded out so thin.
-
Before you start on another filet, I would clear out the skillet of straggling panko crumbs. Just take a spatula and scrape them out. They’ll burn if you keep them in there for your other filets and your house will smell like disaster 🙂
To assemble:
-
Put some cooked white rice on a plate then ladle curry over top. Slice the chicken katsu into thin strips (as seen in photos) then place next to the curry.
Notes
- Storing: Seal the katsu chicken in one container and the curry in another. Place both in the refrigerator for up to 3 days.
- Reheating: When ready to reheat, put the curry in a pot on the stovetop over medium heat until warmed through. At the same time, place the katsu in a toaster oven (or an oven heated to 375 degrees F) and bake for 6-7 minutes. Serve the curry and the katsu together over rice.
- Freezing: Seal the katsu and the curry in separate airtight containers and place them in the freezer. They will keep there for up to 2 months. When you are ready to reheat, allow both components to thaw in the refrigerator before following the reheating instructions above.
Nutrition
Serving:
1bowl
,
Calories:
575kcal
,
Carbohydrates:
45g
,
Protein:
55g
,
Fat:
19g
,
Saturated Fat:
7g
,
Polyunsaturated Fat:
2g
,
Monounsaturated Fat:
8g
,
Trans Fat:
1g
,
Cholesterol:
233mg
,
Sodium:
371mg
,
Potassium:
1514mg
,
Fiber:
5g
,
Sugar:
5g
Disclaimers
This website provides approximate nutrition information for convenience and as a courtesy only. Nutrition information can vary for a variety of reasons. For the most precise nutritional data use your preferred nutrition calculator based on the actual ingredients you used in the recipe.
The default measuring system for this website is US Customary. Unit conversions are provided for convenience and as a courtesy only. While we strive to provide accurate unit conversions, please be aware that there may be some discrepancies.
Photography by Eat Love Eats