

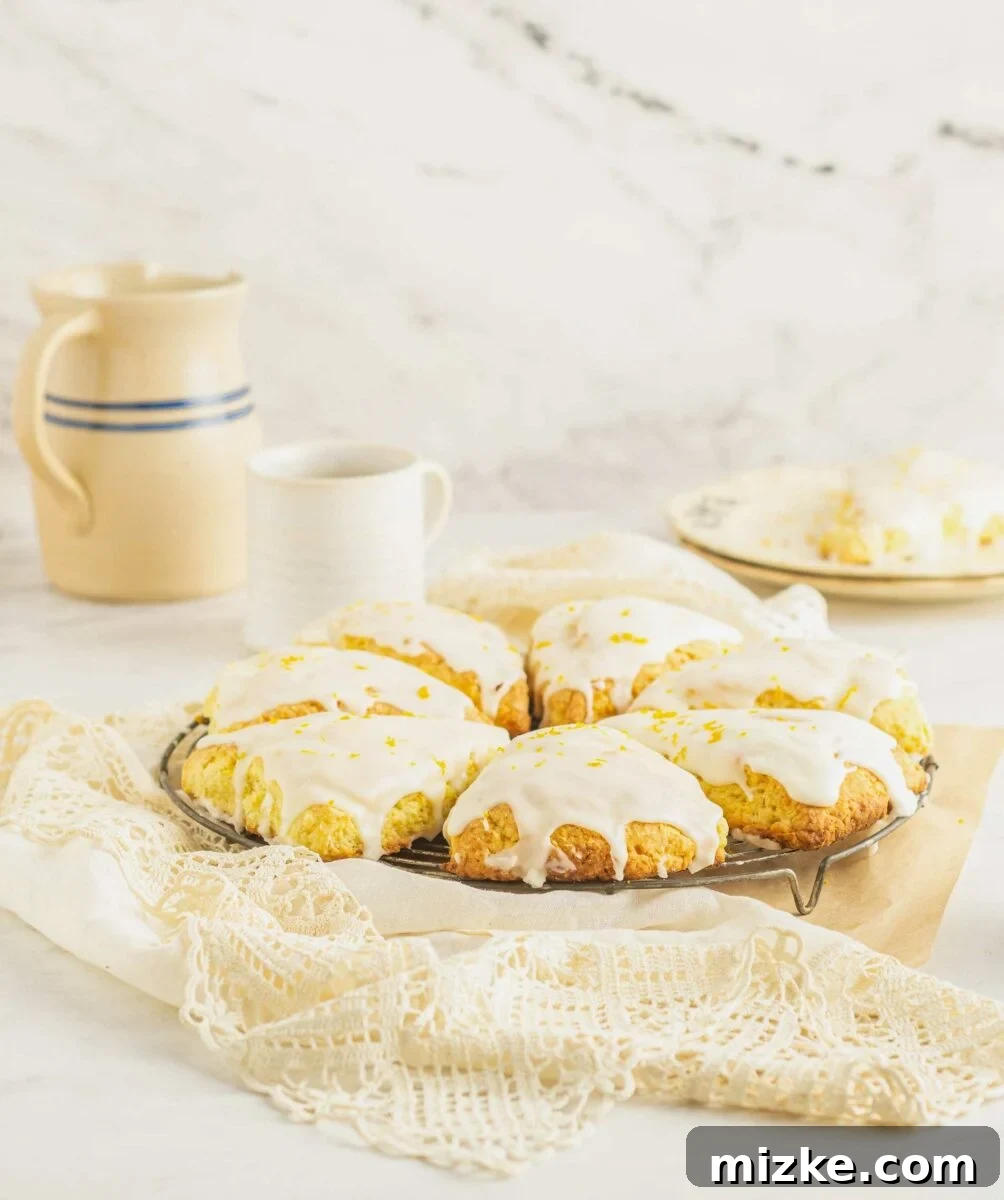
Start your morning off bright and sunny with a batch of homemade Orange Scones! Soft, crumbly scones are flavored with real orange juice, as is the sweet glaze on top. These delightful pastries are truly a taste of sunshine.
Brighten Your Morning: The Ultimate Homemade Orange Scones Recipe
As the days grow longer and the weather warms, there’s nothing quite like the invigorating taste of fresh citrus to awaken your senses. While orange juice might be your go-to morning beverage, imagine infusing that vibrant flavor into a perfectly baked, tender pastry. That’s exactly what you get with these incredible homemade Orange Scones – a no-brainer addition to any springtime or summertime menu, designed to bring a burst of sunshine to your breakfast or brunch table.
Forget everything you thought you knew about scones if your experience has been limited to dry, crumbly store-bought versions. These homemade orange scones are a revelation. They boast a consistency that defines scone perfection: soft to the bite, delicately crumbly, and wonderfully buttery. Every element, from the dough infused with real orange juice and zest to the luscious glaze made with powdered sugar and more fresh orange juice, harmonizes to create a truly irresistible treat. It’s a flavor combination that evokes feelings of happiness and warmth, making them the ideal accompaniment as the seasons transition and new, fresh flavors take center stage.
Baking scones from scratch isn’t just about the superior taste; it’s also a wonderfully rewarding experience. The aroma of citrus and warm butter filling your kitchen is unmatched. Plus, you control the quality of ingredients, ensuring each scone is made with love and the freshest flavors. Get ready to elevate your baking game and impress everyone with these vibrant, delicious orange scones.
Why Homemade Orange Scones Are a Must-Try
There’s a special magic in homemade baked goods, and scones are no exception. While the convenience of store-bought pastries is tempting, the difference in flavor and texture when you bake them yourself is truly astounding. Our Orange Scones stand out for several reasons:
- Unbeatable Freshness: Made with fresh orange juice and zest, these scones deliver an authentic citrus punch that mass-produced versions simply can’t replicate. The vibrant aroma alone is enough to get you excited for the first bite.
- Perfect Texture: We’ve perfected the balance of soft, tender crumb and just the right amount of flakiness. The secret lies in using cold butter and careful mixing, ensuring a light and airy result that practically melts in your mouth.
- Simple & Rewarding: Despite their gourmet appeal, these scones are surprisingly easy to make. The process is straightforward, and the result is incredibly rewarding, making you feel like a master baker.
- Versatile Treat: Perfect for any occasion – a quick breakfast, a leisurely brunch, an elegant afternoon tea, or simply a comforting snack with your favorite hot beverage.
- Customizable: While delicious on their own, these scones serve as a fantastic base for various additions. (More on variations later!)
Essential Ingredients for Your Orange Scones
Creating the perfect orange scone starts with understanding the role of each ingredient. Here’s what you’ll need, along with a few tips to ensure the best results:
For the Scones:
- All-Purpose Flour: The foundation of our scones. Ensure it’s fresh and correctly measured for the best structure.
- White Granulated Sugar: Adds just the right amount of sweetness to balance the tartness of the orange.
- Baking Powder: This crucial leavening agent helps the scones rise beautifully, contributing to their light and airy texture. Don’t skip it or substitute!
- Salt: A pinch of salt enhances all the other flavors, making them pop. Kosher salt is preferred for its pure taste.
- Cold Unsalted Butter, Cubed: This is arguably the most important ingredient for flaky scones. The cold butter creates pockets of steam as it bakes, resulting in those desirable layers. Using unsalted butter gives you control over the overall saltiness.
- Whole Milk: The fat content in whole milk adds richness and helps create a tender crumb.
- Pulp-Free Orange Juice: Infuses the dough with natural orange flavor. Using pulp-free ensures a smooth scone consistency.
- Egg: Acts as a binder and contributes to the scone’s rich texture and golden color.
- Fresh Orange Zest: The true flavor enhancer! Zest contains the essential oils of the orange, providing an intense, aromatic burst of citrus that pure juice alone cannot deliver. Don’t use dried zest; fresh is key!
For the Glaze:
- Powdered Sugar (Confectioners’ Sugar): Essential for a smooth, pourable glaze. Do not substitute with granulated sugar, as it won’t dissolve properly.
- Orange Juice: Mixes with the powdered sugar to create a vibrant, citrus-flavored glaze that complements the scones perfectly. Adjust the amount to achieve your desired consistency.

Step-by-Step Guide: How to Make Orange Scones
Making these delicious orange scones is a straightforward process, but paying attention to a few key steps will ensure perfection every time. For detailed measurements and a complete recipe card, please refer to the section below.
- Prepare Your Workspace: Begin by preheating your oven to 400°F (204°C) and lightly spraying a baking sheet or lining it with parchment paper. This preparation ensures your scones bake evenly and don’t stick.
- Combine Dry Ingredients: In a large mixing bowl, whisk together the all-purpose flour, granulated sugar, baking powder, and Kosher salt. This step ensures that the leavening agents and flavorings are evenly distributed throughout the dough.
- Incorporate the Butter: Add the cold, cubed unsalted butter to the dry ingredients. Using a pastry cutter or your fingertips, cut the butter into the flour mixture until it resembles coarse crumbs with some pea-sized pieces of butter remaining. This is crucial for achieving a flaky texture.
- Add Orange Zest and Wet Ingredients: Stir in the fresh orange zest, then add the milk, orange juice, and egg. Gently mix until the dough just comes together. Be careful not to overmix, as this can lead to tough scones. The dough will be shaggy but should hold together.
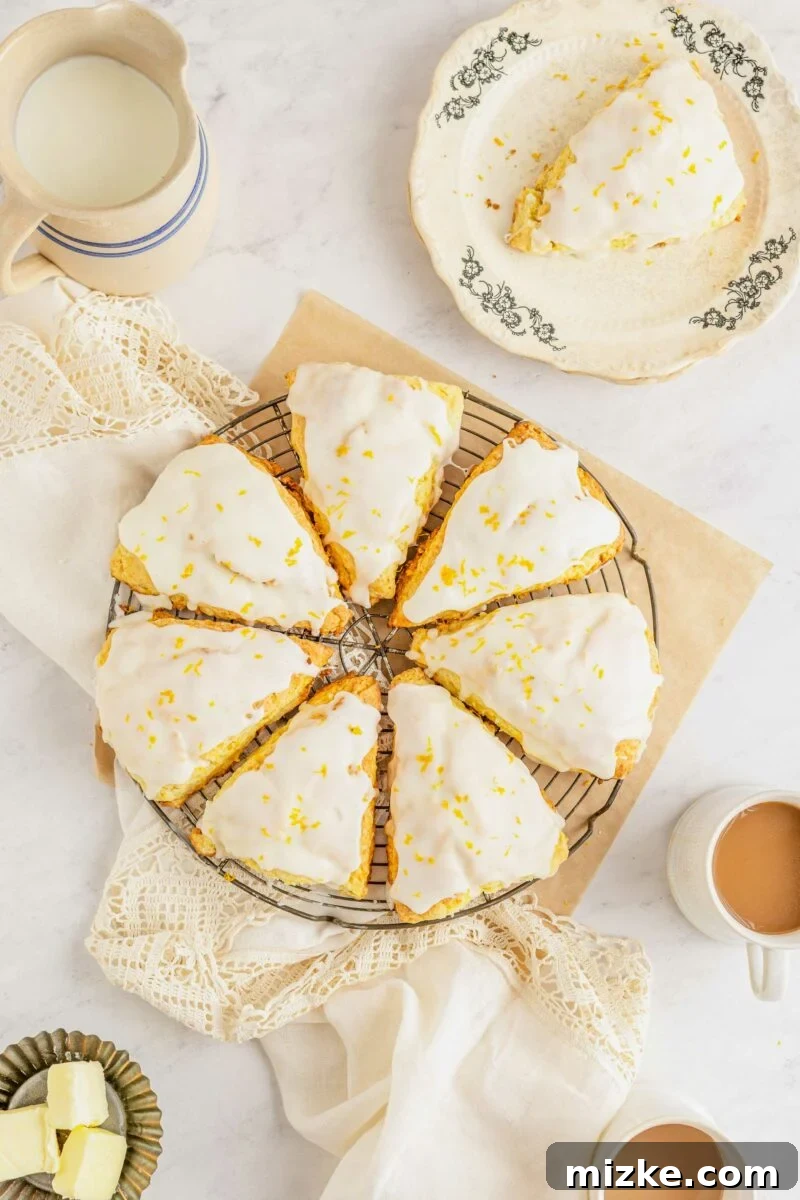
- Form the Scones: Transfer the dough to a lightly floured surface. Briefly knead it just a few times (no more than 5-6 times) to bring it together, then flatten it into a large circle, about 1 inch thick. Using a sharp knife or a round cutter, cut the dough into 8 equal triangles (or circles).
- Bake to Perfection: Carefully place the scones onto your prepared baking sheet. Bake for 18-20 minutes, or until the tops are beautifully golden brown and the scones are cooked through. Remove from the oven and transfer to a wire rack to cool slightly.
- Prepare the Orange Glaze: While the scones cool, combine the powdered sugar with 3 tablespoons of orange juice in a small bowl. Whisk vigorously until smooth. If the glaze is too thick, add the remaining tablespoon of orange juice, a few drops at a time, until you reach a pourable consistency. A whisk works best for this.
- Glaze and Enjoy: Once the scones have cooled sufficiently (they can still be warm, but not hot), spoon the fresh orange glaze generously over each one. Let the glaze set for a few minutes before serving.

Tips for Scone Perfection
Achieving light, flaky, and delicious scones consistently involves a few simple tricks:
- Keep Ingredients Cold: This cannot be stressed enough, especially for the butter! Cold butter creates pockets of steam during baking, which is essential for that signature flaky texture. If your kitchen is warm, you can even chill your flour and mixing bowl briefly.
- Don’t Overwork the Dough: Overmixing develops gluten, leading to tough, dense scones. Mix just until the ingredients are combined and the dough barely comes together. A few quick kneads on a floured surface are all it needs.
- Use a Pastry Cutter (or your fingertips): A pastry cutter helps incorporate the butter without overworking it or warming it up with your hands. If using your hands, work quickly.
- Handle Gently: Once the dough is formed, handle it as little as possible. The less you touch it, the more tender your scones will be.
- Cut, Don’t Twist: When cutting the dough into triangles or circles, press straight down with your knife or cutter. Twisting the cutter can seal the edges of the scone, preventing it from rising properly.
- High Heat Baking: Scones benefit from a hot oven. The initial burst of high heat helps the baking powder activate quickly and the butter melt rapidly, creating steam and a good rise.
- Adjust Glaze Consistency: If your glaze is too thick, add more orange juice a teaspoon at a time. If it’s too thin, sift in a little more powdered sugar. It should be thick enough to cling to the scones but still pourable.
- Fresh Zest is Key: Always use fresh orange zest for maximum flavor and aroma. The oils in the zest are potent and provide a depth of flavor that dried zest cannot match.
Variations to Explore
While these orange scones are divine as is, don’t hesitate to get creative with additions:
- Berry Bliss: Fold in ½ cup of fresh or frozen cranberries, blueberries, or raspberries into the dough for a fruity twist.
- Chocolate Citrus: Add ½ cup of white chocolate chips or finely chopped dark chocolate for a decadent combination.
- Spiced Scones: A pinch of ground cardamom, ginger, or even a tiny bit of cinnamon can add warmth and complexity.
- Lemon Love: Substitute orange juice and zest with lemon for a tangy lemon scone version.
- Cream Cheese Glaze: For an even richer topping, consider a simple cream cheese glaze instead of the powdered sugar and orange juice.

Frequently Asked Questions About Orange Scones
Here are answers to some common questions you might have when making these delicious orange scones:
How do I know when the scones are fully cooked?
You’ll know the scones are ready to be removed from the oven when their tops have turned a beautiful golden brown. They should feel firm to the touch, and a toothpick inserted into the center of a scone should come out clean. The internal temperature should be around 200-210°F (93-99°C) if you’re using a thermometer.
How long will orange scones stay fresh?
In an airtight container at room temperature, these orange scones will stay fresh and delicious for about 2 days. For a slightly longer shelf life, you can keep them in the fridge, where they’ll last for up to a week. For best results, warm them slightly before serving.
Can I freeze orange scones?
Yes, absolutely! You can freeze baked scones (with or without glaze) for up to 2-3 months. Wrap them tightly in plastic wrap and then place them in a freezer-safe bag or container. Thaw at room temperature and reheat briefly in the oven or microwave. You can also freeze unbaked scone dough. Cut the triangles, place them on a baking sheet, and freeze until solid. Then transfer to a freezer bag. Bake directly from frozen, adding a few extra minutes to the baking time.
Why are my scones tough?
Tough scones are usually a sign of overworking the dough. Too much kneading or mixing develops the gluten in the flour, resulting in a dense, chewy texture rather than a light, flaky one. Remember to mix just until the ingredients are combined and handle the dough as little as possible.
Can I use store-bought orange juice?
Yes, a good quality pulp-free store-bought orange juice works perfectly fine for both the scones and the glaze. However, if you have fresh oranges on hand, freshly squeezed orange juice will offer an even brighter and more intense flavor.
As the weather heats up, enjoy more of my favorite spring and summer treats!
- Peach Fritters
- Stunning Lemon Tart
- Triple Berry Cheesecake Bars
- Banana Pudding Poke Cake

Orange Scones
By: Julie Chiou
Start your morning off bright and sunny with a batch of homemade Orange Scones! Soft, crumbly scones are flavored with real orange juice, as is the sweet glaze on top.
15 minutes
20 minutes
35 minutes
8 scones
Equipment
- Pastry cutter
- Large rimmed baking sheet
Ingredients
For the scones:
- 3 cups (375 g) all-purpose flour
- ¼ cup (50 g) granulated sugar
- 1 tablespoon baking powder
- 1 teaspoon Kosher salt
- 20 tablespoons (280 g) cold unsalted butter, cubed
- Zest from 2 oranges
- ½ cup (122 g) whole milk
- ½ cup (124 g) pulp-free orange juice
- 1 large egg
For the glaze:
- 2 cups (240 g) powdered sugar
- 3-4 tablespoons pulp-free orange juice
Instructions
- Preheat the oven to 400°F (204°C). Lightly spray a baking sheet or line with parchment paper and set aside.
- In a large mixing bowl, combine the flour, sugar, baking powder, and Kosher salt. Whisk well to ensure all dry ingredients are evenly distributed.
- Using a pastry cutter, cut the cold, cubed butter into the dry mixture until it resembles coarse crumbs with some pea-sized pieces of butter remaining. Stir in the fresh orange zest.
- In a separate small bowl, whisk together the milk, orange juice, and egg. Pour the wet ingredients into the dry ingredients and mix gently until the dough just comes together. Be careful not to overmix.
- Turn the dough out onto a lightly floured surface. Gently form it into a ball and then flatten it into a large circle, about 1 inch thick. Cut the circle into 8 equal triangles using a sharp knife.
- Place the scone triangles onto the prepared baking sheet. Bake for 18-20 minutes, or until the tops are golden brown and cooked through. Remove from the oven and transfer to a wire cooling rack. Let cool for at least 15-20 minutes before glazing.
- In the meantime, prepare the glaze. In a small bowl, combine the powdered sugar and 3 tablespoons of orange juice. Whisk vigorously until smooth. If the glaze is too thick for drizzling, add the remaining tablespoon of orange juice, a few drops at a time, until you reach your desired consistency.
- Spoon the orange glaze onto each of the cooled scones. Allow the glaze to set for a few minutes before serving. Enjoy your homemade orange scones!
Notes
Scones may be stored in an airtight container or bag for up to 2 days at room temperature, or up to 1 week in the refrigerator. For best enjoyment, reheat briefly before serving.
This website provides approximate nutrition information for convenience and as a courtesy only. Nutrition information can vary for a variety of reasons. For the most precise nutritional data use your preferred nutrition calculator based on the actual ingredients you used in the recipe. The default measuring system for this website is US Customary. Unit conversions are provided for convenience and as a courtesy only. While we strive to provide accurate unit conversions, please be aware that there may be some discrepancies.
Nutrition
Serving: 1 scone
Calories: 590 kcal
Carbohydrates: 75 g
Protein: 6 g
Fat: 30 g
Saturated Fat: 19 g
Polyunsaturated Fat: 1 g
Monounsaturated Fat: 8 g
Trans Fat: 1 g
Cholesterol: 98 mg
Sodium: 469 mg
Potassium: 134 mg
Fiber: 1 g
Sugar: 38 g
Conclusion
There you have it – a comprehensive guide to baking the most delightful homemade orange scones. With their tender crumb, bursts of fresh citrus flavor, and sweet, tangy glaze, these scones are more than just a treat; they’re an experience. Perfect for a cozy morning, a vibrant brunch, or a sophisticated afternoon tea, they promise to bring a little bit of sunshine into your day. Don’t be intimidated by baking from scratch; with our detailed instructions and helpful tips, you’ll be enjoying these golden beauties in no time. So, gather your ingredients, fire up your oven, and prepare to fall in love with the simple joy of homemade orange scones!