
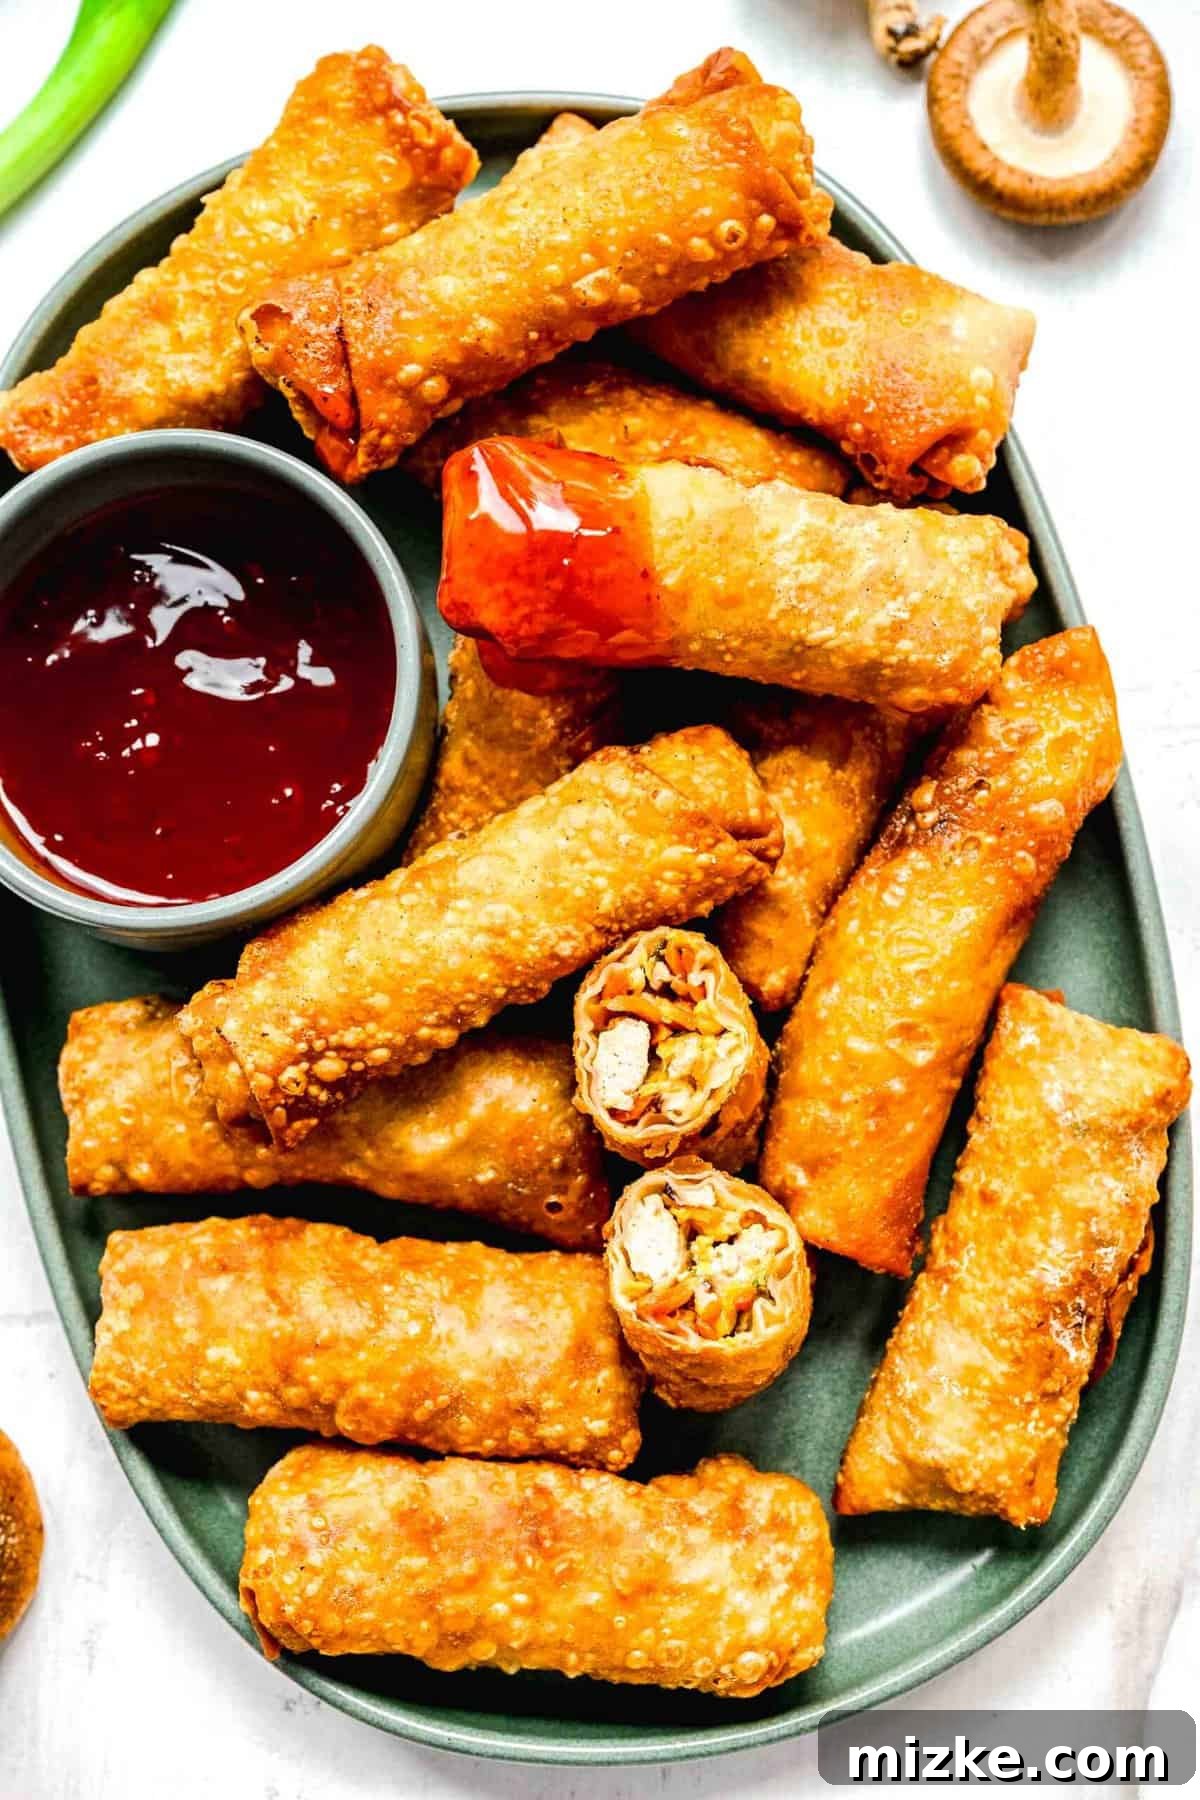
Prepare to fall head over heels for these irresistibly crispy, golden pockets of culinary delight. Featuring a delightfully savory filling of seasoned ground chicken and vibrant vegetables, all enveloped in a delicate wrapper and fried to a perfect crunch, this **easy spring roll recipe** will quickly become your new favorite. Forget waiting for takeout; these homemade beauties are ready in a flash!
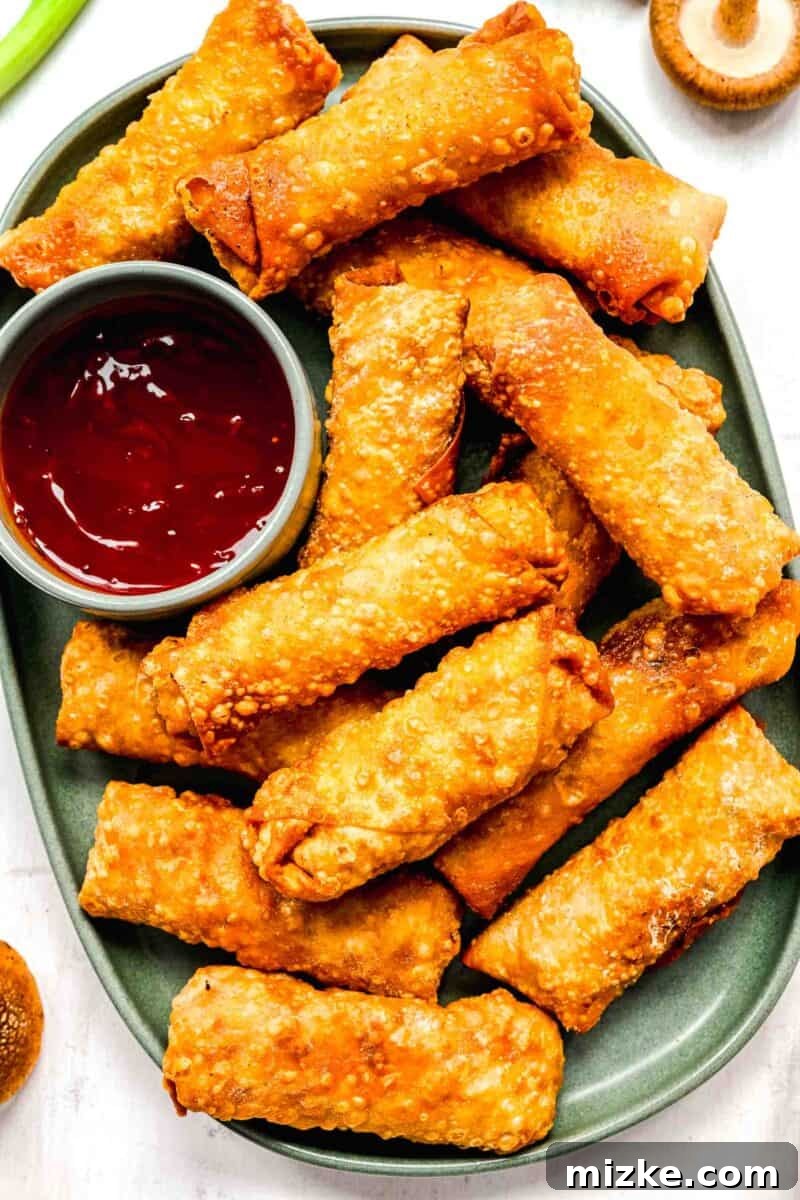
Crispy Golden Spring Rolls: Your Ultimate Homemade Takeout Favorite
That satisfying “crunch!” It’s the sound you crave when you bite into a perfect spring roll, especially after dipping it in a luscious sweet and sour sauce. Imagine achieving that exact same, incredible experience right in your own kitchen! These fantastic little roll-ups deliver on that promise, and more. In just about 40 minutes, you can create a batch of spring rolls that not only surpass your favorite takeout in freshness and flavor but also allow you to control every ingredient, avoiding unhealthy additives and saving a few dollars in the process.
Our recipe begins with perfectly browned ground chicken, sautéed with aromatic garlic, thinly shredded napa cabbage, sweet carrots, earthy shiitake mushrooms, and fresh green onions. This vibrant medley then soaks in a savory, subtly sweet sauce made from soy sauce, rich oyster sauce, and a touch of sugar, creating an explosion of umami in every bite. Once cooled, this flavorful mixture is carefully enclosed in a thin, crisp wheat wrapper and deep-fried until it reaches a magnificent, golden-brown perfection. Are you ready for that crunch? Because it’s coming!
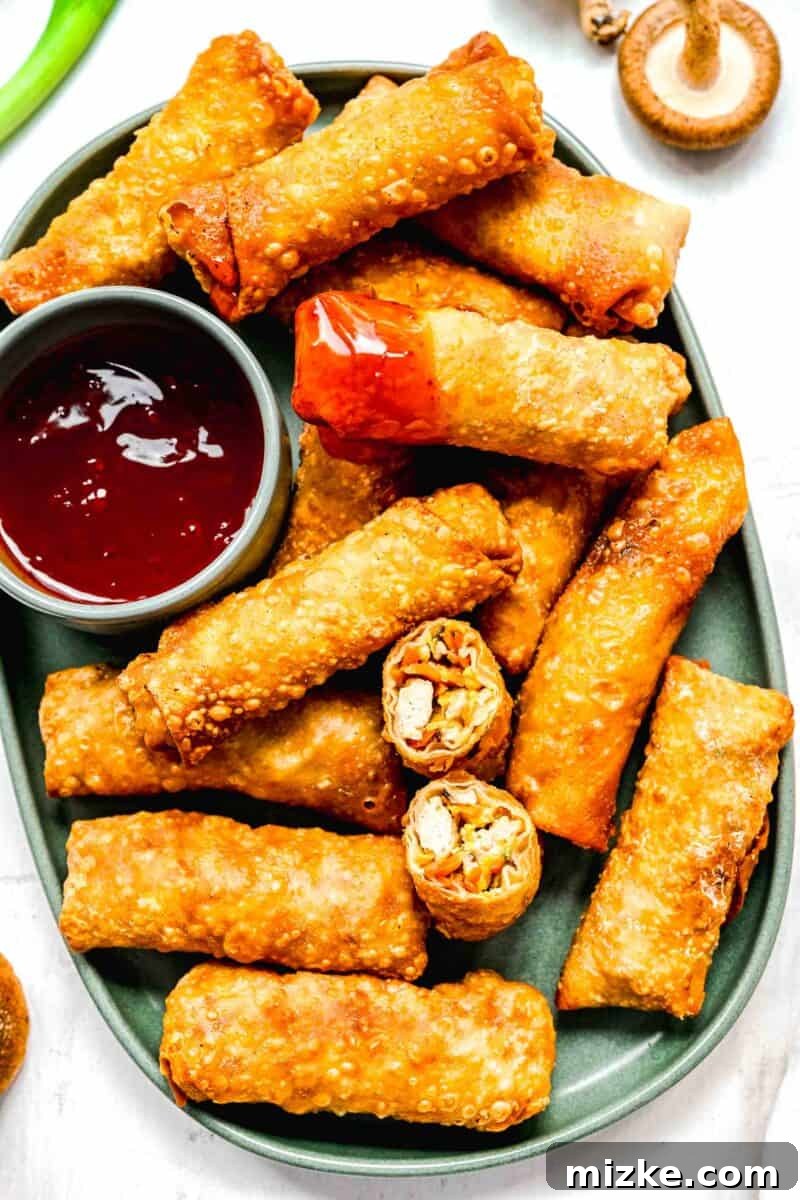
Why You’ll Adore These Easy Homemade Spring Rolls
This crispy golden spring roll recipe masterfully recreates a beloved takeout classic, elevating it with the freshness and satisfaction of homemade cooking. Here are just a few reasons why these will quickly become a staple in your culinary repertoire:
- Unbeatable Crunch: The defining characteristic of a truly great spring roll is its texture. Our recipe guarantees that coveted, perfectly crunchy first bite, far exceeding the quality you often find in takeout. There’s something extra special about that crispness when you know you made it yourself.
- Quick & Simple Preparation: Don’t be intimidated by the idea of making spring rolls from scratch! This recipe is surprisingly straightforward and perfect for cooks of all skill levels. The process involves three main steps: preparing the delicious filling, expertly wrapping and sealing your rolls, and finally, a quick fry to golden perfection. You’ll be amazed at how easily these come together!
- Incredible Versatility: One of the best aspects of this recipe is its adaptability. It’s incredibly forgiving and can be customized to suit a wide range of dietary needs and personal taste preferences. Feel free to swap the ground chicken for other proteins like ground pork, finely chopped shrimp, or even firm tofu for a vegetarian option. For those avoiding soy, coconut aminos make an excellent substitute for soy sauce. If you’re looking for a gluten-free alternative, simply opt for rice paper wrappers instead of traditional wheat-based ones. For more inspired ideas, check out our “Easy Variations” section below.
- Superior to Takeout: Say goodbye to long waits and potentially questionable ingredients often found in delivery. Dedicate the same 40 minutes you’d spend impatiently waiting for your order to an engaging and rewarding culinary adventure in your own kitchen. Making these spring rolls from scratch is not only a fun, interactive experience but also ensures you’re enjoying fresh, wholesome ingredients without any unwelcome additives or excessive oils. It’s a healthier, tastier, and more satisfying alternative.
Spring Rolls vs. Summer Rolls vs. Egg Rolls: A Clear Distinction
These three popular Asian appetizers are often grouped together, leading to frequent confusion. Let’s clarify their delicious differences once and for all. While all three involve a flavorful filling encased in a wrapper, their preparation methods and serving temperatures are distinct.
- Spring Rolls: Like the ones in this recipe, traditional spring rolls feature a savory filling (often meat and vegetables) encased in a thin, wheat-based wrapper. They are typically deep-fried until golden and crispy, and served hot. The wrapper becomes delightfully crunchy, offering a textural contrast to the soft filling.
- Egg Rolls: Very similar to spring rolls in preparation, egg rolls also have a savory filling that is deep-fried. The key difference lies in the wrapper itself; egg roll wrappers are generally thicker and contain egg in the batter, giving them a slightly bubblier, more textured crunch when fried compared to the smoother finish of spring rolls. They are also served hot.
- Summer Rolls (Gỏi Cuốn): In stark contrast to their fried counterparts, summer rolls are a fresh, uncooked delight. They are characterized by their translucent, delicate rice paper wrappers, which encase a vibrant array of fresh ingredients such as cooked shrimp, thinly sliced pork, vermicelli noodles, and crisp vegetables like lettuce, cucumber, and herbs. Summer rolls are served cold, offering a light, refreshing, and healthy alternative, often accompanied by a peanut dipping sauce.
If you’re curious to try summer rolls, I have two fantastic recipes on my blog: one for Chicken Summer Rolls and another for vibrant Rainbow (Veggie) Summer Rolls. Give them a try for a different, equally delicious experience!
Essential Ingredients for Crispy Golden Spring Rolls
To create these mouthwatering crispy golden spring rolls, you’ll need a selection of fresh produce and flavorful pantry staples. This quick list provides an overview; for precise measurements and quantities, please refer to the detailed recipe card below.
For the Flavorful Filling:
- Vegetable Oil: The base for sautéing, ensuring even cooking and flavor distribution.
- Garlic: Freshly minced garlic is crucial for an aromatic foundation that infuses the entire filling with its pungent, savory notes.
- Ground Chicken: Lean and tender, ground chicken serves as the primary protein. For an adventurous twist, you can easily substitute ground pork or finely chopped shrimp, each offering a unique flavor profile.
- Carrots: Grated carrots add a touch of sweetness, vibrant color, and essential nutrients, softening beautifully during cooking.
- Shiitake Mushrooms: These mushrooms bring a deep, earthy, and umami-rich flavor that is characteristic of many Asian dishes. Thinly slicing them ensures they blend well into the filling.
- Napa Cabbage: Known for its mild flavor and tender texture, shredded napa cabbage cooks down quickly, adding bulk and a subtle sweetness without overpowering the other ingredients.
- Green Onions: Sliced green onions provide a fresh, pungent bite that brightens the entire filling. Add them towards the end of cooking to maintain some of their crispness and flavor.
- Oyster Sauce: A key ingredient for its rich, savory, and slightly sweet flavor, oyster sauce adds depth and a beautiful glaze to the filling.
- Soy Sauce: A fundamental Asian condiment, soy sauce contributes saltiness and an essential umami kick. If you have dietary restrictions, feel free to use coconut aminos as a gluten-free and soy-free alternative.
- Sugar: Just a hint of sugar balances the savory and salty flavors, enhancing the overall complexity of the sauce.
- Cornstarch: Used as a thickener, cornstarch ensures the filling binds together perfectly, preventing it from becoming watery and keeping it neatly inside the wrapper.
For Assembly and Frying:
- 6-inch Square Spring Roll Wrappers: These thin, delicate wrappers are specifically designed for spring rolls, frying up to an incredibly crispy, golden finish. Ensure they are thawed if frozen.
- Water & Cornstarch (for slurry): A simple mixture of water and cornstarch creates a “slurry” that acts as a powerful edible glue, sealing your spring rolls tightly to prevent the filling from escaping during frying.
- Vegetable or Peanut Oil (for frying): A neutral-flavored oil with a high smoke point is essential for deep-frying, ensuring your spring rolls cook evenly to a beautiful golden brown without imparting unwanted flavors.
Simple & Delicious Spring Roll Variations
One of the aspects I love most about this spring roll recipe is its incredible flexibility. It’s wonderfully adaptable, allowing you to easily cater to different dietary preferences or experiment with new flavor combinations. Here are some of my favorite ways to customize these crispy delights:
- Experiment with Different Proteins: While ground chicken is fantastic, feel free to substitute it with other proteins. Ground pork offers a richer flavor, while finely chopped shrimp adds a delicate seafood note. For a plant-based option, crumbled firm tofu or tempeh can be seasoned similarly to mimic the texture and absorb the flavors of the sauce beautifully.
- Go Full Vegetarian: If you’re vegetarian or simply looking to incorporate more vegetables into your diet, omit the ground chicken entirely. Instead, boost the vegetable content by adding more of the existing carrots, mushrooms, and cabbage. You could also introduce other finely chopped vegetables such as bean sprouts, water chestnuts, bamboo shoots, or bell peppers for added texture and nutrients.
- Make it Gluten-Free: For those with gluten sensitivities or dietary restrictions, converting this recipe to gluten-free is incredibly simple. Instead of wheat-based spring roll wrappers, opt for readily available rice paper wrappers. Ensure your soy sauce is swapped for a gluten-free tamari or coconut aminos to keep the entire dish free from gluten.
- Spice it Up: For those who love a bit of heat, consider adding a pinch of red pepper flakes or a dash of sriracha to the filling mixture. A finely diced jalapeño or serrano pepper could also elevate the spice level.
- Baked or Air-Fried Alternative: While deep-frying provides the ultimate crunch, you can achieve a healthier version by baking or air-frying your spring rolls. Brush the assembled rolls lightly with oil and bake at 400°F (200°C) for 15-20 minutes, flipping halfway, or air-fry at 375°F (190°C) for 10-15 minutes until golden brown and crispy. Note that the texture will be slightly different, but still delicious!
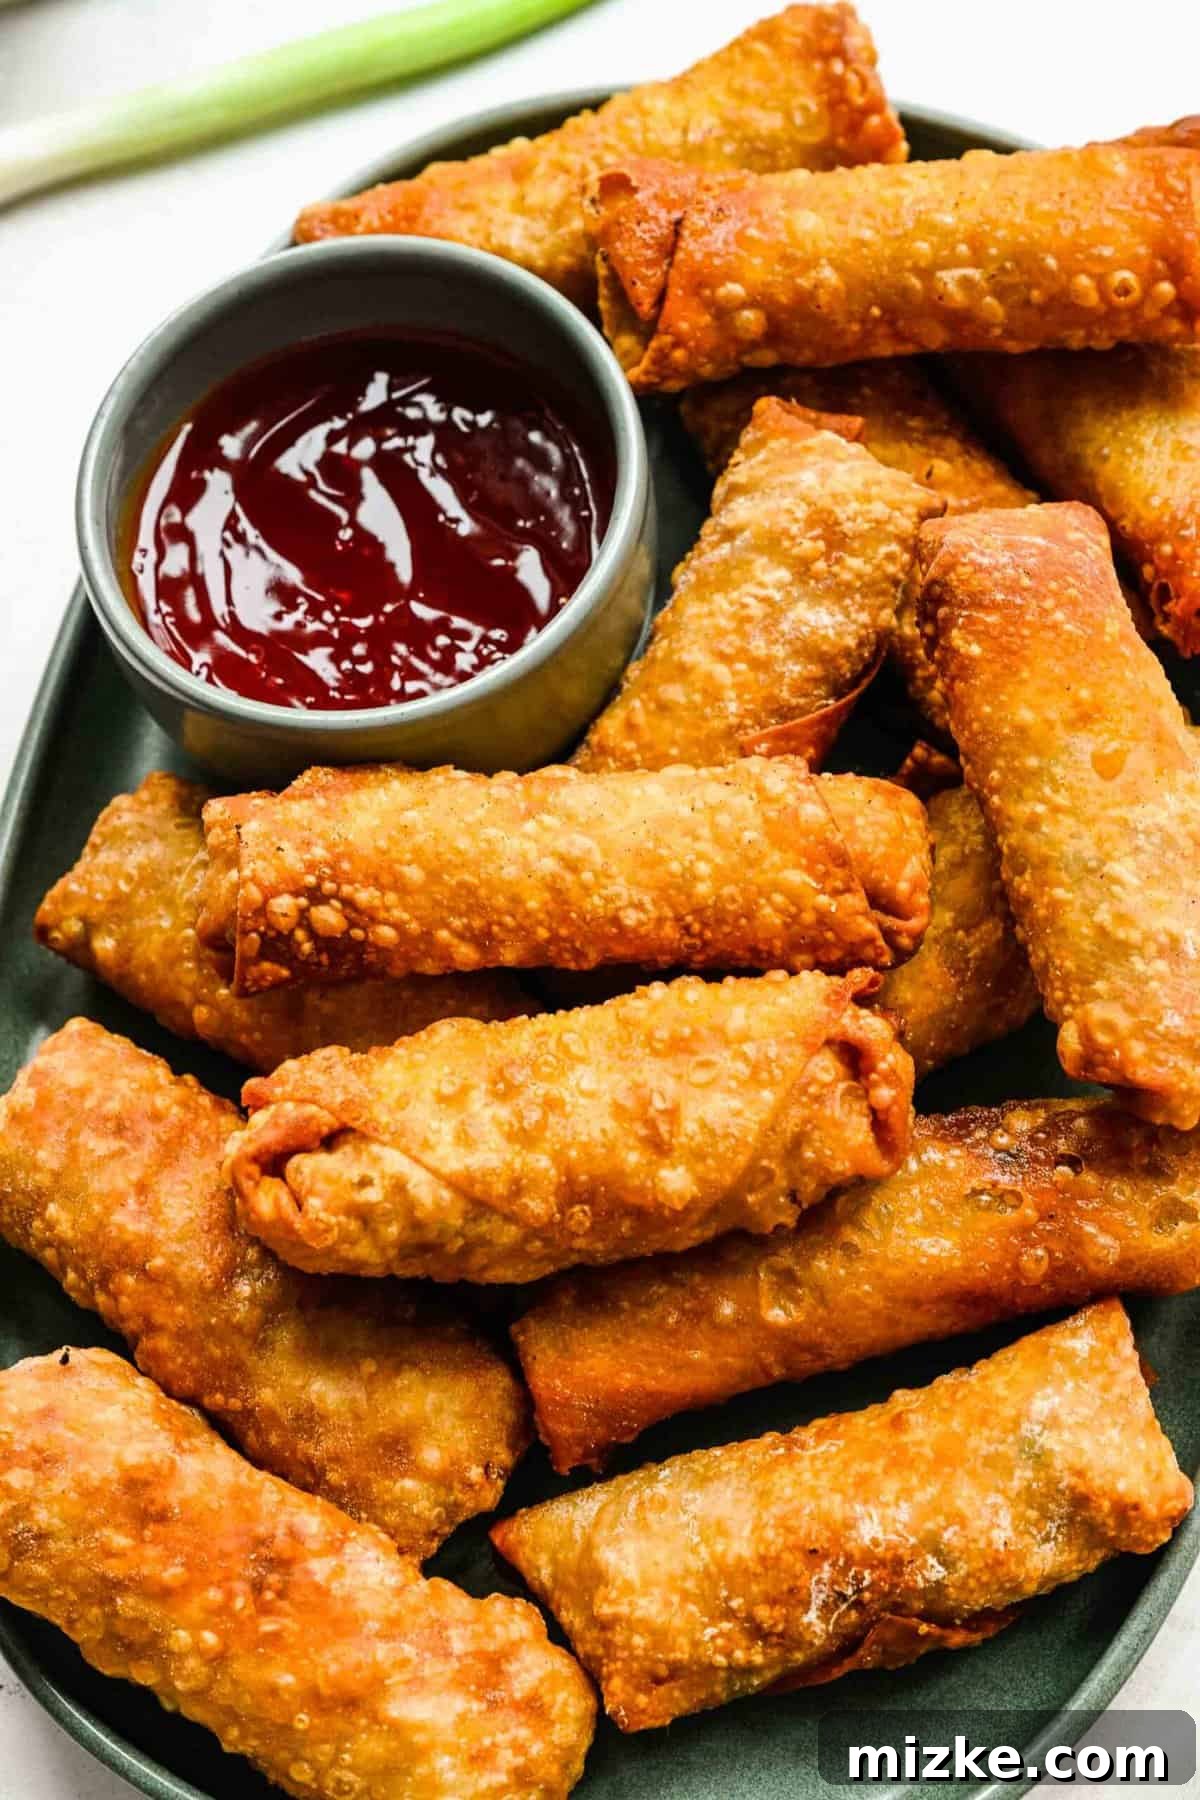
Crafting Your Crispy Golden Spring Rolls: A Step-by-Step Guide
Making these crunchy spring rolls is simpler than you might imagine, breaking down into three core stages: preparing the delicious filling, expertly wrapping and sealing the delicate wrappers, and finally, frying them to a perfect golden crisp. Here’s a detailed rundown to guide you through the process. For even more specific instructions and measurements, please consult the complete recipe card found further below.
Step 1: Preparing the Flavorful Filling
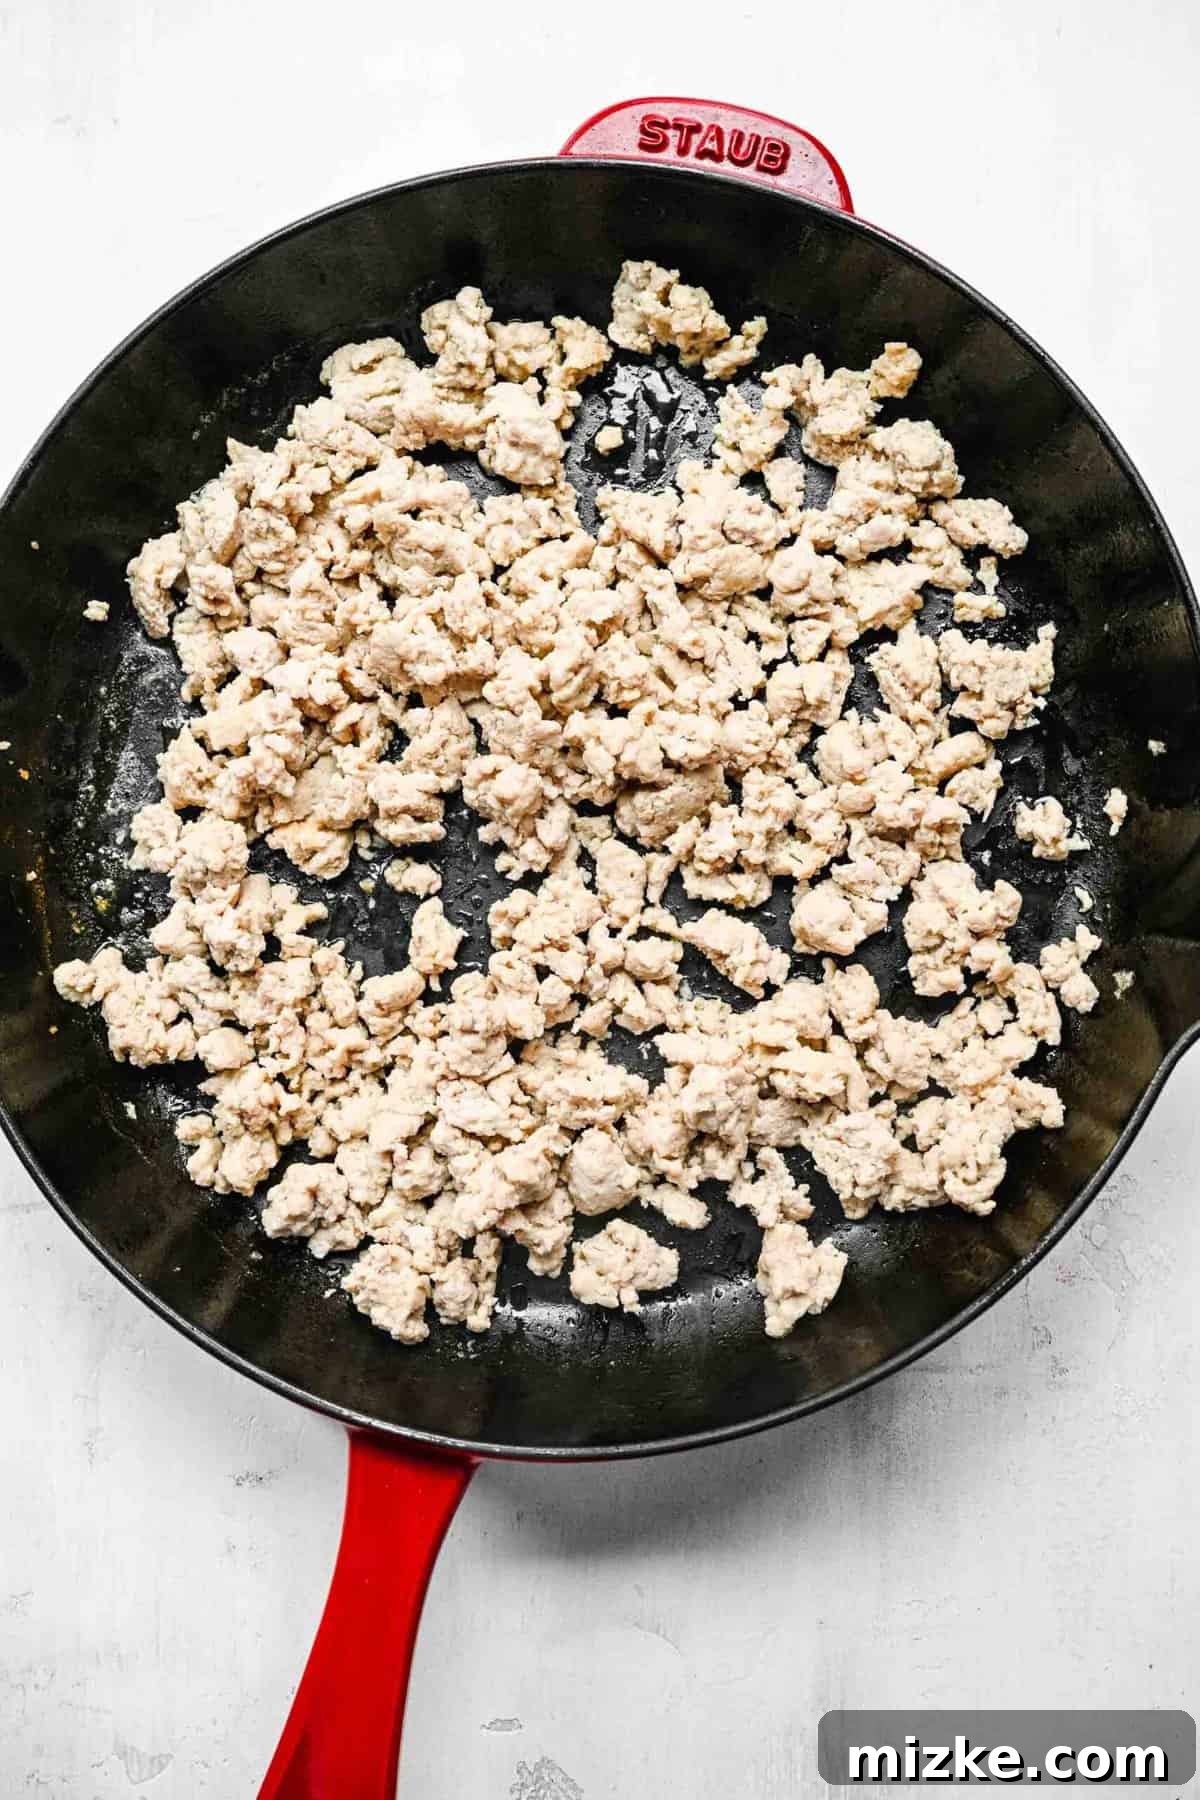
- Brown the Chicken: Begin by heating a large skillet over medium heat with a tablespoon or two of vegetable oil. Add the minced garlic and sauté for about 30 seconds until its inviting aroma fills your kitchen. Next, introduce the ground chicken to the skillet. Cook, using a meat chopper or a sturdy wooden spoon to break it apart, until it is thoroughly browned and no pink remains. Browning ensures a rich flavor base for your filling.
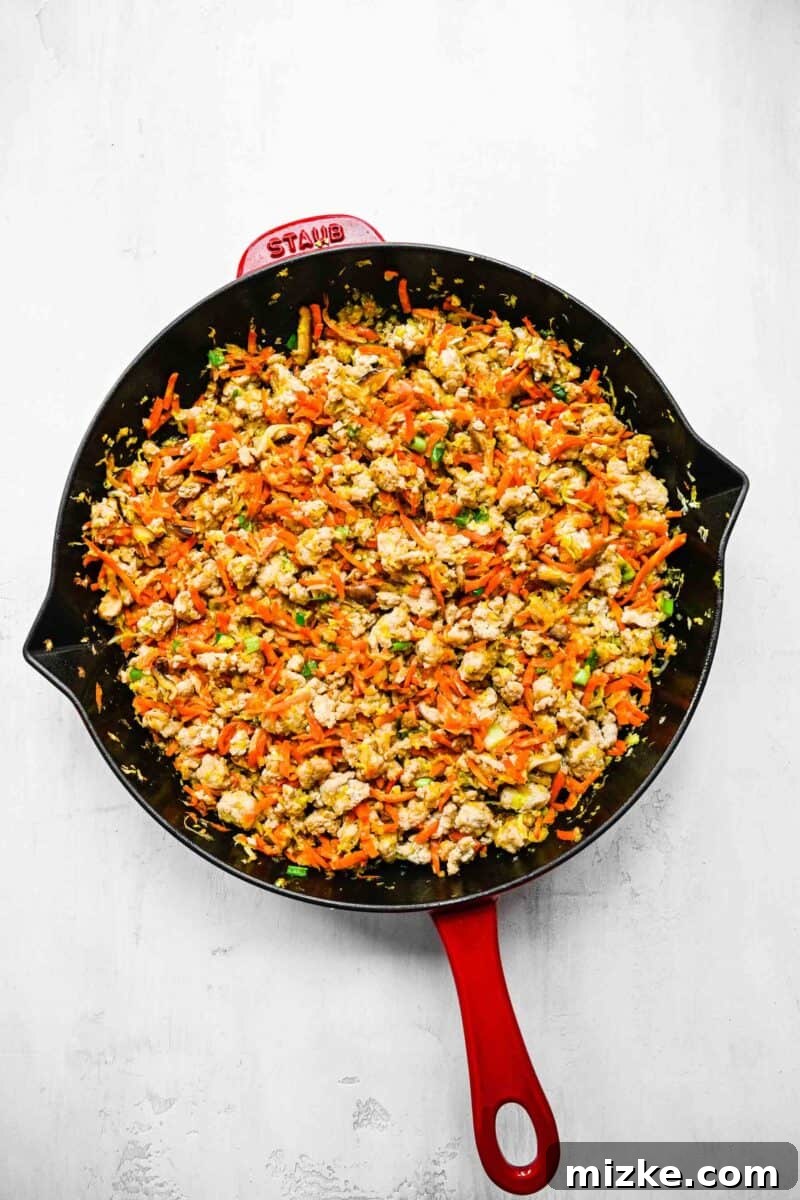
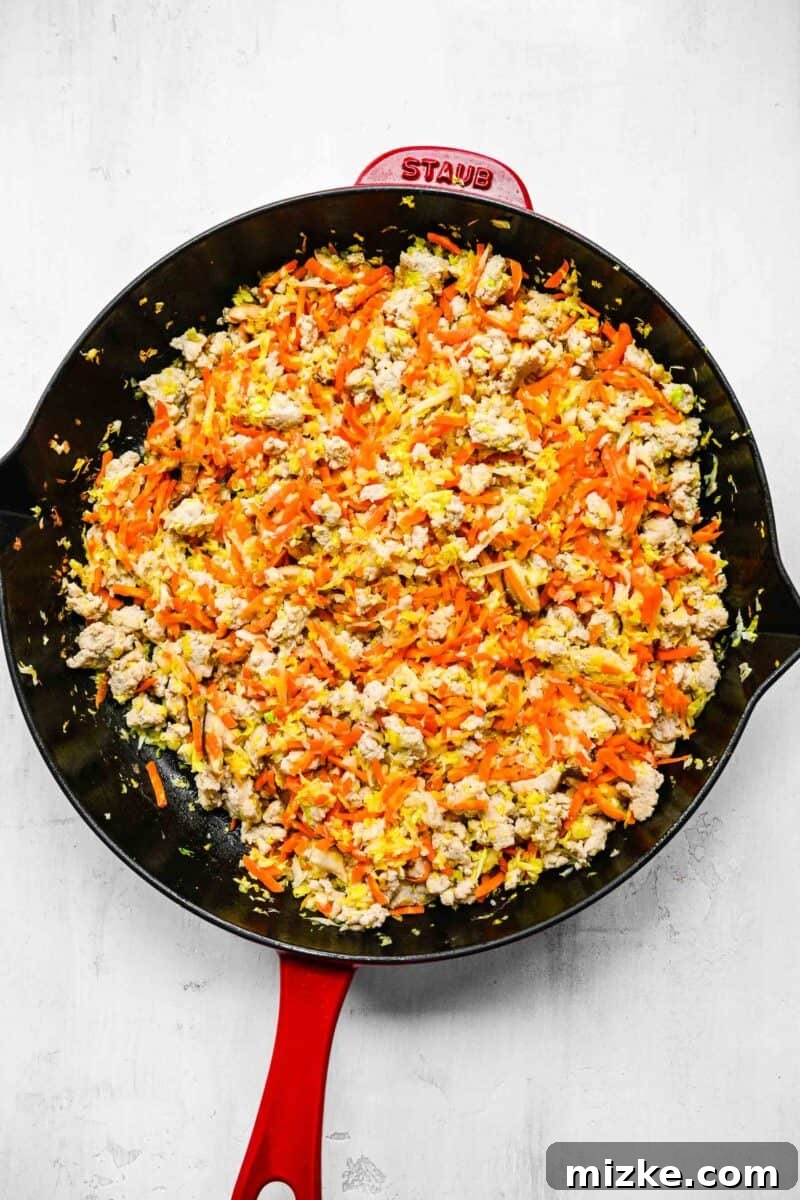
- Sauté the Vegetables & Combine Flavors: To the browned chicken, add the grated carrots, thinly sliced shiitake mushrooms, and shredded napa cabbage. Sauté these vegetables for 3-5 minutes, or until they begin to soften but still retain a slight crispness. Meanwhile, in a small bowl, whisk together the oyster sauce, soy sauce, sugar, and cornstarch until smooth. Pour this savory mixture over the chicken and vegetables in the pan, along with the sliced green onions. Stir everything thoroughly to ensure the filling is evenly coated. Continue cooking for approximately 1 minute, allowing the sauce to thicken slightly and meld with the ingredients. Remove the skillet from the heat and let the filling cool completely. A cool filling is essential for easy and successful wrapping.
Step 2: Expert Assembly of Your Spring Rolls
- Prepare the Cornstarch Slurry: In a small bowl, whisk together the water and cornstarch until it forms a smooth, lump-free paste. This slurry will be your essential edible glue for sealing the spring rolls. Set it aside for easy access.
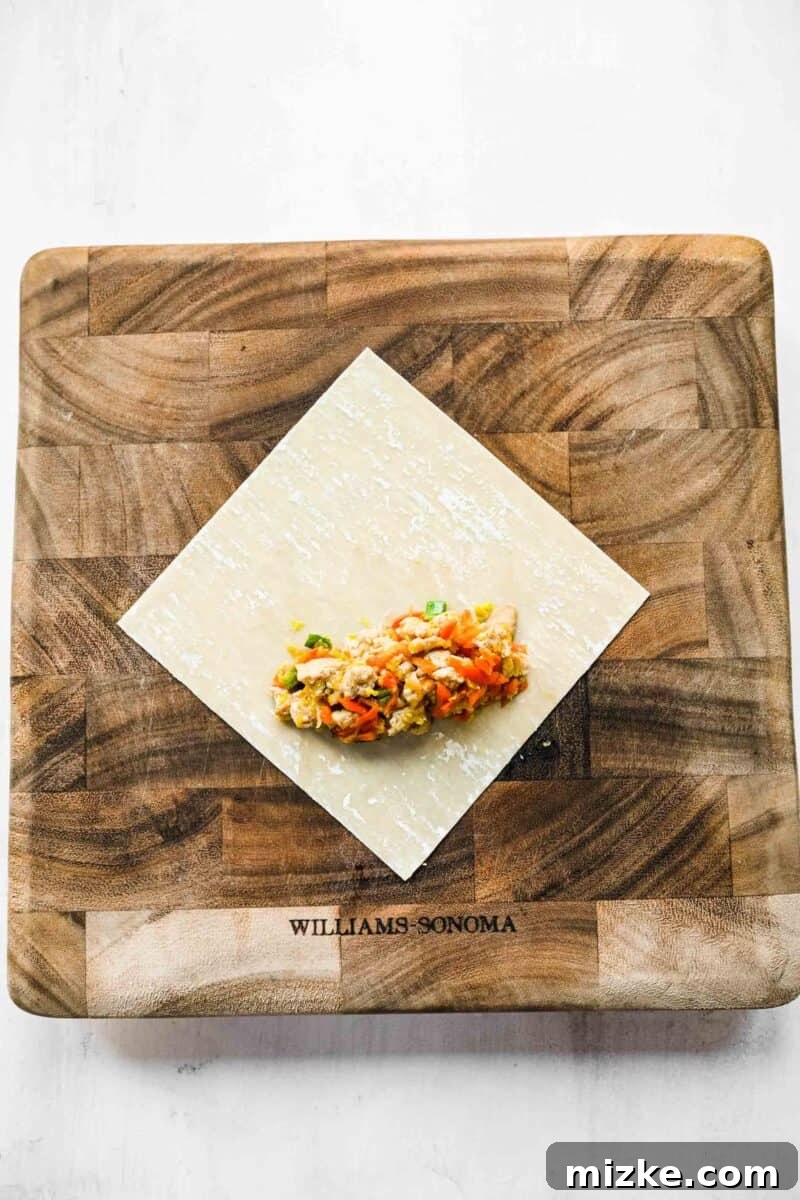
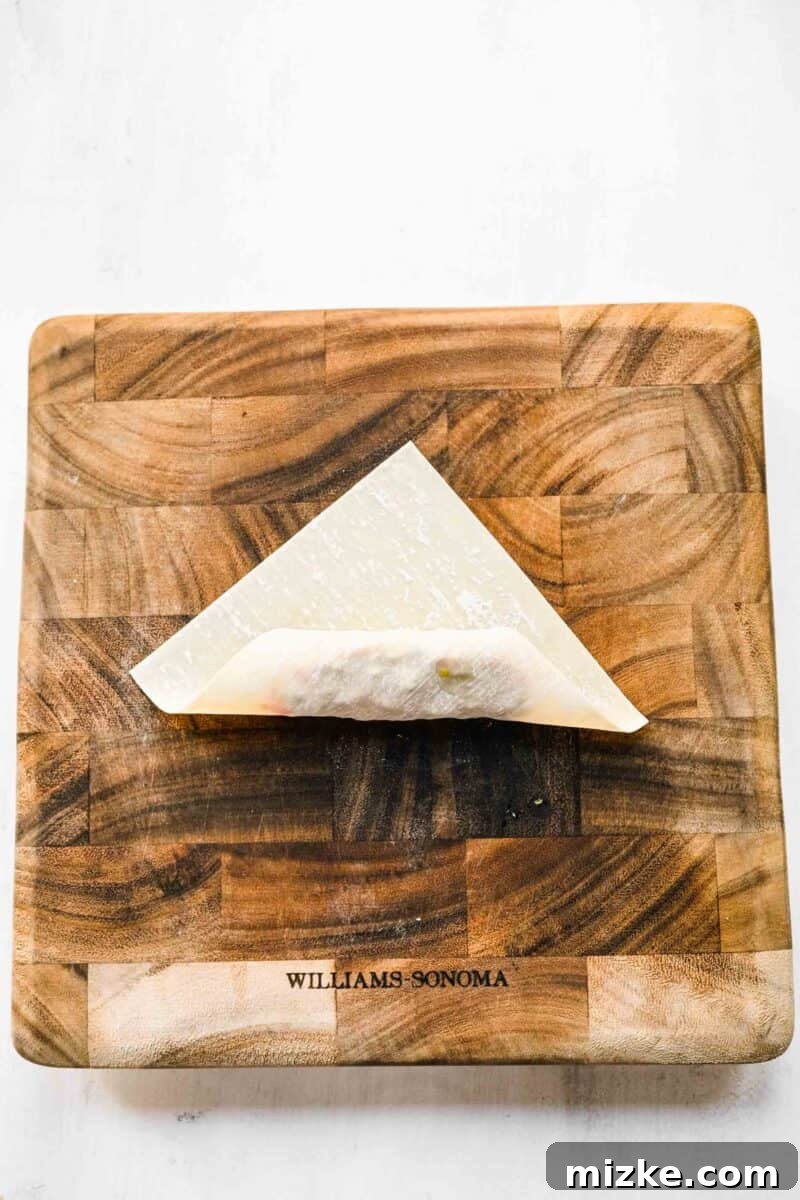
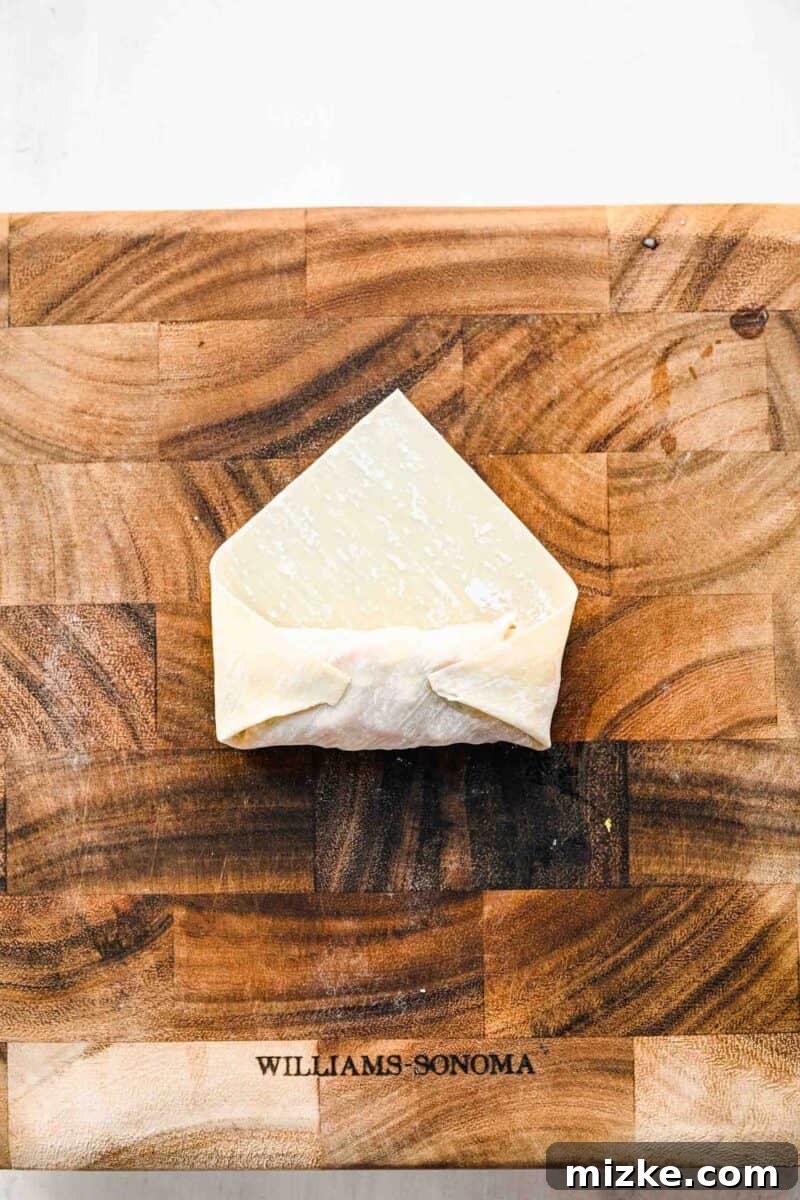
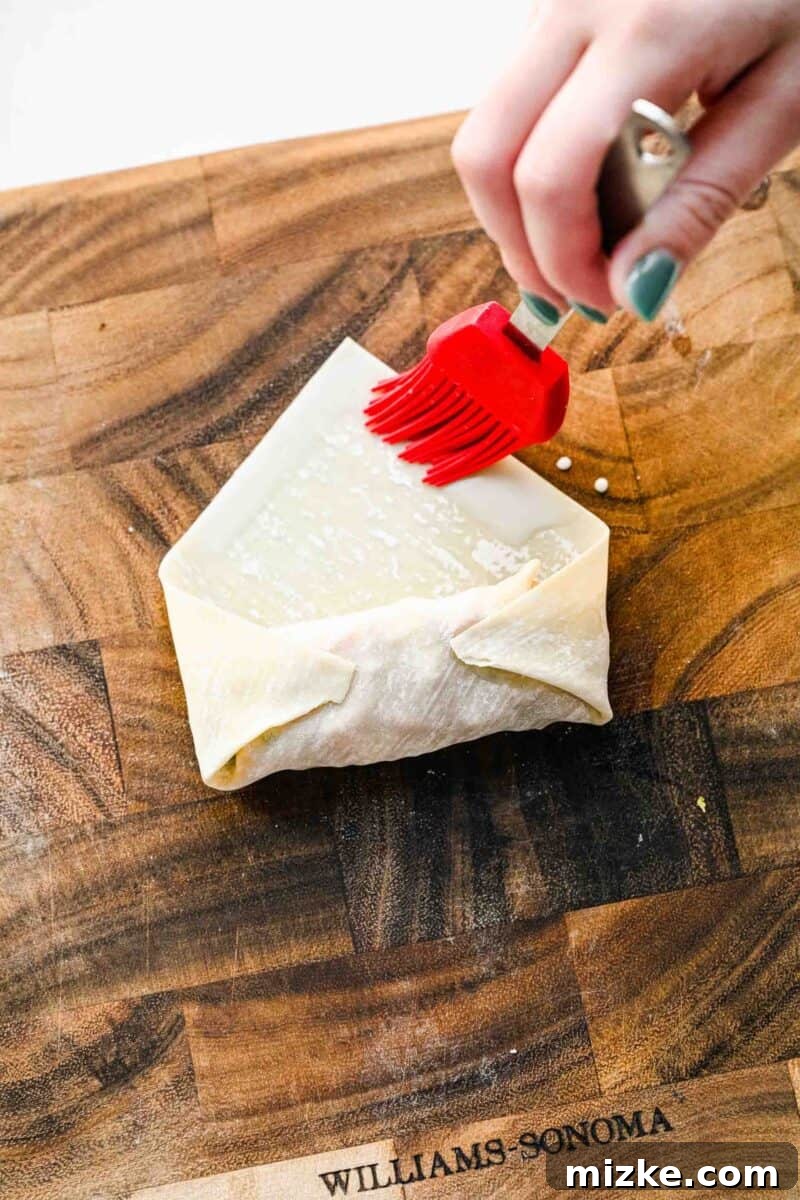
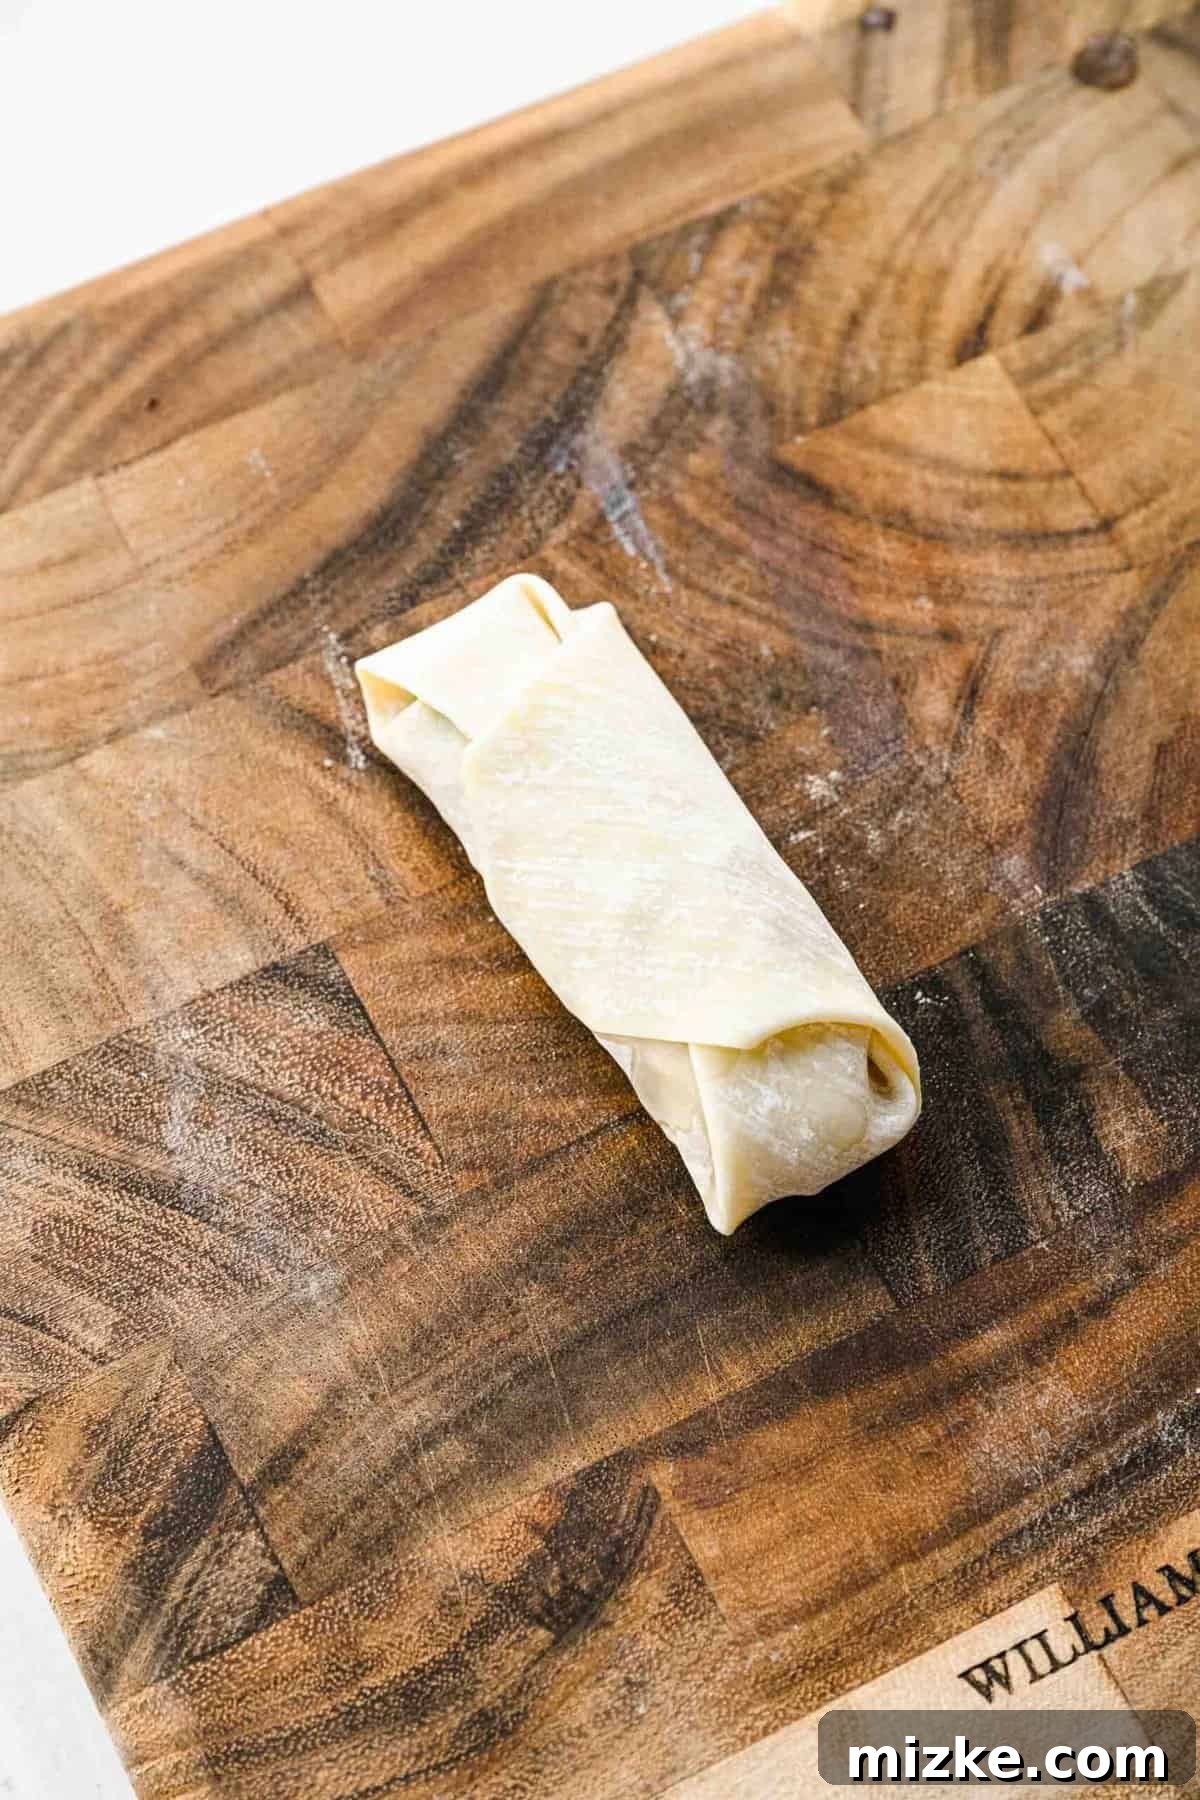
- Fill & Seal the Wrappers: Take one spring roll wrapper and lay it smooth side down on a clean work surface, positioning it like a diamond with one corner pointed towards you. Spoon about 2 tablespoons of the cooled filling onto the bottom center of that pointed corner. Fold the bottom corner tightly over the filling, then roll it up about halfway towards the top point. Next, fold the left and right side corners inward, creating an envelope shape. Brush the top peak of the wrapper generously with your cornstarch slurry. Finally, finish rolling the wrapper all the way up, creating a compact, sealed cylinder. Repeat this process with the remaining wrappers and filling. You should yield approximately 15-18 perfectly formed spring rolls. Mastering the fold is key to preventing oil seepage and achieving that perfect crunch; practice makes perfect!
Step 3: Frying to Golden Perfection
- Heat the Oil & Fry in Batches: In a large, heavy-bottomed pot or Dutch oven, heat 3-4 inches of vegetable or peanut oil to 325°F (163°C). It’s crucial to maintain this temperature for optimal crispiness. Carefully place 4-5 spring rolls into the hot oil at a time, ensuring you don’t overcrowd the pot. Overcrowding will drop the oil temperature and result in greasy, soggy spring rolls. Fry each batch for 3-4 minutes, turning occasionally, until they achieve a beautiful deep golden brown color on all sides.
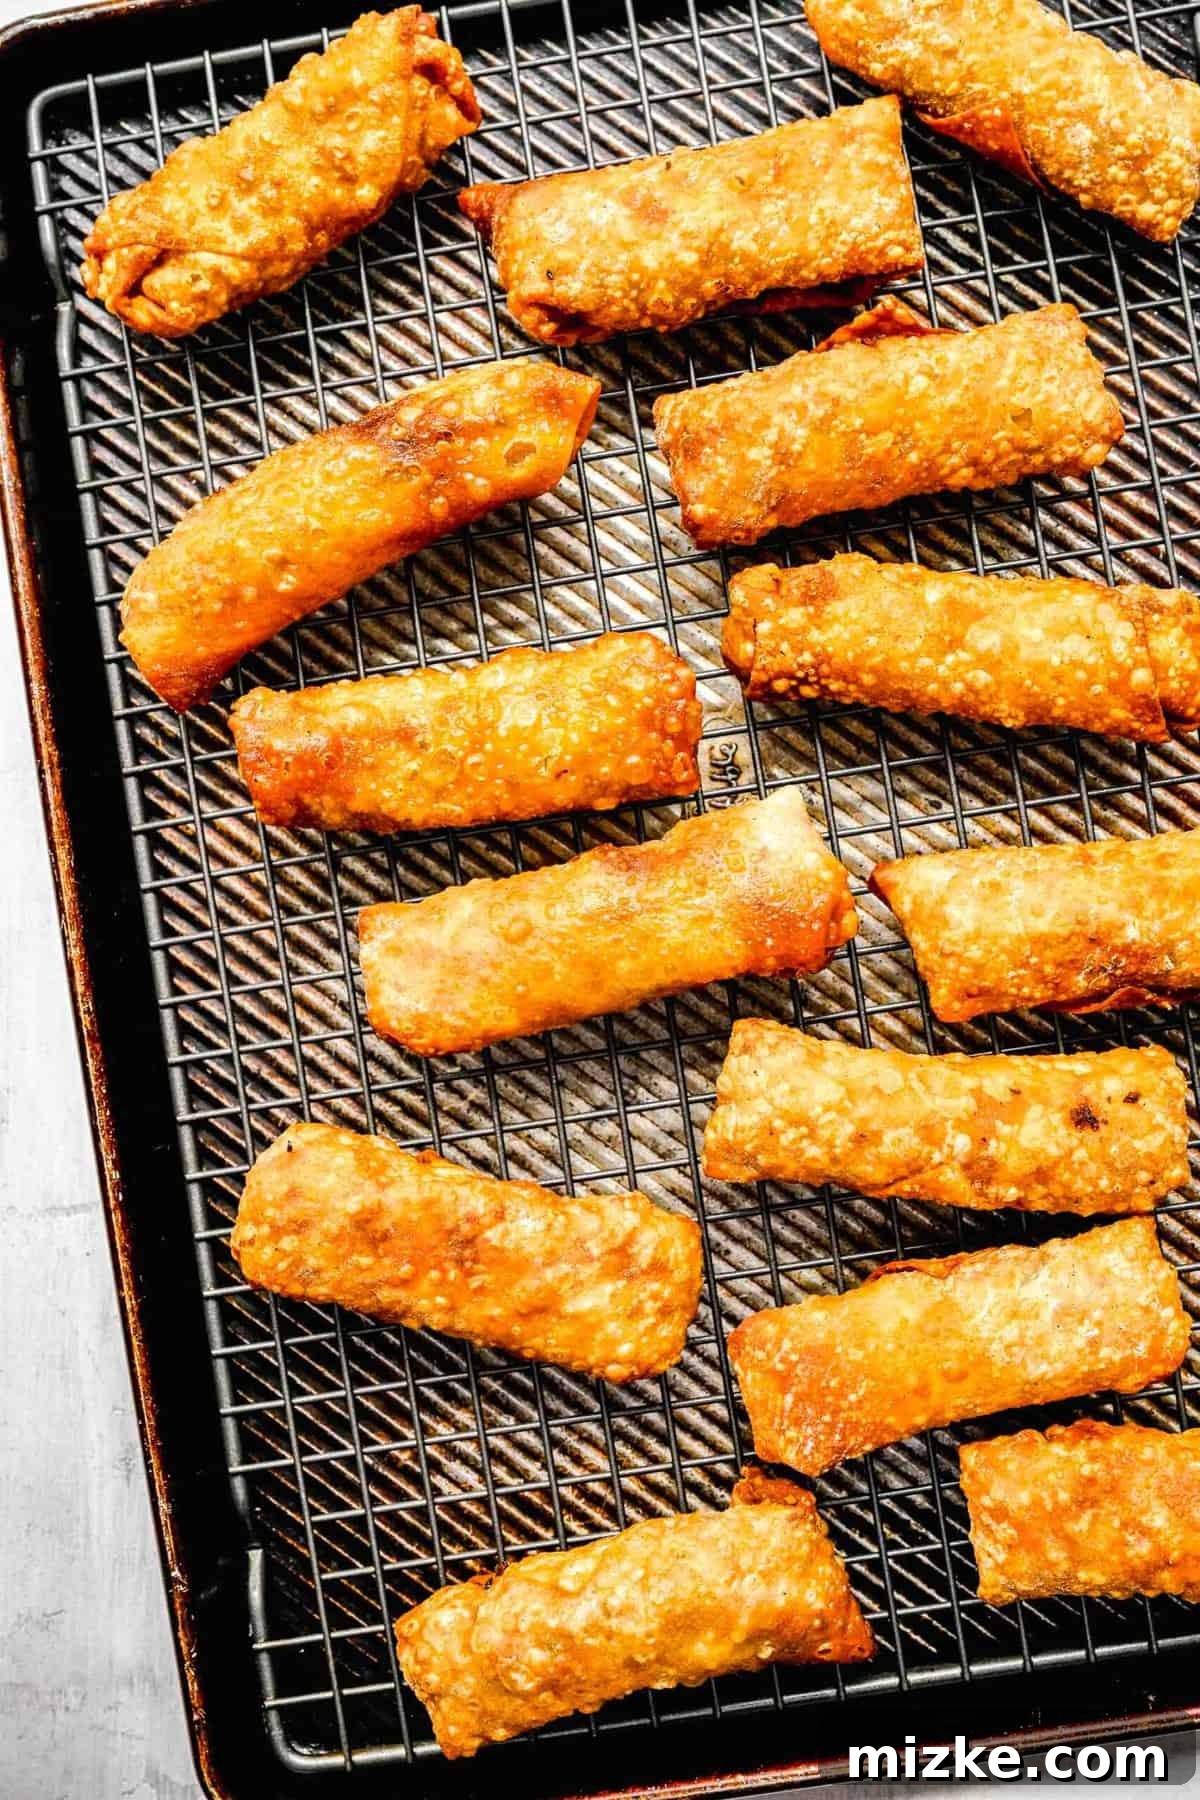
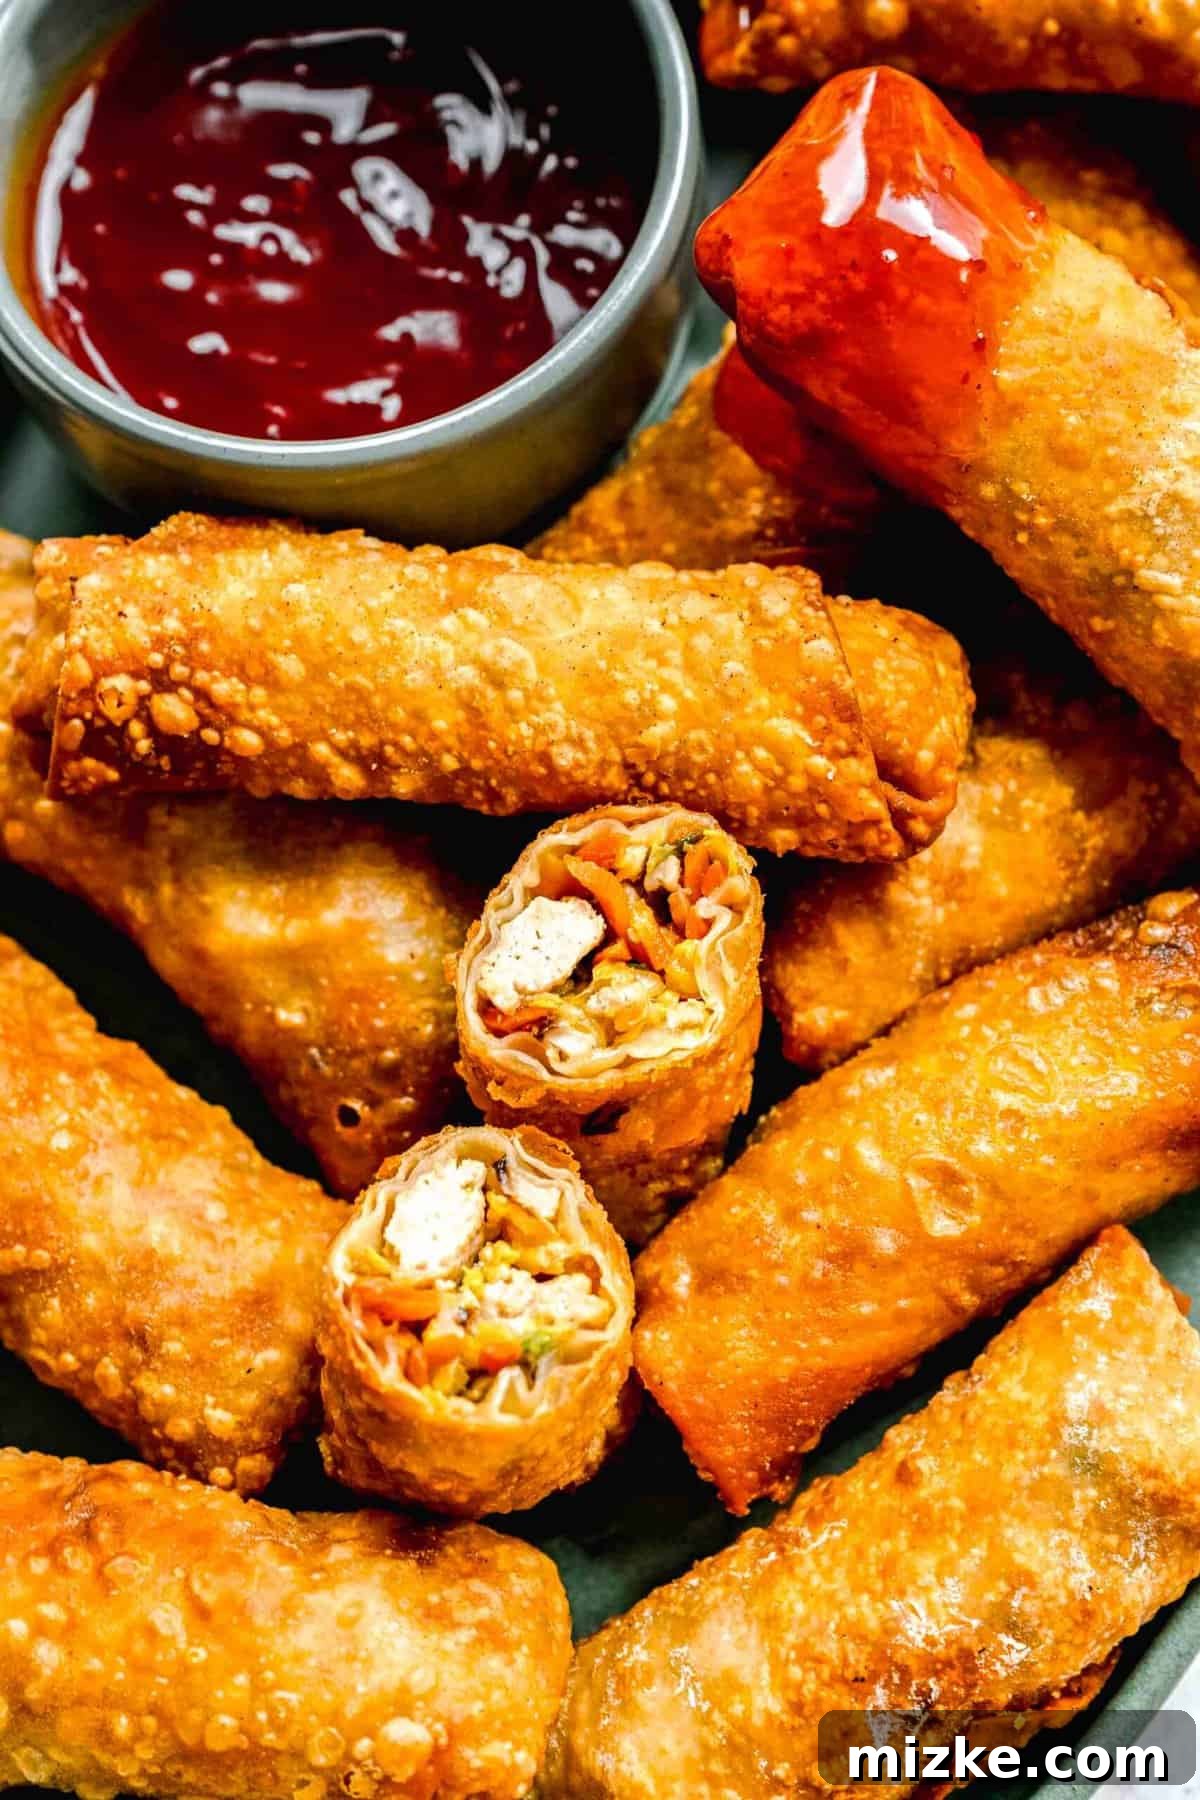
- Drain & Serve: Using tongs or a spider strainer, carefully remove the fried spring rolls from the oil and transfer them to a wire rack set over a baking sheet lined with paper towels. This allows any excess oil to drain away, preserving their crispness. Once drained, serve them immediately while they are still hot and wonderfully crunchy, ideally alongside your favorite sweet and sour dipping sauce. And just like that, you’ve created a restaurant-quality appetizer right at home!
Essential Tips for Perfect Crispy Spring Rolls
While these crispy chicken spring rolls are straightforward to make, paying attention to a few key details can elevate your results from good to absolutely outstanding. These simple tips and tricks will help you achieve consistent success and the ultimate crunch:
- Hand-Shred Your Veggies for Best Texture: If you’re preparing your own vegetables, I highly recommend shredding carrots and cabbage with a sharp knife or a mandoline. Avoid using a box grater for these ingredients, as it can release too much moisture, which can lead to a soggy filling and potentially soggy spring rolls. The goal is tender-crisp vegetables, not waterlogged ones.
- Wrap Tightly & Neatly: The secret to a perfectly crispy and non-greasy spring roll lies in the wrapping technique. Ensure there are no air pockets inside the wrapper, and that the filling is snug. A tight wrap prevents oil from seeping in during frying, guaranteeing a uniformly crisp exterior and a delicious, contained filling. Think of it as creating a secure, edible package.
- Be Generous with the Cornstarch Slurry: Don’t skimp on your cornstarch and water slurry! This mixture acts as a powerful edible glue. A liberal application to the edges of the wrapper, especially the final flap, is crucial for sealing the rolls securely. A poorly sealed roll risks unraveling in the hot oil, leading to a messy and disappointing outcome.
- Maintain Optimal Oil Temperature: Use a kitchen thermometer to ensure your oil reaches and maintains the recommended temperature of 325°F (163°C). If the oil is too cold, the spring rolls will absorb too much oil and become greasy. If it’s too hot, the wrappers will brown too quickly on the outside, leaving the inside potentially undercooked or the filling not heated through. Consistency is key for that perfect golden crisp.
- Always Fry in Batches: Resist the urge to overcrowd your frying pot. Frying too many spring rolls at once will drastically lower the oil’s temperature. This temperature drop prevents the wrappers from crisping up properly, resulting in soft, oily, and less appealing spring rolls. Fry in small batches, giving each roll enough space, to ensure they cook evenly and become uniformly golden and crunchy.
- Drain Thoroughly: Once fried, immediately transfer your spring rolls to a wire rack placed over paper towels. This setup allows air to circulate, helping the spring rolls stay crispy by preventing steam buildup, while the paper towels absorb any residual oil. Never place them directly on paper towels without a rack, as this can trap steam and make them soggy.
Preparing Spring Rolls in Advance: Tips for Convenience
While spring rolls are undeniably at their peak deliciousness when enjoyed piping hot and fresh out of the fryer, there are clever ways to prepare them in advance, making meal prep easier without entirely sacrificing quality. Here are my two preferred methods for making these crispy delights ahead of time:
- Prepare the Filling in Advance: The most straightforward method is to prepare the savory chicken and vegetable filling completely. Once cooked and cooled, transfer the filling to an airtight container and store it in the refrigerator for up to 2-3 days. When you’re ready to enjoy your spring rolls, simply take out the pre-made filling, wrap it in fresh wrappers, and fry as usual. This significantly cuts down on active preparation time on the day of serving.
- Assemble and Freeze Unfried Rolls: For maximum convenience, you can prepare the filling, assemble and seal all your spring rolls, and then freeze them before frying. Arrange the unfried spring rolls in a single layer on a parchment-lined baking sheet and freeze until solid (this prevents them from sticking together). Once solid, transfer them to an airtight freezer-safe container or bag, placing wax paper between layers if stacking. They can be stored in the freezer for up to 2 months. When you’re ready to cook, there’s no need to thaw! Simply fry the frozen spring rolls directly in hot oil, adding a couple of extra minutes to the frying time to ensure they cook through and turn golden brown.
While you *can* cook the spring rolls entirely in advance and reheat them later, be aware that they will likely lose some of their initial crispiness. For the best texture, frying just before serving is always recommended. See my notes below on how to store and reheat cooked leftovers to best preserve their texture.
What to Serve with Your Delicious Chicken Spring Rolls
These crispy golden spring rolls are incredibly versatile and make a fantastic appetizer or a delightful light meal. They pair wonderfully with a variety of Asian-inspired dishes, especially as a prelude to your favorite Chinese or fusion meal. Don’t forget a classic sweet and sour dipping sauce, or try a spicy peanut sauce or a tangy chili-garlic sauce for an extra kick!
Here are some delectable entrees and sides that I’ve particularly enjoyed serving alongside these crunchy bites:
- Chinese Salt and Pepper Chicken Wings: The savory, peppery crunch of these wings complements the rich spring rolls perfectly, creating a balanced flavor profile.
- Air Fryer Teriyaki Salmon: For a lighter, yet equally flavorful main course, the sweet and umami notes of teriyaki salmon provide a lovely contrast to the fried richness of the spring rolls.
- Instant Pot General Tso’s Chicken: A classic favorite, the sticky, spicy, and sweet General Tso’s chicken makes an excellent pairing, offering a hearty and satisfying meal alongside the crispy appetizers.
- Chicken Lettuce Wraps: If you’re looking for a fresher, lighter pairing, these savory chicken lettuce wraps offer a wonderful textural and flavor balance, creating a diverse Asian feast.
- Beijing Beef: The sweet and tangy notes of Beijing beef with its tender strips of beef and crispy exterior would make for a truly indulgent and satisfying meal.
- Simple Fried Rice or Lo Mein: For a complete meal, a side of homemade fried rice or vegetable lo mein is always a great choice, rounding out the Asian culinary experience.
Storing & Reheating Leftover Spring Rolls for Best Results
While fresh-from-the-fryer spring rolls are unbeatable, sometimes you have leftovers, or you might choose to prepare a larger batch. Here’s how to properly store and reheat your cooked spring rolls to best preserve their delightful crispiness:
- Storing Cooked Spring Rolls: It’s crucial to allow the spring rolls to cool down completely to room temperature before storing them. Placing warm spring rolls directly into a container will trap steam, making them soggy. Once cool, arrange them in a single layer in an airtight container. If you need to stack them, place a layer of parchment paper between each row to prevent sticking. Store them in the refrigerator for up to 3 days. For longer storage, you can freeze cooked spring rolls for up to 3 months using the same method.
- Reheating for Optimal Crispness: The key to bringing back some of that coveted crispiness is to avoid the microwave, which will only make them soggy.
- Oven Method: Preheat your oven to 325°F (163°C). Line a baking sheet with parchment paper or aluminum foil and arrange the spring rolls in a single layer, ensuring they don’t touch. Bake for approximately 10-15 minutes, or until they are heated through and the wrapper feels crisp again. If reheating from frozen, allow the spring rolls to thaw in the refrigerator first, or add an extra 5-10 minutes to the baking time.
- Air Fryer Method: This is often the best method for reheating, as it can revive a good deal of the crispiness. Place the spring rolls in a single layer in your air fryer basket, ensuring not to overcrowd it. Air fry at 350°F (175°C) for 5-7 minutes, shaking the basket halfway through, until they are hot and crispy. Frozen spring rolls may require 8-12 minutes.
Always check that the internal temperature is thoroughly heated before serving.
More Easy & Exciting Side Dishes
I don’t know about you, but for me, a great meal isn’t complete without fantastic side dishes! They add so much excitement, variety, and flavor to any table. While these crispy golden spring rolls are a delicious choice for an appetizer or side, here are some other wonderful ideas from around the globe to inspire your next meal:
- Crispy Parmesan Potatoes: These oven-roasted potatoes with a golden Parmesan crust are an irresistible, savory side that pairs well with almost anything.
- Gobi Manchurian: A popular Indo-Chinese dish, crispy fried cauliflower florets tossed in a spicy, tangy sauce offer an explosion of flavors and textures.
- Za’atar Cucumber Tomato Salad: A refreshing and vibrant Middle Eastern-inspired salad, perfect for cutting through richer dishes with its fresh herbs and tangy dressing.
- Poblano Mexican Street Corn off the Cob: All the creamy, cheesy, and spicy goodness of elote, conveniently served off the cob – a fantastic fiesta for your taste buds.
- Kimchi Fried Rice: A Korean classic, this flavorful and spicy fried rice is packed with savory kimchi, making it a satisfying and addictive side or light meal.
Crispy Golden Spring Rolls
Julie Chiou
20
20
40
18 spring rolls
Equipment
-
Meat chopper
Ingredients
Filling:
- 2 tablespoons vegetable oil
- 2 cloves minced garlic
- 1 pound (454 g) ground chicken, or ground pork
- 2 large carrots, grated
- ½ cup (113 g) shiitake mushrooms, thinly sliced
- 2 cups (152 g) shredded napa cabbage
- 2 tablespoons oyster sauce
- 2 tablespoons soy sauce
- 1 teaspoon sugar
- 1 teaspoon cornstarch
- 3 green onions, thinly sliced
Assembly:
- Vegetable or peanut oil for frying
- 2 tablespoons water
- 1 tablespoon cornstarch
- 18 6” square spring roll wrappers
Instructions
For the filling:
-
Heat oil in a large skillet over medium heat. Add garlic and cook for 30 seconds, until fragrant, then add chicken and cook, breaking up with a meat chopper or wooden spoon, until browned.2 tablespoons vegetable oil,
2 cloves minced garlic,
1 pound (454 g) ground chicken -
Add in carrots, mushrooms and cabbage and continue cooking for 3-5 minutes, until vegetables start to soften.2 large carrots,
½ cup (113 g) shiitake mushrooms,
2 cups (152 g) shredded napa cabbage -
In a small bowl, whisk together oyster sauce, soy sauce, sugar and cornstarch. Add to the chicken mixture with green onions and stir well to coat. Continue cooking for about 1 minute, then remove from heat and let cool.2 tablespoons oyster sauce,
2 tablespoons soy sauce,
1 teaspoon sugar,
1 teaspoon cornstarch,
3 green onions
To assemble:
-
Heat 3-4 inches of oil in a large pot to 325 °F (163 °C)Vegetable or peanut oil for frying
-
In a small bowl, whisk together water and cornstarch (you’ll use this to seal the spring rolls).2 tablespoons water,
1 tablespoon cornstarch -
Place a spring roll wrapper smooth side down with one corner pointed towards you. Place about 2 tablespoons of filling in the bottom center of the corner pointed towards you. Fold the corner over the filling, then roll about halfway towards the top. Fold the two sides over the filling. Brush cornstarch slurry on the top peak of the wrapper, then finish rolling all the way.18 6” square spring roll wrappers
-
Repeat with remaining wrappers/filling.
-
Place about 4-5 spring rolls in the oil at a time, frying until deep golden brown (3-4 minutes). Remove from oil and place on paper towel to soak up remaining oil. Serve hot with sweet and sour sauce.
Nutrition
Calories: 120kcal,
Carbohydrates: 14g,
Protein: 7g,
Fat: 4g,
Saturated Fat: 1g,
Polyunsaturated Fat: 1g,
Monounsaturated Fat: 1g,
Trans Fat: 0.03g,
Cholesterol: 23mg,
Sodium: 298mg,
Potassium: 263mg,
Fiber: 1g,
Sugar: 1g
This website provides approximate nutrition information for convenience and as a courtesy only. Nutrition information can vary for a variety of reasons. For the most precise nutritional data use your preferred nutrition calculator based on the actual ingredients you used in the recipe.
The default measuring system for this website is US Customary. Unit conversions are provided for convenience and as a courtesy only. While we strive to provide accurate unit conversions, please be aware that there may be some discrepancies.