

Indulge in the heavenly delight of a classic **tiramisu**, a simple yet sophisticated Italian masterpiece. This exquisite dessert features delicate, espresso-soaked ladyfingers elegantly layered with a cloud-like, velvety mascarpone cream. Infused with a subtle hint of amaretto, each spoonful offers a symphony of flavors that will truly captivate your taste buds. Elevate your dessert game by trying this authentic and easy-to-follow Italian recipe right in your own kitchen.
The Ultimate Easy Tiramisu: Authentic Italian Delight at Home
There’s an undeniable magic to tiramisu, a dessert that instantly transports you to the charming cafes of Italy with its rich, complex flavors. For years, I found myself captivated by its allure, often contemplating whether to splurge on a slice at a restaurant. However, the thought of paying $9 or more for a dessert I knew I could master at home always spurred me to embark on a culinary adventure. That curiosity led me to meticulously study and perfect the art of making this iconic Italian confection. To my pleasant surprise, crafting tiramisu from scratch turned out to be far simpler than anticipated, and the results? Absolutely divine.
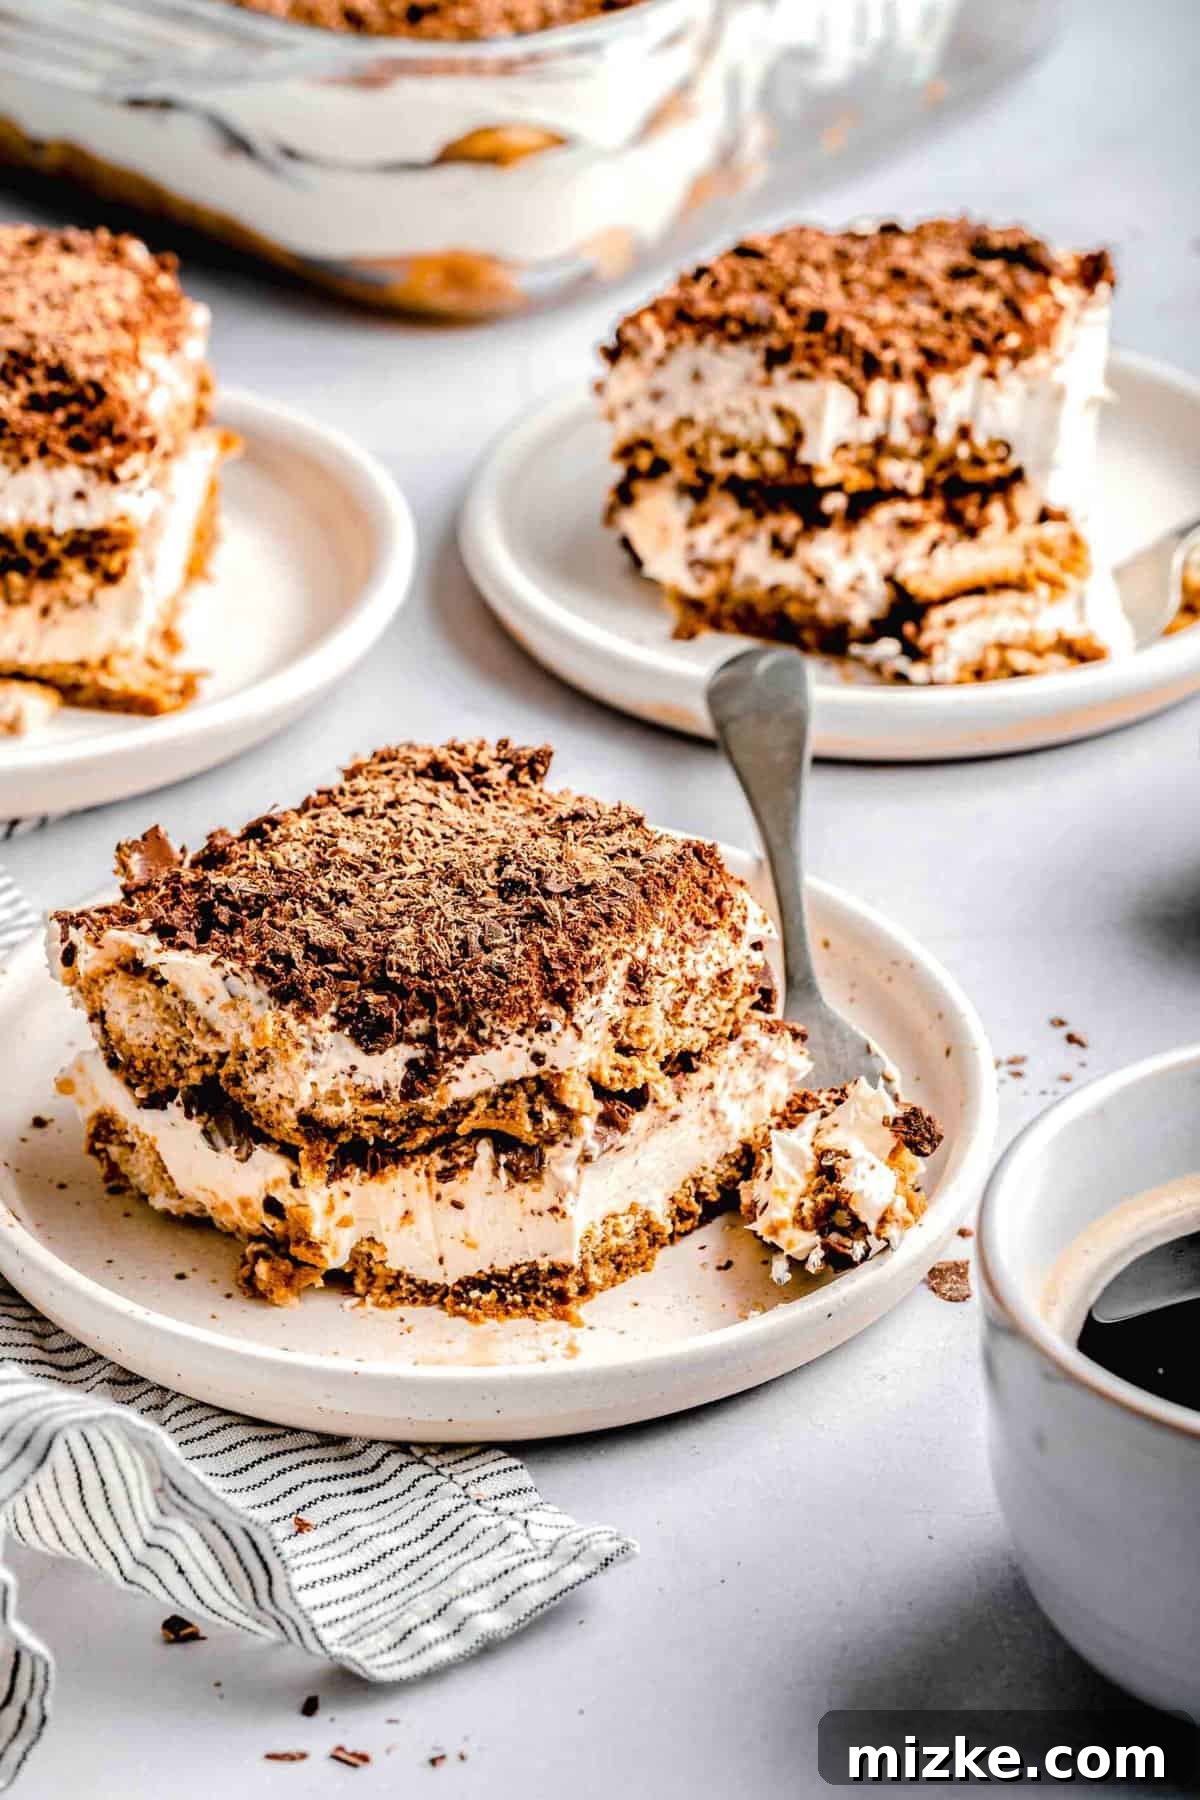
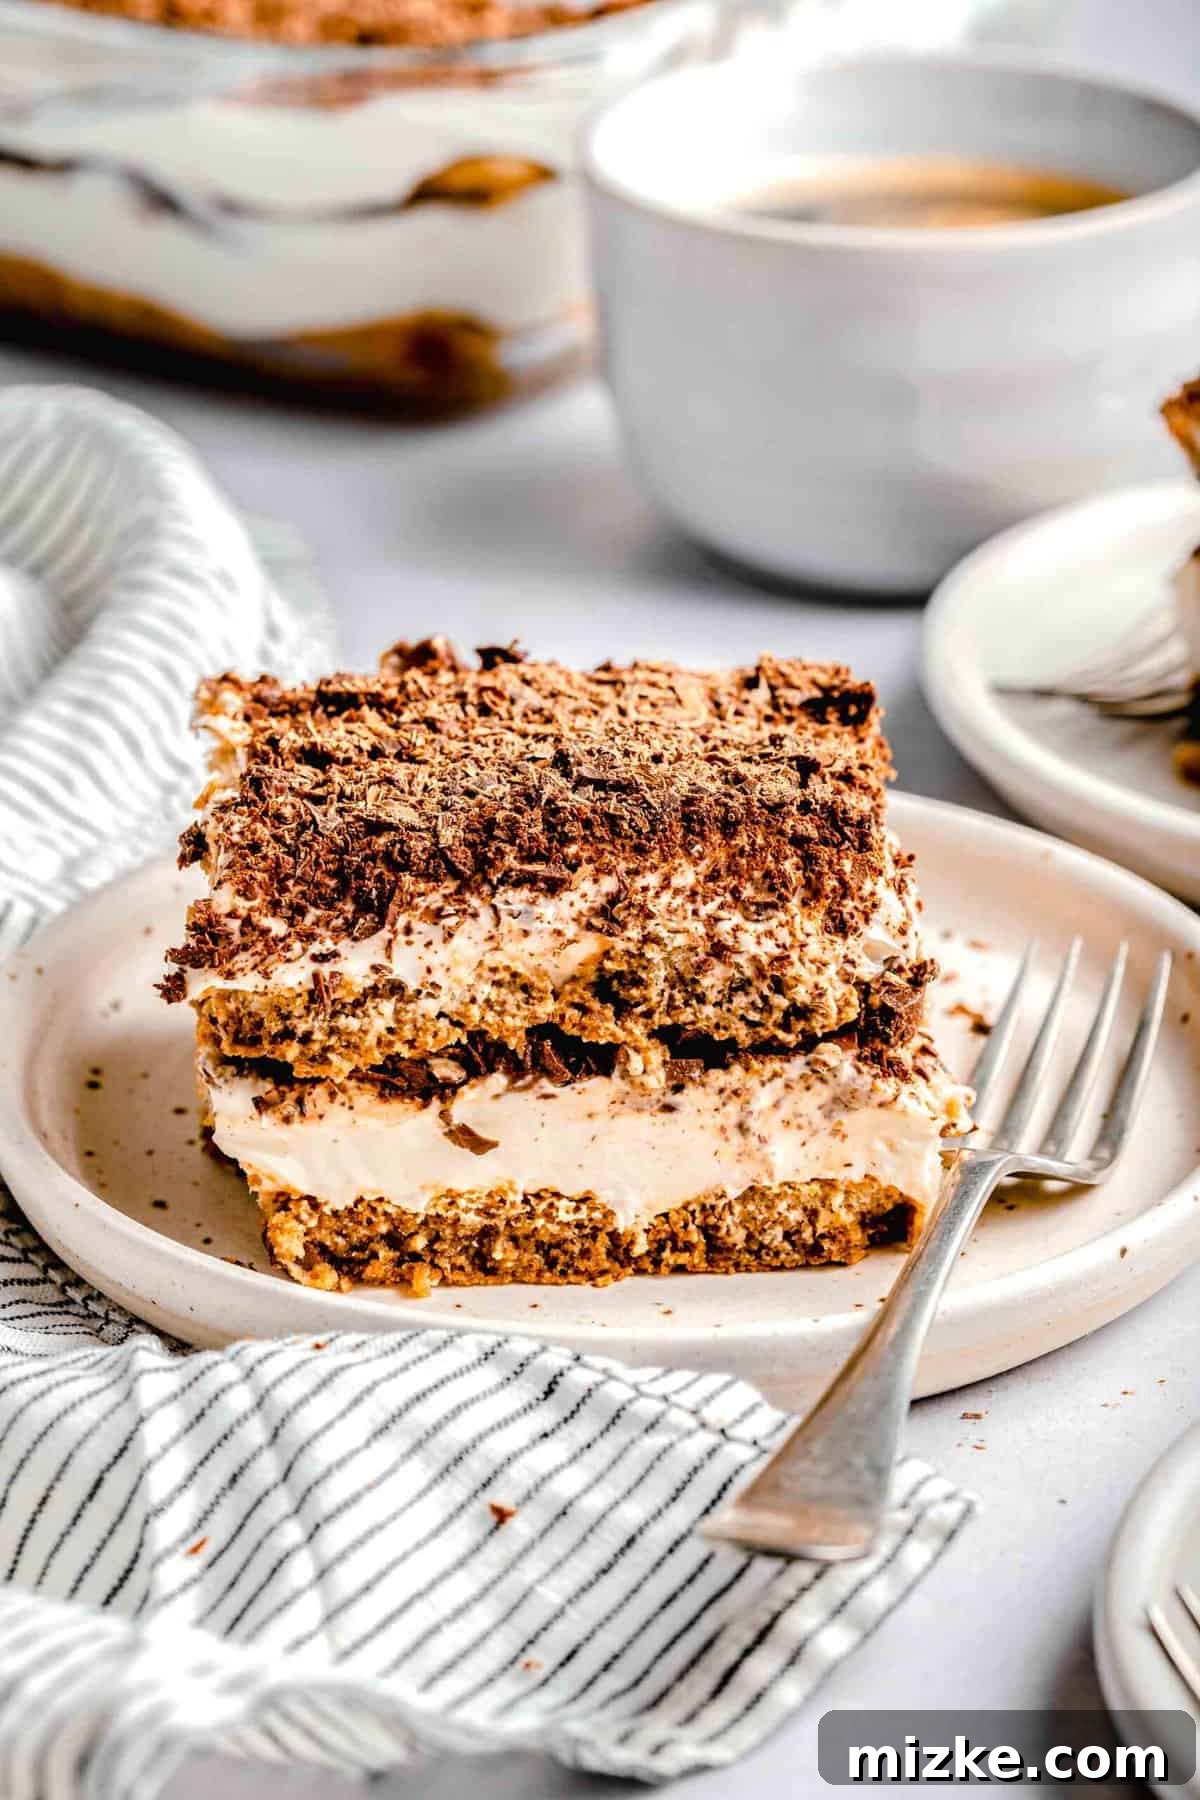
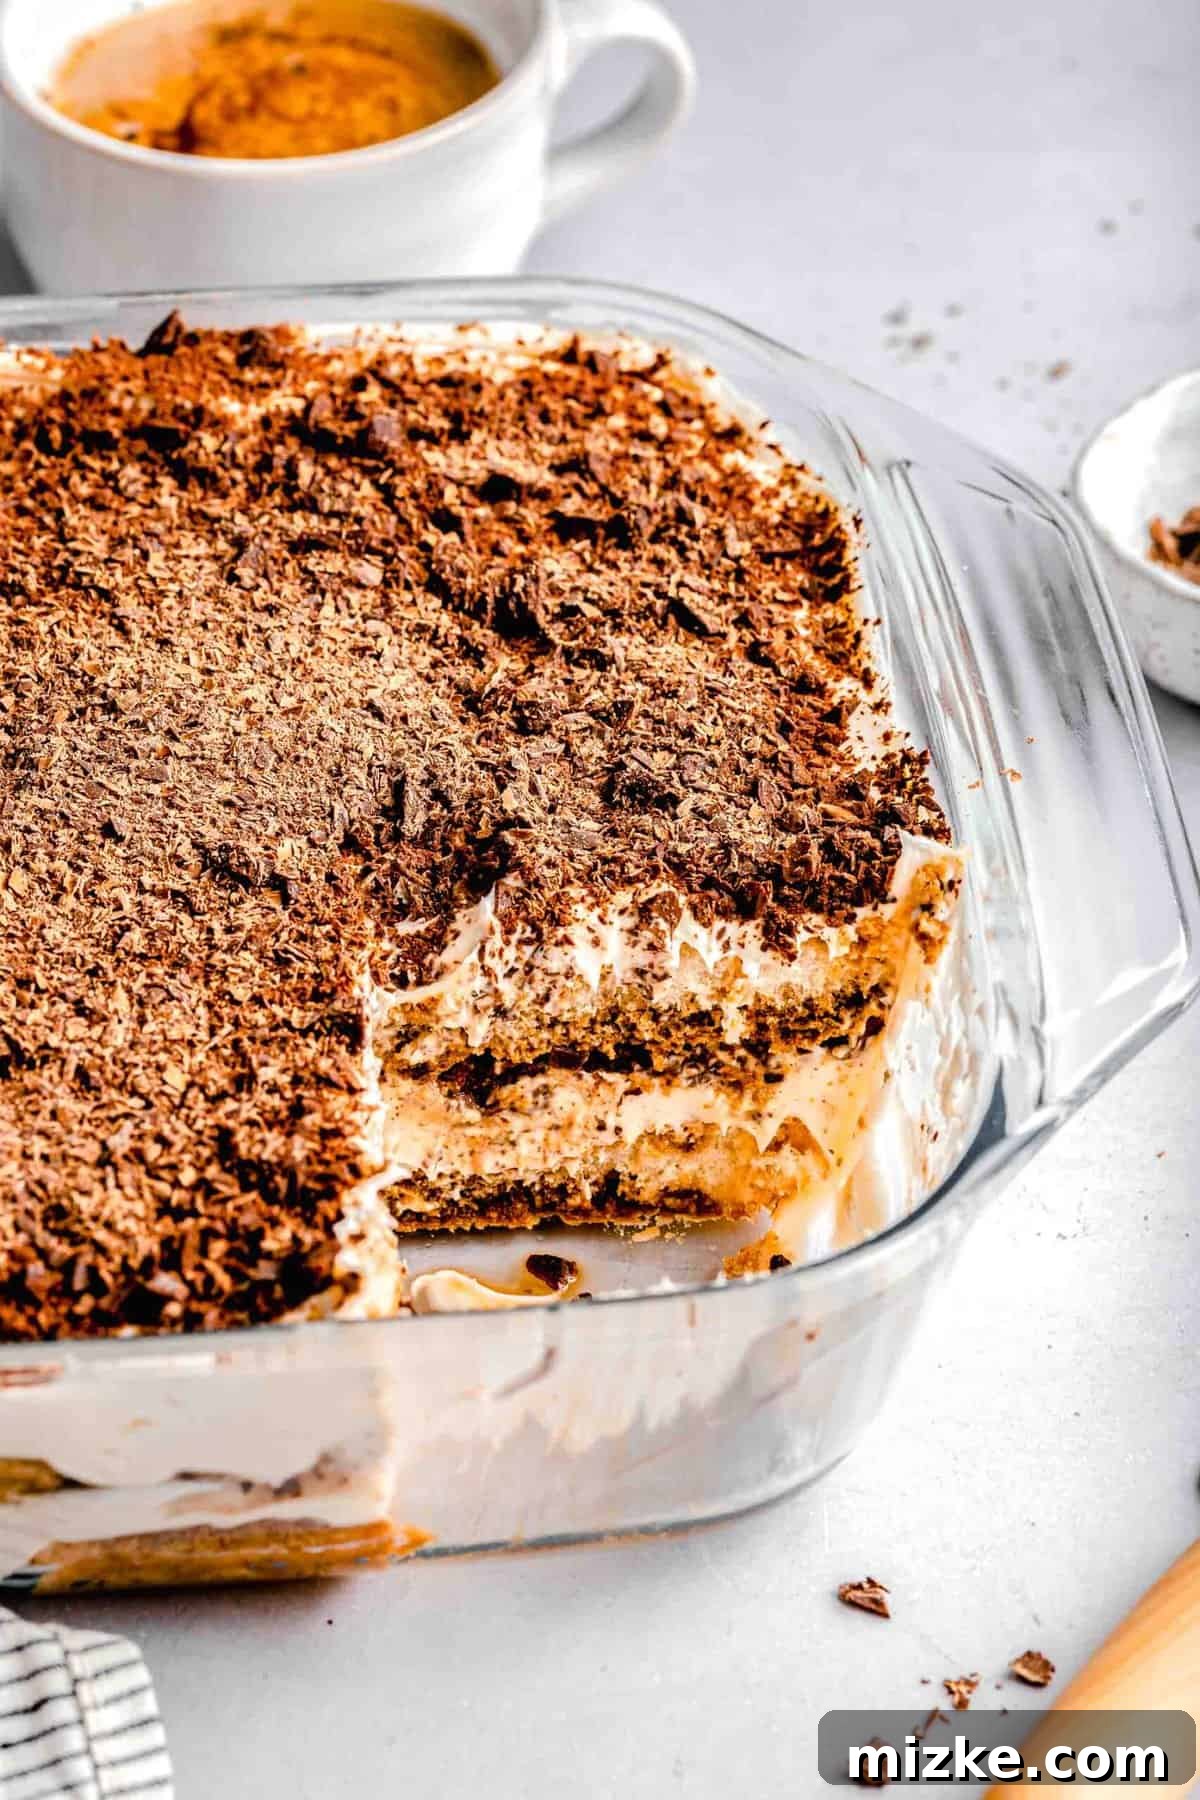
As your fork glides through this perfectly constructed classic tiramisu, you’ll first encounter a delicate dusting of finely chopped dark chocolate, which gives way to an incredibly smooth, amaretto-infused mascarpone filling. Beneath this cloud of cream lies a layer of light, spongy ladyfinger cookies, thoroughly saturated with rich, dark espresso. This delightful sequence is then repeated, culminating in a base of more coffee-kissed ladyfingers. The interplay of these distinct elements creates a subtly sweet, profoundly satisfying, and ethereal dessert that promises to leave you craving just one more bite. It’s an experience that rivals, and often surpasses, anything you might find in a high-end eatery.
Why This Easy Tiramisu Recipe Will Become Your Favorite
This beloved Italian dessert holds a special place in the hearts of many, and for good reason. It’s remarkably easy to prepare and consistently delivers an unbelievably delicious result. Here are just a few reasons why this recipe stands out, and why I believe you’ll fall in love with it too:
- Quick & Effortless Perfection: Don’t let its sophisticated appearance fool you; this tiramisu requires only about 20 minutes of active preparation time. With a few straightforward steps, you’ll be on your way to creating an elegant, restaurant-quality dessert that’s perfect for entertaining or a luxurious treat for yourself, even on a busy weeknight.
- No-Bake Brilliance: One of the most appealing aspects of this tiramisu is that you don’t need to turn on your oven. This no-bake method makes it incredibly accessible and versatile, allowing you to whip it up anytime, anywhere, without heating up your kitchen. It’s especially ideal for warmer weather or when you simply prefer a hassle-free dessert.
- A Symphony of Flavor and Texture: The magic of tiramisu lies in its exquisite balance. The smooth, sweet richness of the silky mascarpone filling beautifully contrasts with the subtle bitterness of the coffee-soaked ladyfingers. Each layer contributes to a complex yet harmonious blend of flavors and textures, making every bite a delightful experience.
- Gourmet Taste, Home Kitchen Price: Why pay premium prices for a dessert you can make at home with superior quality? This homemade tiramisu is just as good, if not better, than the versions found in upscale restaurants, but at a mere fraction of the cost. Plus, there’s an immense satisfaction that comes with presenting a dessert and proudly saying, “I made that!”
- Perfect for Any Occasion: Whether you’re hosting a grand dinner party, enjoying a quiet evening in, or simply need a pick-me-up, tiramisu fits every scenario. Its impressive presentation makes it a showstopper, while its comforting flavors make it a beloved classic for casual gatherings.
Unraveling the Name: What Does “Tiramisu” Truly Mean?
The enchanting name “Tiramisu” carries a beautiful meaning that perfectly encapsulates the essence of this delightful dessert. Translated from Italian, “Tiramisu” literally means “lift me up” or “pick me up.” This evocative name isn’t merely a poetic description; it refers to the dessert’s unique ability to invigorate both the spirit and the body. Beyond delighting the palate with its incredible taste, tiramisu is famously made with two key ingredients known for their stimulating properties: rich espresso and cocoa powder. While the amount of caffeine isn’t enough to disrupt your sleep, it certainly provides a gentle *lift* to your energy levels, offering a perfect, comforting boost at the end of a satisfying meal. It’s a dessert that truly lives up to its name, offering a delightful sensory and energetic elevation.
Essential Ingredients for an Authentic Tiramisu
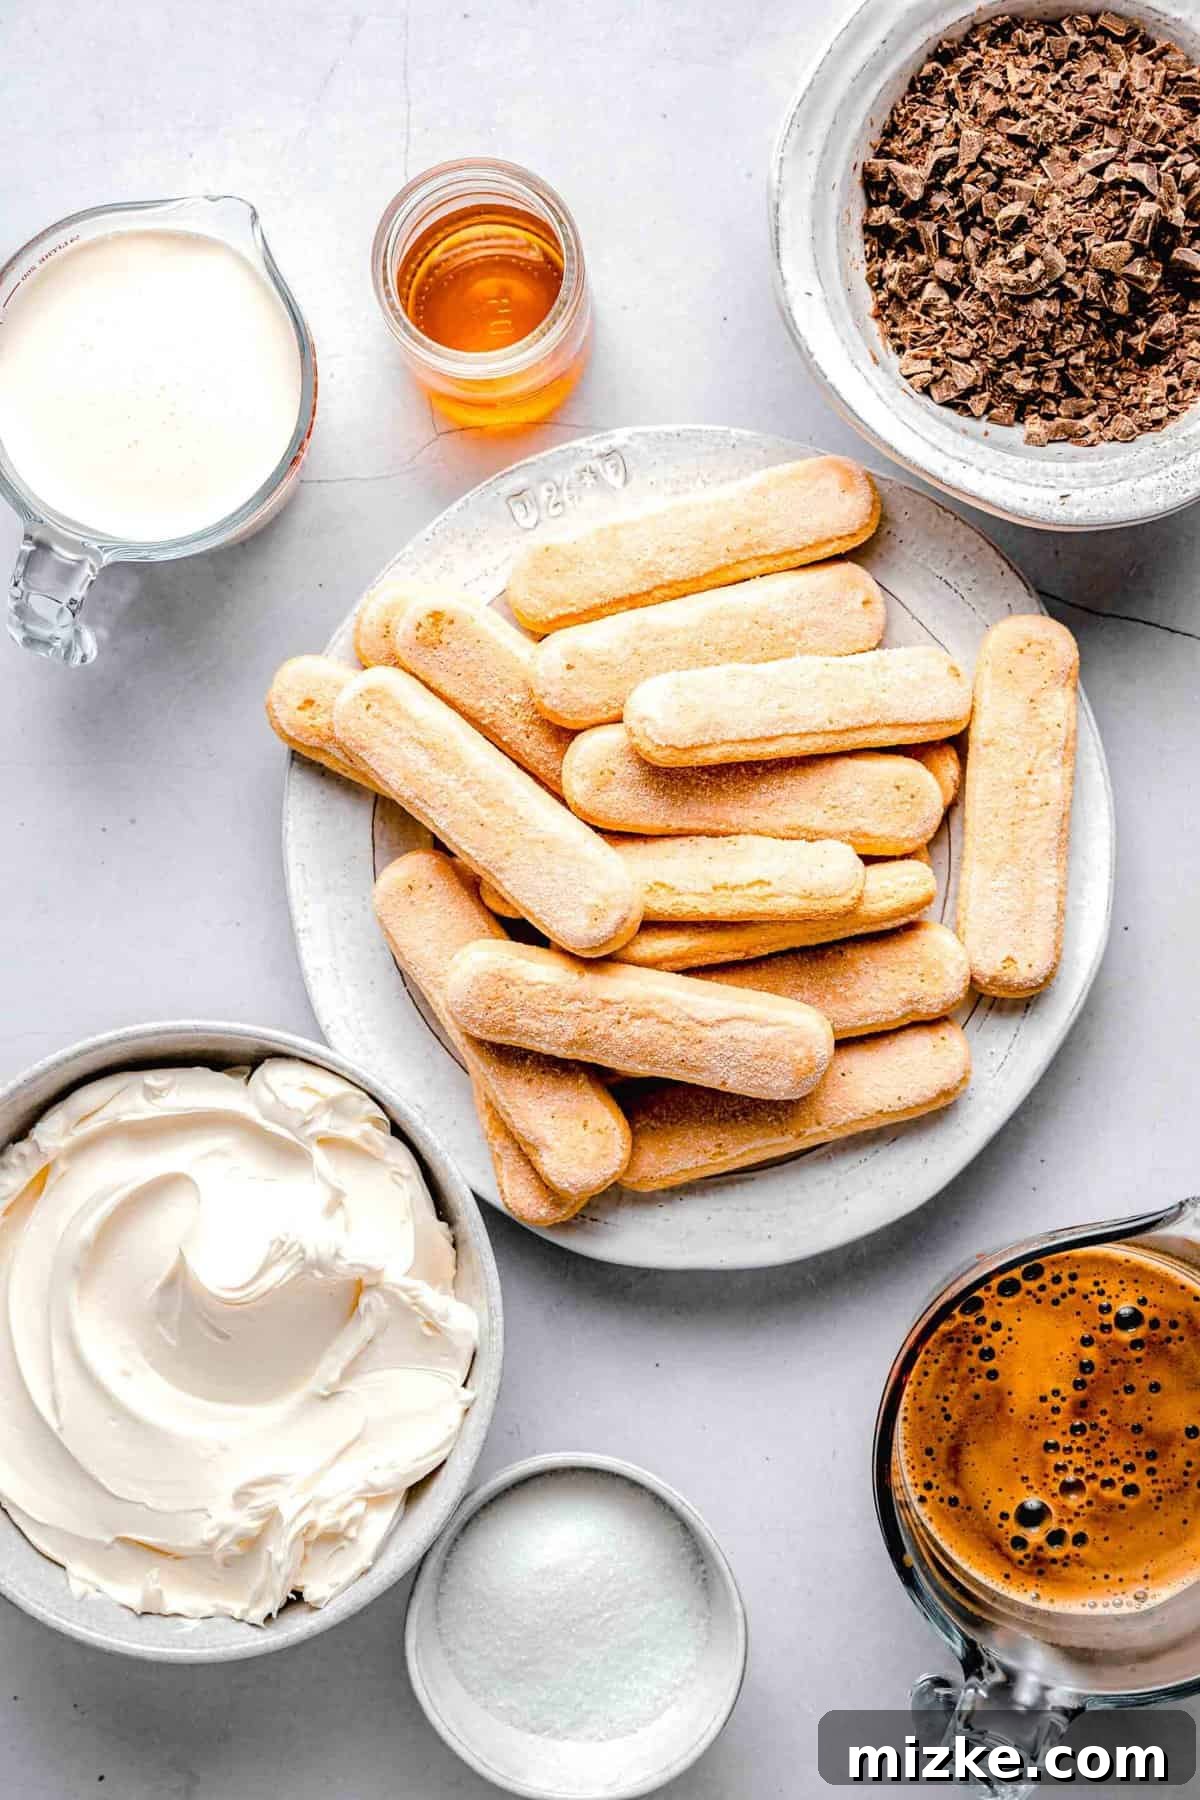
Despite its luxurious appearance and complex flavor profile, an authentic tiramisu surprisingly requires only a handful of key ingredients – seven, to be precise. Each component plays a vital role in creating the iconic taste and texture of this classic Italian dessert. Below is a detailed list of what you’ll need. For specific measurements, please refer to the full recipe provided further down this page.
- Mascarpone Cheese: This is the cornerstone of the creamy filling. Mascarpone is a rich, soft Italian cream cheese, known for its buttery texture and mildly sweet flavor. It provides unparalleled richness and volume to the dessert. Do not substitute with regular cream cheese, as its tangier flavor and denser texture will significantly alter the authentic taste and consistency of tiramisu.
- Heavy Cream: Essential for achieving that light, cloud-like mascarpone filling. Always ensure your heavy cream is very cold before whipping; this helps it hold its volume better and whip up into beautiful soft peaks, contributing to the dessert’s airy texture.
- Granulated Sugar: Provides the perfect level of sweetness, balancing the bitterness of the espresso and the richness of the mascarpone.
- Amaretto: A classic almond-flavored Italian liqueur that adds a distinctive, aromatic depth to the tiramisu. Its warm, nutty notes complement the coffee and chocolate beautifully.
- Brewed Espresso: The soul of the tiramisu. Use freshly brewed, strong espresso for the best flavor. Dark roast coffee can be a suitable substitute if espresso isn’t readily available. If you’re sensitive to caffeine or serving children, feel free to use decaffeinated espresso.
- Ladyfingers (Savoiardi): These light, airy, and porous sponge cakes are absolutely perfect for soaking up the espresso without becoming overly soggy. Their texture allows them to absorb just the right amount of liquid, resulting in a flavorful and tender bite. You can typically find them in the international aisle of most grocery stores.
- Dark Chocolate: Finely chopped dark chocolate or high-quality cocoa powder is used for dusting the layers and the top. Its slight bitterness provides a wonderful contrast to the sweet cream. You can adjust this to semi-sweet or even milk chocolate if you prefer a less intense chocolate flavor, but dark chocolate offers the most traditional balance.
Alcohol in Tiramisu: A Sweet Debate
One common question about tiramisu revolves around its alcohol content. Technically, yes, traditional tiramisu recipes, including this one, do feature a liqueur – in this case, Amaretto. Amaretto is an Italian almond-flavored liqueur with an Alcohol By Volume (ABV) typically ranging from 21% to 28%. However, the amount used in a full batch of tiramisu is quite modest, and when distributed across multiple servings, the alcohol content per slice is very low. Rest assured, it’s certainly not enough to cause any intoxicating effects, so there’s no need for concern about becoming “tipsy” from enjoying this dessert.
That being said, if you prefer to avoid alcohol entirely due to personal preference, dietary restrictions, or if you’re serving children, there are excellent non-alcoholic alternatives. You can easily replace the Amaretto with half a teaspoon of almond extract, which will provide a similar nutty flavor profile without the alcohol. Alternatively, you can simply omit the liqueur altogether, and your tiramisu will still be incredibly delicious, with the rich flavors of coffee, mascarpone, and chocolate taking center stage.
Crafting Your Classic Tiramisu: A Step-by-Step Guide
While this classic Italian dessert boasts a fancy, sophisticated look, it’s surprisingly straightforward to assemble. The beauty of tiramisu lies in its no-bake method and simple layering process. Here’s a quick overview of how to bring this delightful creation to life. For comprehensive and detailed instructions, including exact measurements and preparation tips, please refer to the complete recipe card below.
- Prepare the Mascarpone Cream: In a mixing bowl, combine the mascarpone cheese, cold heavy cream, and granulated sugar. Using an electric mixer (either a stand mixer with a whisk attachment or a hand mixer), whisk the mixture on high speed until it reaches a consistency where soft peaks just begin to form. This means the cream holds its shape somewhat but still has a gentle curl at the tip. At this stage, gently whisk in the amaretto until it is just incorporated. Be careful not to over-mix, as this can cause the cream to become too stiff or even grainy, losing its signature cloudy texture.
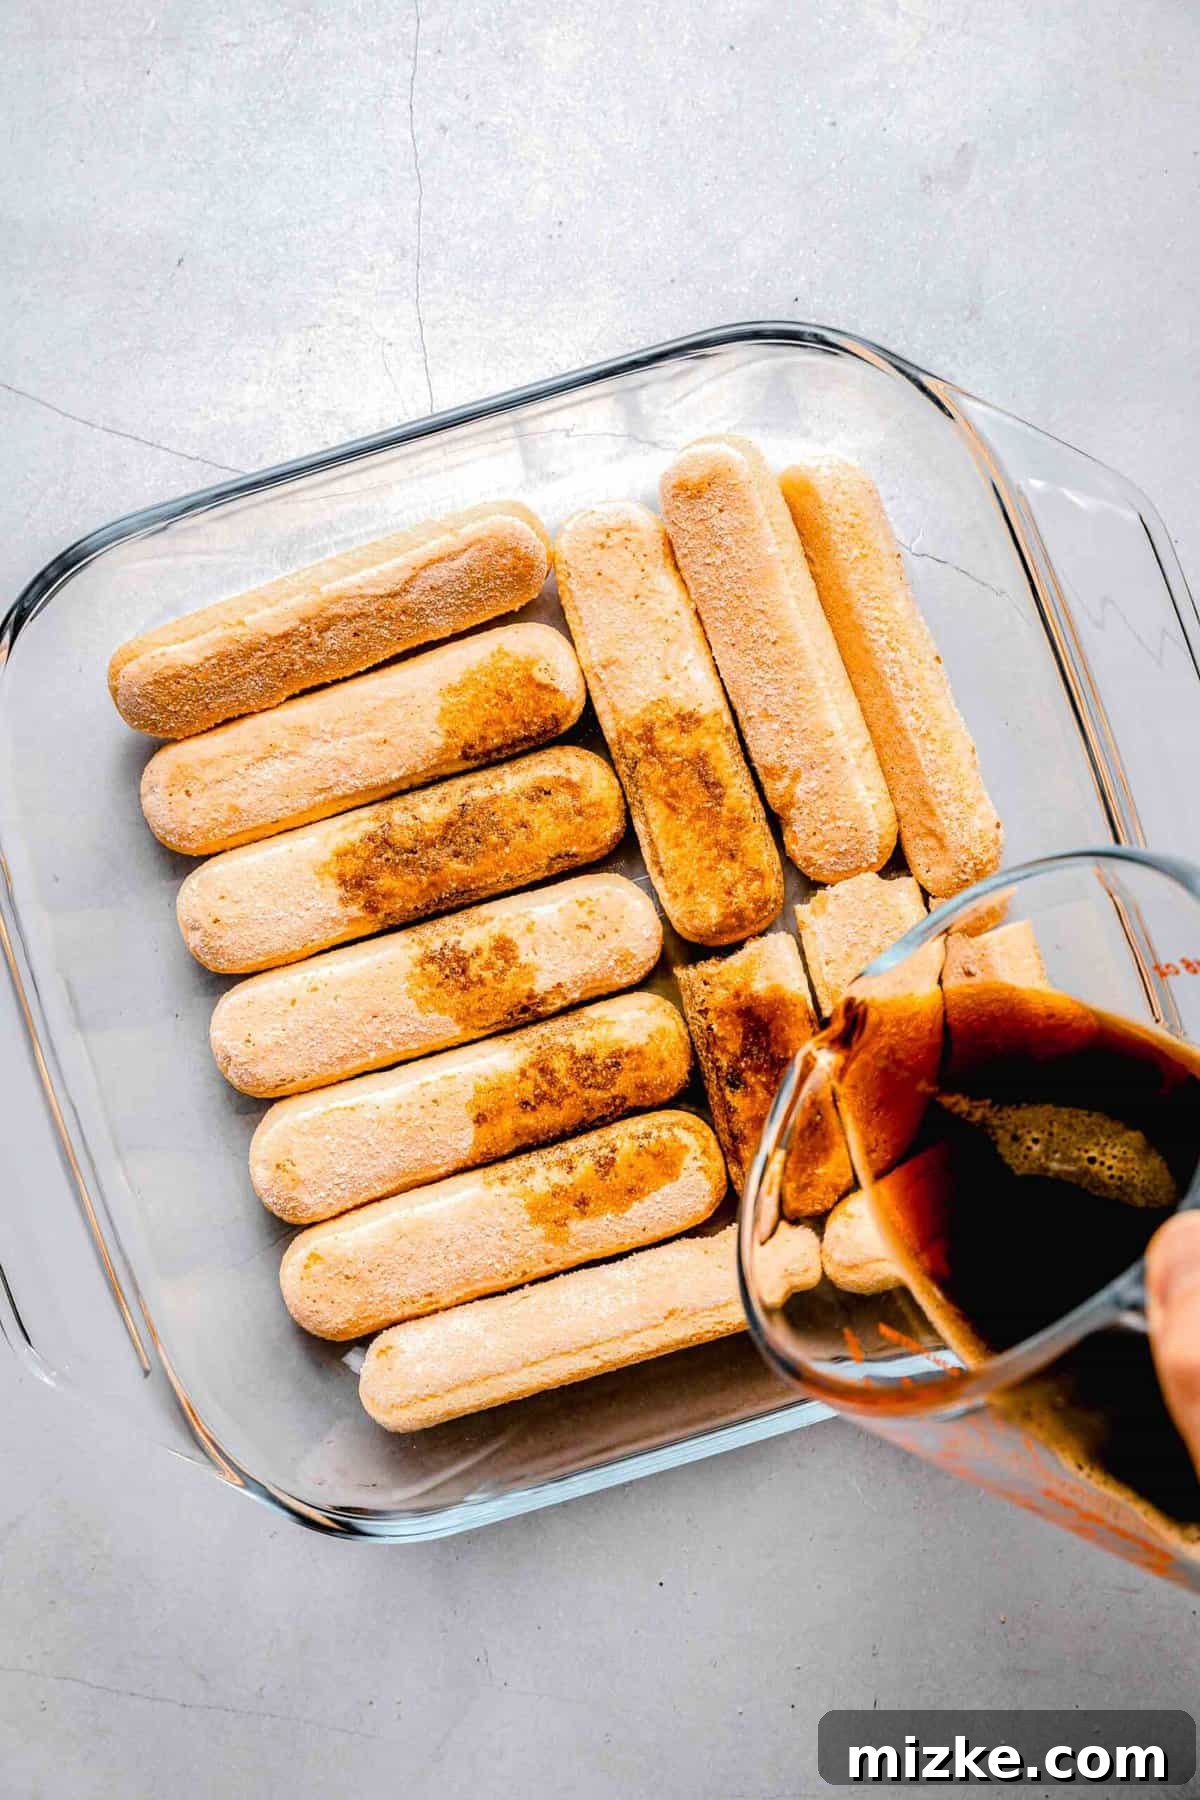
- Soak the First Layer of Ladyfingers: Take your ladyfingers and quickly dip them into the freshly brewed espresso. You want them to absorb the coffee but not become completely saturated and soggy. Arrange these espresso-soaked ladyfingers in a single layer at the bottom of an 8×8-inch baking pan. You may need to break some ladyfingers to fit the pan perfectly.
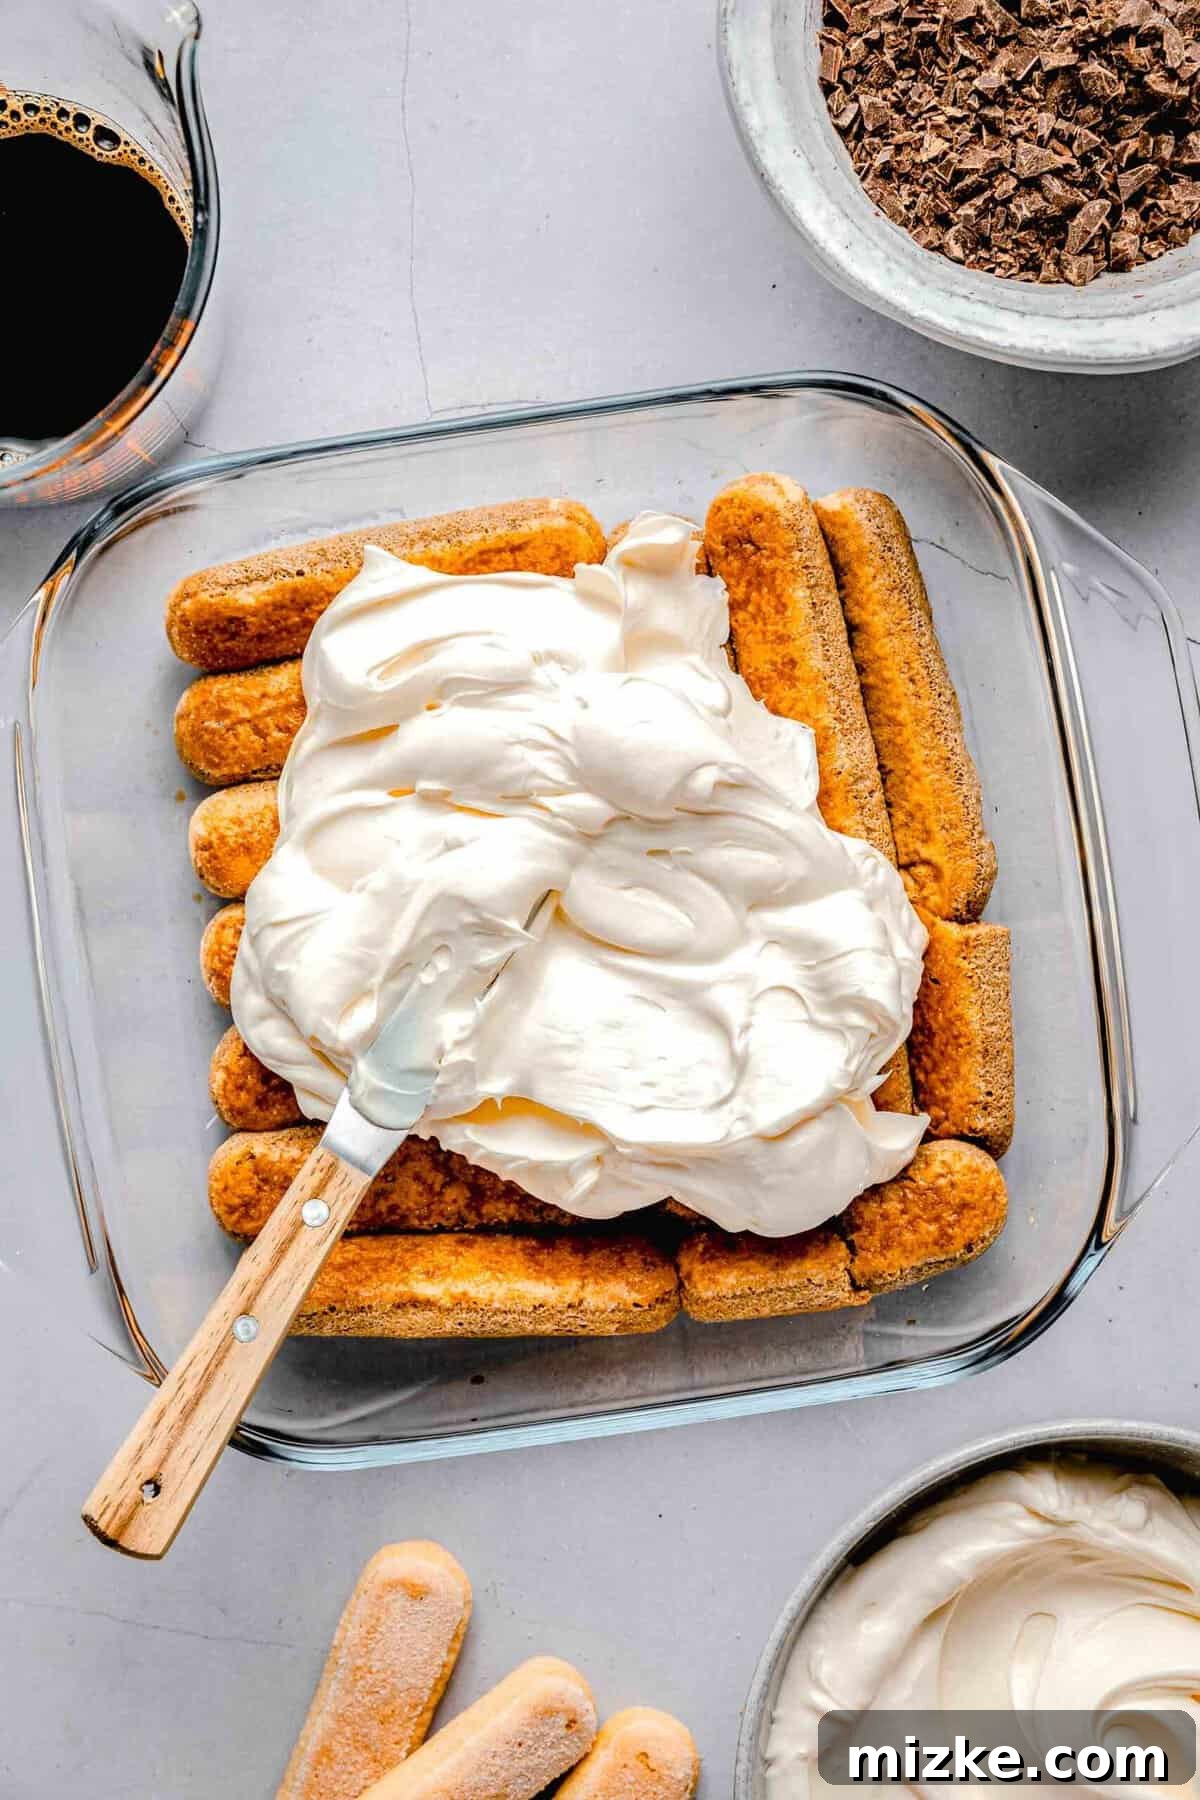
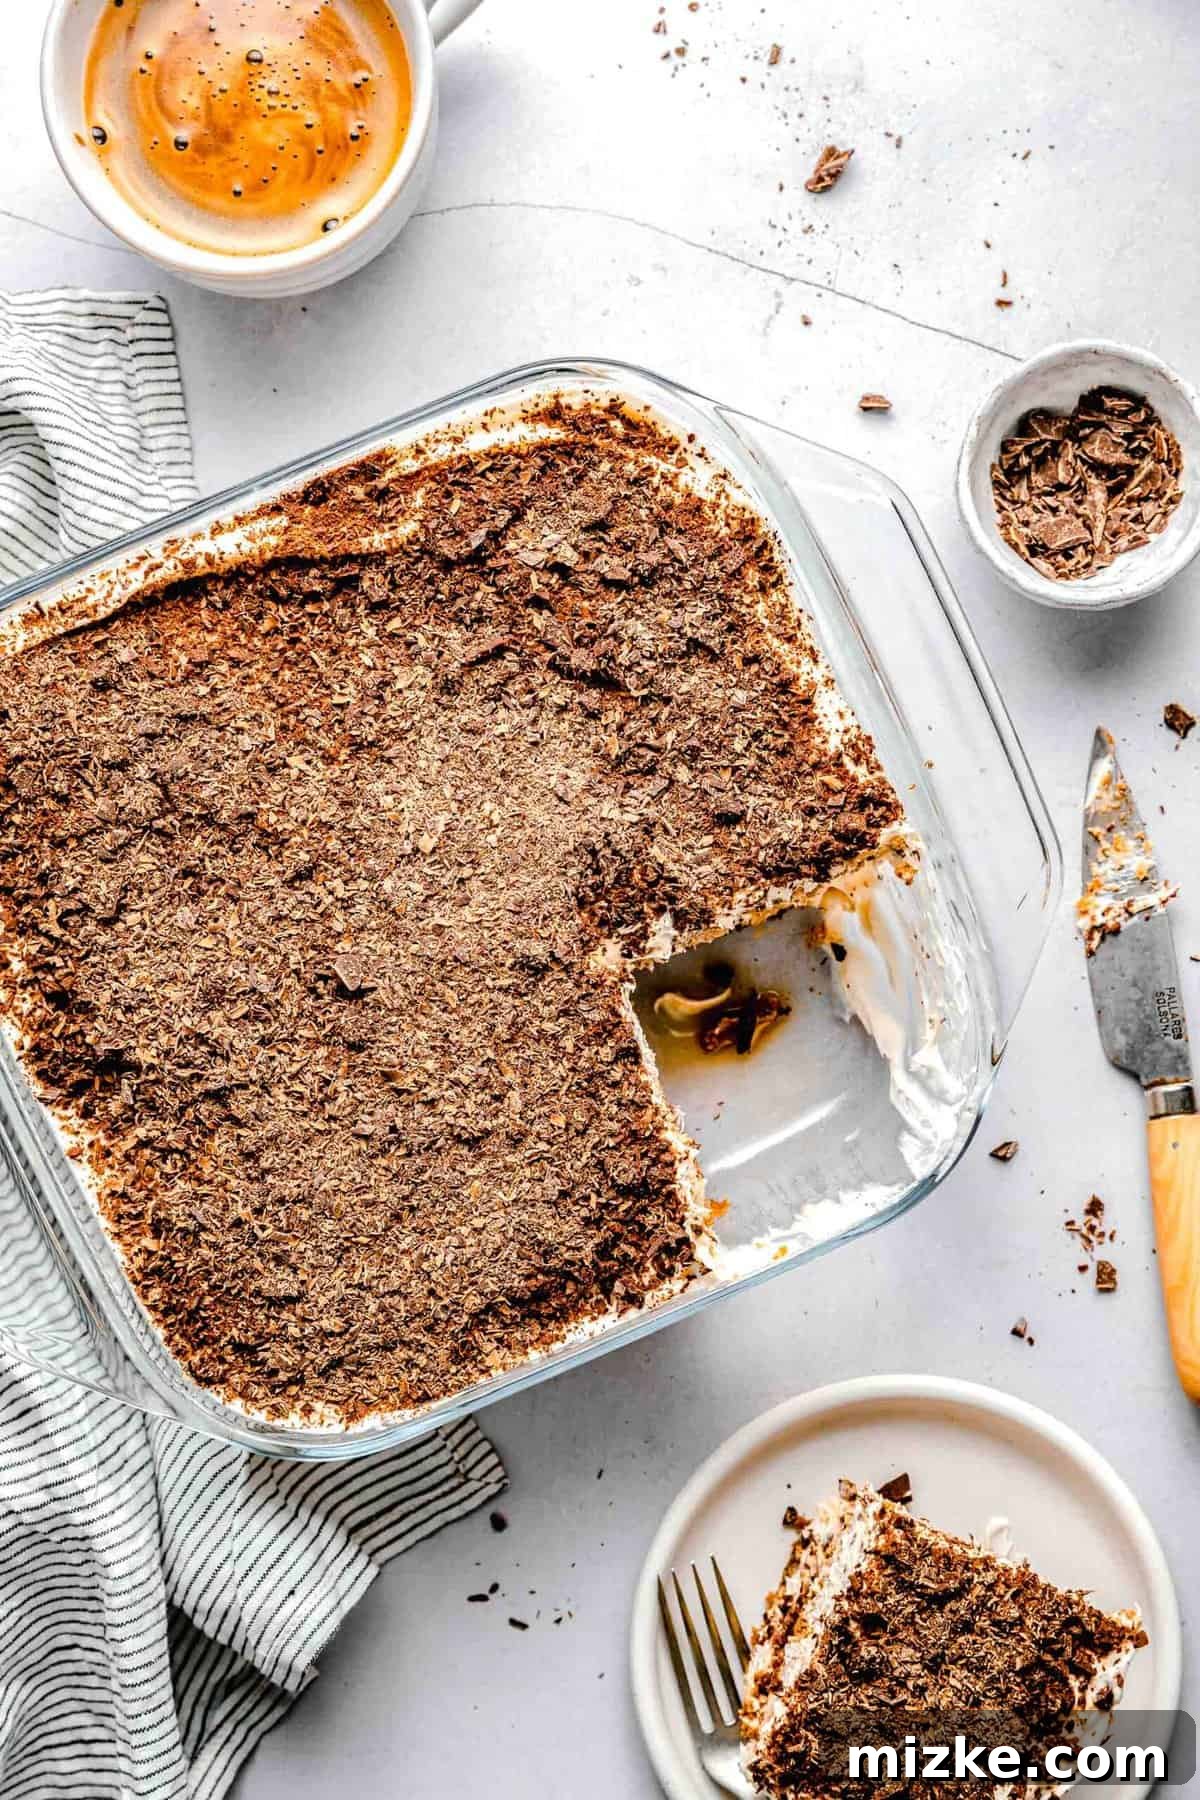
- Assemble the Layers: Spread half of the prepared mascarpone cream mixture evenly over the layer of espresso-soaked ladyfingers. Next, sprinkle half of the finely chopped dark chocolate over the cream. For the second layer, quickly dip the remaining ladyfingers in espresso and arrange them on top of the chocolate and cream. Finish by spreading the remaining mascarpone cream over the second layer of ladyfingers and dust generously with the remaining chopped chocolate or cocoa powder.
- Chill to Perfection: This crucial step allows the flavors to meld beautifully and the dessert to set properly. Cover the baking pan loosely with plastic wrap and chill in the refrigerator for a minimum of 4 to 6 hours. For the absolute best results, chilling overnight is highly recommended, as it allows the ladyfingers to fully absorb the rich flavors and moisture, creating an incredibly harmonious and delightful texture.
Achieving Tiramisu Perfection: Expert Tips and Tricks
This tiramisu recipe is designed to be quick, easy, and accessible for home cooks of all skill levels. While the steps are simple, incorporating a few expert tips can elevate your homemade tiramisu from simply good to truly spectacular. Pay attention to these nuances, and you’ll impress everyone with your culinary prowess:
- Mascarpone is Key – No Substitutions! This cannot be stressed enough. Authentic tiramisu relies on the unique properties of mascarpone cheese. It’s a very rich, creamy, and mildly sweet Italian cheese, less tangy and much softer than traditional cream cheese. Using cream cheese will fundamentally alter the dessert’s character, making it denser, heavier, and introducing an undesirable tang that is not characteristic of classic tiramisu. Stick to mascarpone for that signature light, cloud-like texture and delicate flavor.
- Master the Art of Mixing the Filling: When preparing the mascarpone cream, it’s vital to mix only until soft peaks form. Soft peaks are when the cream holds its shape but the tip gently curls over. Overmixing is a common pitfall that can lead to a dense, stiff, or even grainy filling. The fats in mascarpone can solidify quickly if over-whipped, robbing your dessert of its airy, cloud-like quality. Stop mixing as soon as the desired consistency is achieved – it’s better to slightly under-mix than to over-mix.
- Don’t Over-Soak the Ladyfingers: The ladyfingers need to absorb a good amount of espresso to impart flavor, but there’s a fine line between perfectly moist and disastrously soggy. Ladyfingers are porous and absorb liquid rapidly. A quick, gentle dip is usually sufficient. You want them saturated enough to be tender and flavorful, but still retain some structure. If you leave them in the espresso for too long, they will become mushy, leading to a “soggy-bottomed” tiramisu that lacks textural integrity. The goal is a tender, espresso-infused sponge, not a soggy mess.
- The Golden Rule: Don’t Skip the Chill Time! Patience is a virtue, especially when it comes to tiramisu. Allowing the dessert to chill in the refrigerator for at least 4 to 6 hours (and ideally overnight) is absolutely non-negotiable for the best results. This extended chilling period serves multiple crucial purposes:
- It allows the ladyfingers to fully absorb all the espresso and meld with the creamy mascarpone, creating a unified, moist texture.
- It gives the flavors time to deepen, intertwine, and harmonize, transforming individual components into a cohesive, rich, and balanced taste.
- It allows the mascarpone cream to firm up and set properly, making the tiramisu easier to slice and serve cleanly. Skipping this step will result in a dessert with dry, lackluster ladyfingers and a runny, unappealing filling.
- Quality Ingredients Matter: While the recipe is simple, the quality of your ingredients makes a noticeable difference. Use good quality espresso, fresh mascarpone, and a decent dark chocolate for dusting.
- Garnish Just Before Serving: For the freshest look and best texture, dust your tiramisu with cocoa powder or finely chopped chocolate right before serving. This prevents the cocoa from becoming damp or clumpy during storage.
Planning Ahead: Making and Serving Tiramisu
One of the fantastic advantages of tiramisu is its suitability for make-ahead preparation, making it a perfect choice for entertaining or simply enjoying throughout the week. You can comfortably prepare this dessert 1 to 2 days in advance of when you plan to serve it. Simply follow the recipe instructions from start to finish, ensuring all layers are assembled in your baking pan. Once complete, cover the pan tightly with plastic wrap to prevent any odors from seeping in or moisture from escaping, and store it in the refrigerator. In fact, I often prefer to make my tiramisu a couple of days ahead of time. This extended chilling period allows the flavors to truly meld and deepen, and gives the ladyfingers ample opportunity to absorb the perfect amount of espresso and moisture, resulting in an even more harmonious and delicious final product. When it’s time to serve, simply uncover, perhaps dust with a fresh layer of cocoa powder, slice, and enjoy!
Storage Solutions: Keeping Your Tiramisu Fresh
Should you find yourself with the delightful problem of leftover tiramisu, rest assured, it stores beautifully, allowing you to savor its flavors for days to come. To store, simply re-cover the baking pan tightly with plastic wrap or transfer individual slices to an airtight container. Your tiramisu will stay fresh and delicious in the refrigerator for up to 4 days. The flavors often continue to develop and meld, making leftovers just as delightful as the first serving.
For longer storage, tiramisu is also freezer-friendly! Tightly wrap the entire baking pan (or individual portions) in several layers of plastic wrap, followed by a layer of aluminum foil to prevent freezer burn. It can be kept in the freezer for up to 2 months. When you’re ready to enjoy your frozen tiramisu, transfer it to the refrigerator and allow it to thaw slowly for several hours, or preferably overnight, before serving. This gentle thawing process helps maintain its delicate texture and ensures optimal flavor.
Beyond Tiramisu: More Divine Dessert Inspirations
Oh, dessert! Who could ever resist the sweet allure of a perfect ending to a meal, or a delightful treat enjoyed any time of day? While this classic tiramisu offers a divine way to conclude a delicious feast (or serve as a much-needed mid-day pick-me-up), I’m excited to share a few more of my absolute favorite dessert ideas with you. Prepare to expand your repertoire of sweet delights!
- Slow Cooker Chocolate Cake
- Chocolate Tres Leches Cake
- Better Than Sex Cake
- Apple Almond Cake
- Golden Grahams S’mores Bars
- Old-Fashioned Cherry Cobbler
Classic Tiramisu Recipe
Ready for spongy, espresso-soaked ladyfingers layered with a cloudy, creamy mascarpone filling? Tiramisu here we come!
By: Julie Chiou
Prep Time: 20 minutes
Chill Time: 4 hours
Total Time: 4 hours 20 minutes
Servings: 8
Equipment
- Stand mixer (or hand mixer)
- Square baking pan (8×8 inch suggested)
- Whisk attachment
Ingredients
- 16 ounce (454 g) mascarpone cheese, cold
- 1 cup (236 ml) heavy cream, very cold
- ¼ cup (50 g) granulated sugar
- 4 tablespoons amaretto (see notes for non-alcoholic options)
- 24 ladyfingers (Savoiardi cookies)
- 1 ⅓ cup (316 ml) brewed espresso, cooled (you may have some leftover)
- 1 cup (175 g) finely chopped dark chocolate (or cocoa powder for dusting)
Instructions
- Prepare the Mascarpone Cream: In the bowl of a stand mixer fitted with the whisk attachment, combine the cold mascarpone cheese, very cold heavy cream, and granulated sugar. Whisk on high speed until soft peaks just begin to form. Once soft peaks are visible, add the amaretto and whisk briefly until just incorporated. Be careful not to over-mix, as this can lead to a stiff or grainy filling.
- Soak the First Layer of Ladyfingers: Quickly dip half of the ladyfingers (about 12) into the cooled brewed espresso, ensuring they are moistened but not fully saturated. Arrange these espresso-soaked ladyfingers in a single layer at the bottom of an 8×8-inch baking pan. You may need to gently break some ladyfingers to achieve a snug fit and cover the entire base. If they seem too dry after the initial pour, add a tiny bit more espresso, but be cautious not to over-soak them to prevent a soggy bottom.
- Assemble the Layers: Spread half of the prepared mascarpone mixture evenly over the first layer of ladyfingers. Sprinkle half of the finely chopped dark chocolate over the cream. Next, dip the remaining ladyfingers in the remaining espresso and arrange them in a single layer on top of the chocolate. Cover this second layer of ladyfingers with the remaining mascarpone cream, spreading it smoothly to the edges. Finish by generously sprinkling the remaining chopped dark chocolate (or dusting with cocoa powder) on top.
- Chill to Set: Cover the baking pan tightly with plastic wrap and refrigerate for a minimum of 4 to 6 hours. For the best flavor and texture development, chilling overnight (12-24 hours) is highly recommended. This allows the flavors to meld beautifully and the dessert to fully set.
- Serve and Store: Once chilled, remove from the refrigerator, slice, and serve. Leftover tiramisu should be tightly wrapped with plastic wrap and stored in the fridge for up to 4 days. For longer storage, it can be frozen for up to 2 months (see storage tips above).
Photography by Eat Love Eat